High side residential eave trim installation – Mueller U-Panel User Manual
Page 19
19
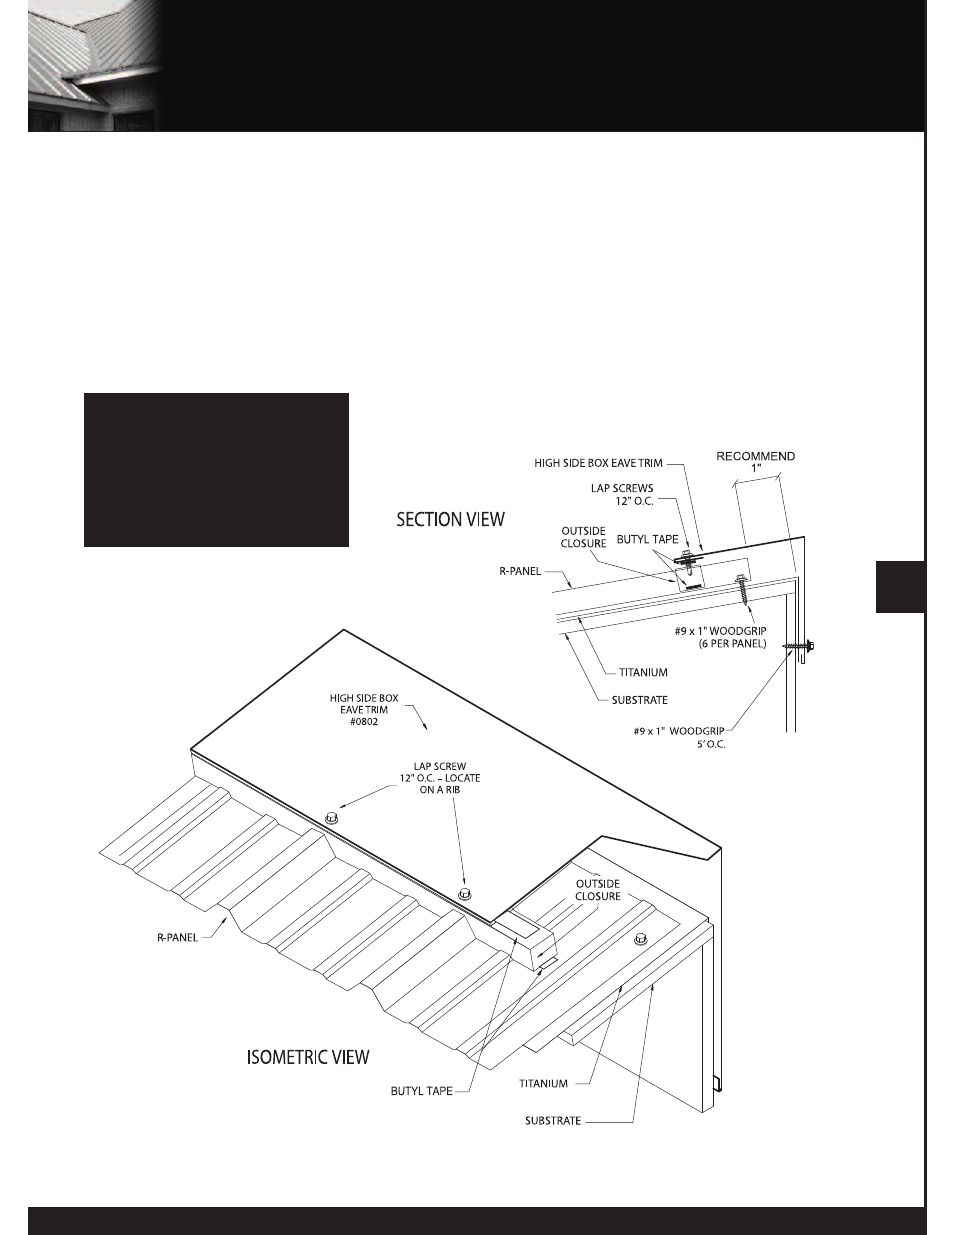
HIGH SIDE RESIDENTIAL EAVE TRIM INSTALLATION
Installations apply to both R & U-Panels. R-Panel shown in illustration.
1. Ensure the roof panel is installed completely. Reference the erection drawings for the top dimension to ensure
correct installation.
2. Install the outside closure on the top of the roof panel, make sure the closure is in line with the extended flange of
the high side eave trim.
3. Install the high side eave trim.
4. Attach the high side eave trim with lap screws @ 12” O.C. locate the screws on the high ribs to
prevent dimpling of the eave trim due to over-tightening.
NOTE: Alternate trim profiles are acceptable using the screw pattern shown.
NOTE: To comply with Texas
Windstorm Certification Testing,
#12x11 SDT Type A screws must
be used in place of the #9
Woodgrip screws.