Rubicon Express RE7141 User Manual
Page 4
Revised
12.19.12
Front Installation:
1. Prepare for the front installation by removing the following items from the front of
the vehicle: tires/wheels, shocks, and sway bar end links.
NOTE: Disconnecting the front track bar may assist in front coil removal/
installation.
2. With the items removed, carefully lower the front axle assembly and remove the
front coil springs.
NOTE: Be careful not to overextend the front brake lines.
3. Place the front bump stop on the center of the lower spring mount on the axle
tube. Insert a center punch through the center hole in the bump stop and mark
the hole to be drilled. Drill the marked hole to 5/16”
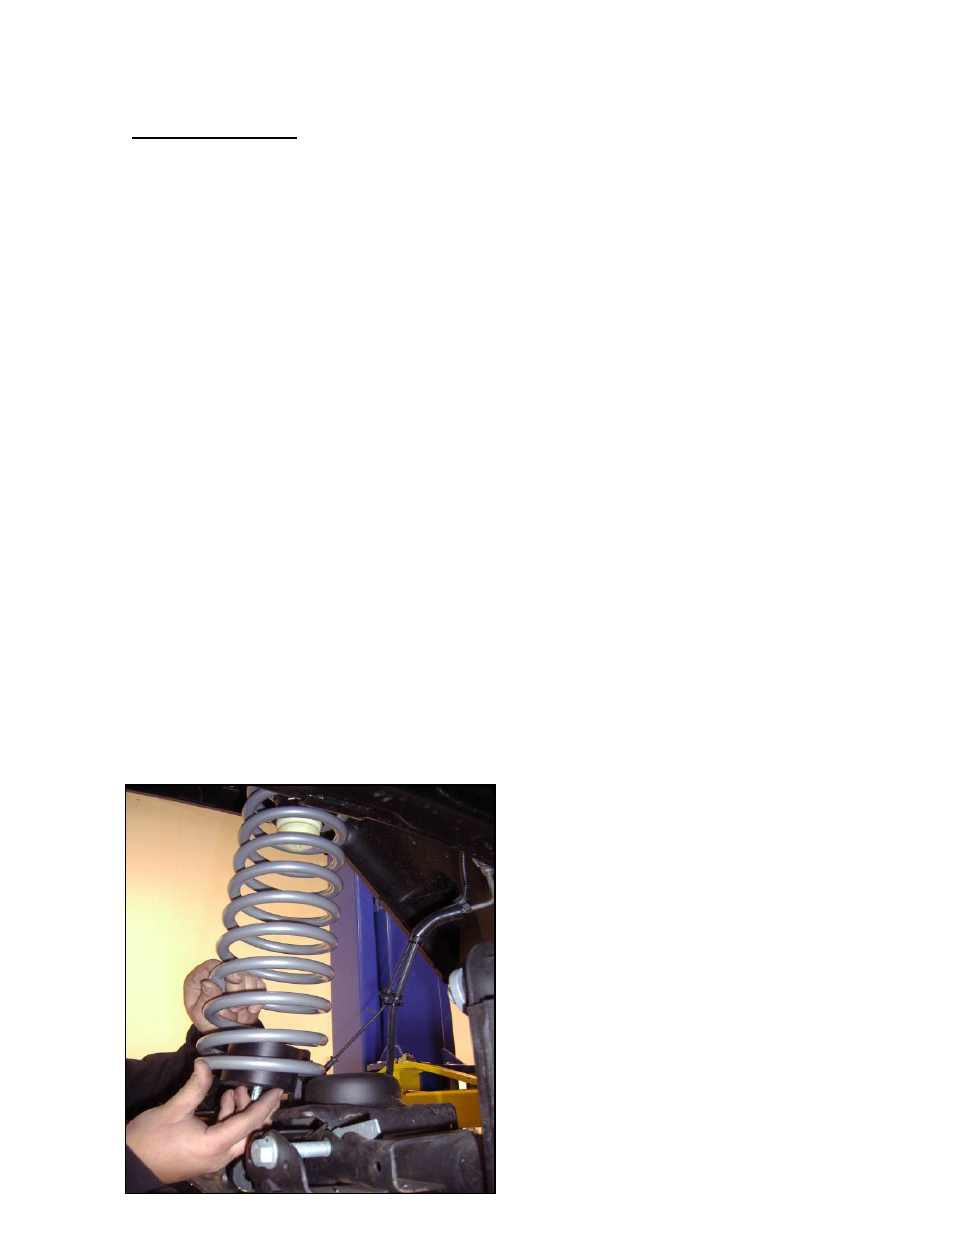
4. With the lower bump stop placed inside the new front coil spring, raise the small
diameter end of the coil into the upper spring bucket and over the lower spring
cup and bump stop pad. Rotate the coil spring so the end of the coil properly sits
in the factory pocket and install the supplied 3/8” self tapping bolt through the
center of the bump stop. Secure it to the axle. See Photo #2.
5. Install the replacement front shocks in place of the previously removed stock
shocks. NOTE: If the suspension was purchased with Rubicon Twin Tube
shocks you will need to install the supplied sleeve thru the bushing on
the body end of the shock prior to installing on the vehicle.
6. Raise the axle into place and install the previously removed stock rear anti-sway
bar end links in place of stock front end-links. Re-connect track bar if disconnec-
tion was required.
7. Reinstall the front wheels and check the torque on all nuts and bolts.
(Photo #2)