Rubicon Express RE7141 User Manual
Page 3
Revised
12.19.12
REQUIRED TOOLS:
Basic mechanics' hand tools
Jack Stands
Vehicle
Hoist Floor
Jacks
5/16” drill bit
Rear Installation:
1. Prepare for the rear installation by removing the following items from the rear of
the vehicle: tires/wheels, shocks, sway bar end links, and the track bar at the
axle end. Keep the rear sway bar links for reuse on the front of the vehicle.
2. With the items removed, carefully lower the rear axle assembly and remove the
coil springs from the vehicle. Note the position and orientation of the upper coil
spring isolators, they will be reinstalled with the new coil springs.
NOTE: Be careful not to overextend the rear brake lines.
3. Install the replacement rear coil springs in place of the previously removed stock
coil springs.
4. Raise the axle into place and install the new rear shocks. NOTE: If the suspension
was purchased with Rubicon Twin Tube shocks you will need to install the sup-
plied bar pin thru the bushing on the rod end (top) of the shock prior to installing
on the vehicle with shock body down.
5. Install the replacement RE1158 rear anti-sway bar end links in place of the previ-
ously removed factory anti-sway bar end links.
6. Install the rear bump stop extensions onto the axle pad with the offset towards
the front of the vehicle, using the supplied hardware.
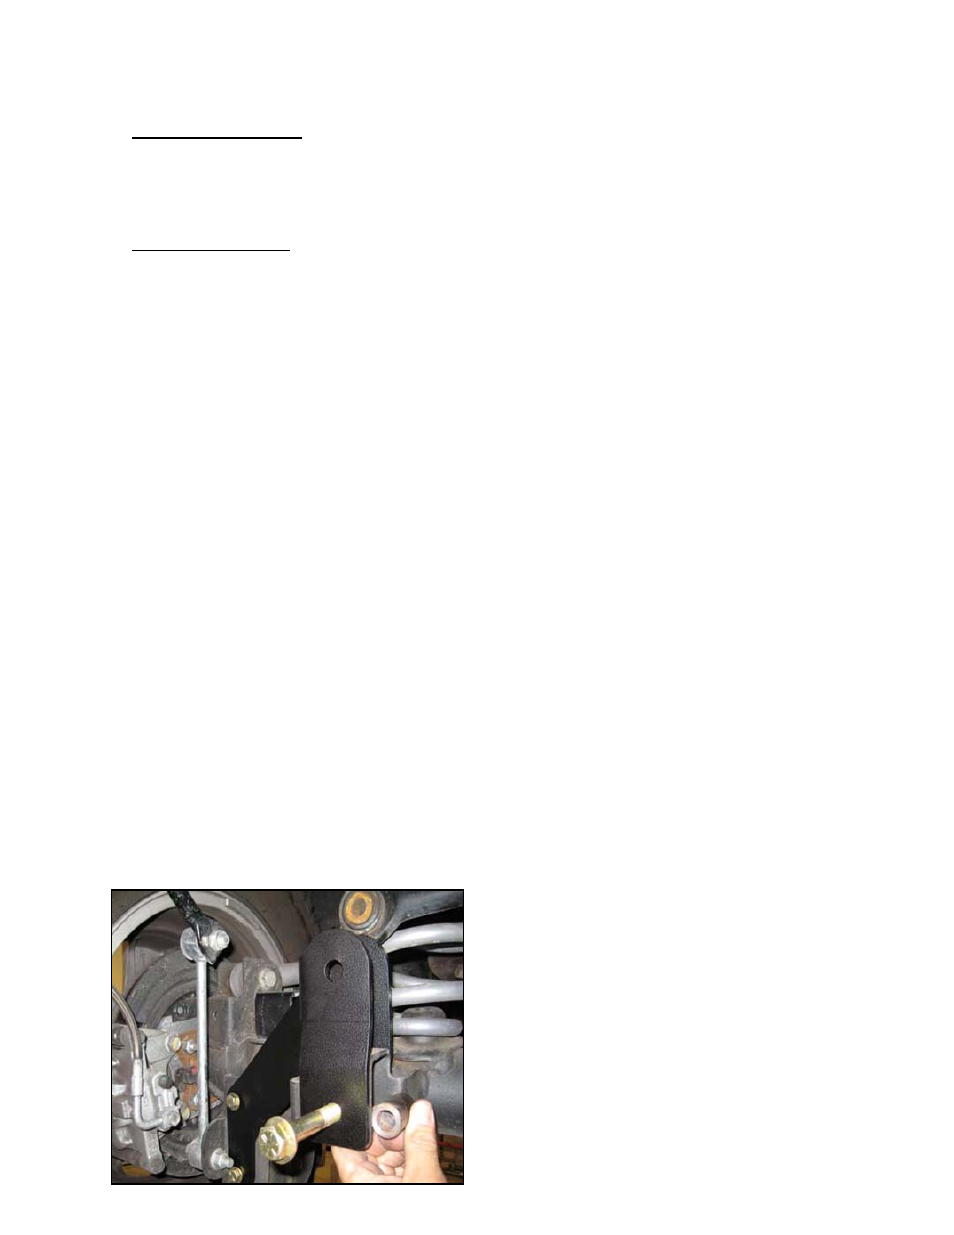
7. Install the rear lower track bar bracket over the factory axle bracket and attach
with the supplied hardware. Use the supplied spacer in the factory track bar loca-
tion to keep the bracket from collapsing when tightening. See Photo #1.
8. Reinstall the rear wheels and check the torque on all nuts and bolts.
9. Re-connect the track bar with vehicle on the ground and at ride height.
10. Adjust the position of the brake lines, breather hoses, and ABS lines as required.
(Photo #1)