Side w all, Duct kit assembly, Unit diffuser – L.B. White 170 Premier User Manual
Page 12
SIDE W
ALL
10 FT
CLEARANCE
EARLIER STYLE DUCTING
DUCT KIT ASSEMBLY
Accessory 26346
CAGE NUTS
SLOT
WING SCREW
INSERT TAB AT BOTTOM
OF DIFFUSER INTO SLOT
BEFORE TIGHTENING WING
SCREWS INTO CAGE NUTS
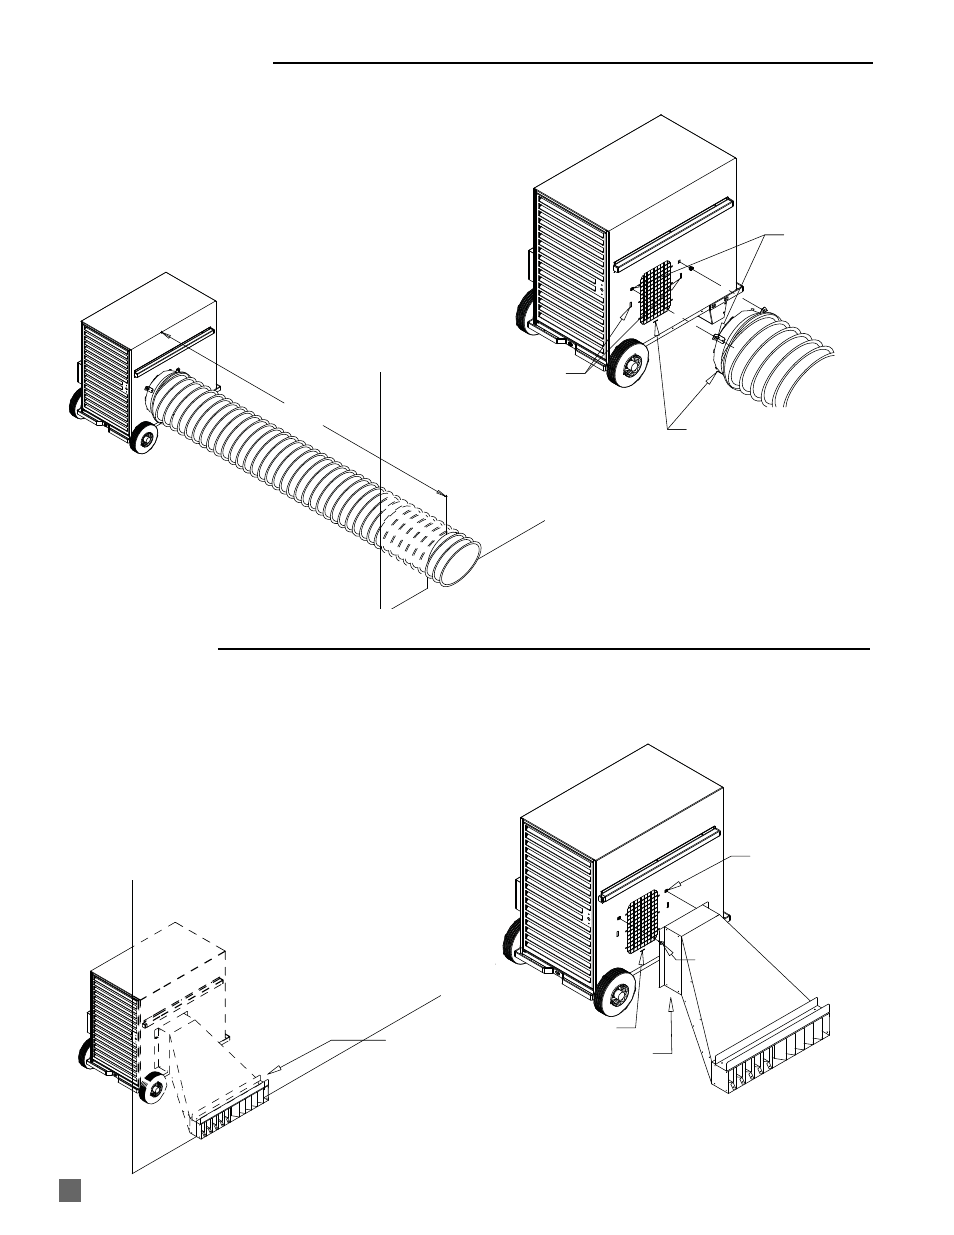
1.
See Fig. 10 for installation of unit diffuser. Hand tighten
the screws snugly. (Note: Slots are provided to
accomodate earlier style unit dif fusers with tab
mounting.)
2.
Position the diffuser under the tent wall as shown. Lay
the tent material within the channel of the diffuser.
Ensure the material is securely anchored within the
channel to prevent contact with the heater. See below
for typical installation.
FIG. 10
UNIT DIFFUSER
Accessory
26349 (Premier 80) & 26351 (Premier 170)
FASTEN WING SCREWS
INTO CAGE NUTS AT
BLOWER OUTLET AND
TIGHTEN
INSTALL TAB AT BOTTOM OF COLLAR
INTO SLOT AT BOTTOM OF OUTLET
BEFORE FASTENING WING SCREWS
SLOTS FOR INSTALLING
EARLIER STYLE DUCTING
SIDE W
ALL
1.
Extend duct kit to 12 ft. length.
2.
See Fig. 9 for installation of duct. Hand tighten the
screws snugly. (Note: Slots are also provided at the
sides of heater’s air discharge to accomodate earlier
style duct adapters with tab mounting configuration.)
3.
Position duct as shown. Eliminate any kinks in duct.
FIG. 9
SIDE W
ALL
MATERIAL LOCATED IN CHANNEL
AND SECURELY ANCHORED TO
PREVENT CONTACT WITH HEATER
12