Description of controls – Philips 17B2402H99 User Manual
Page 4
3
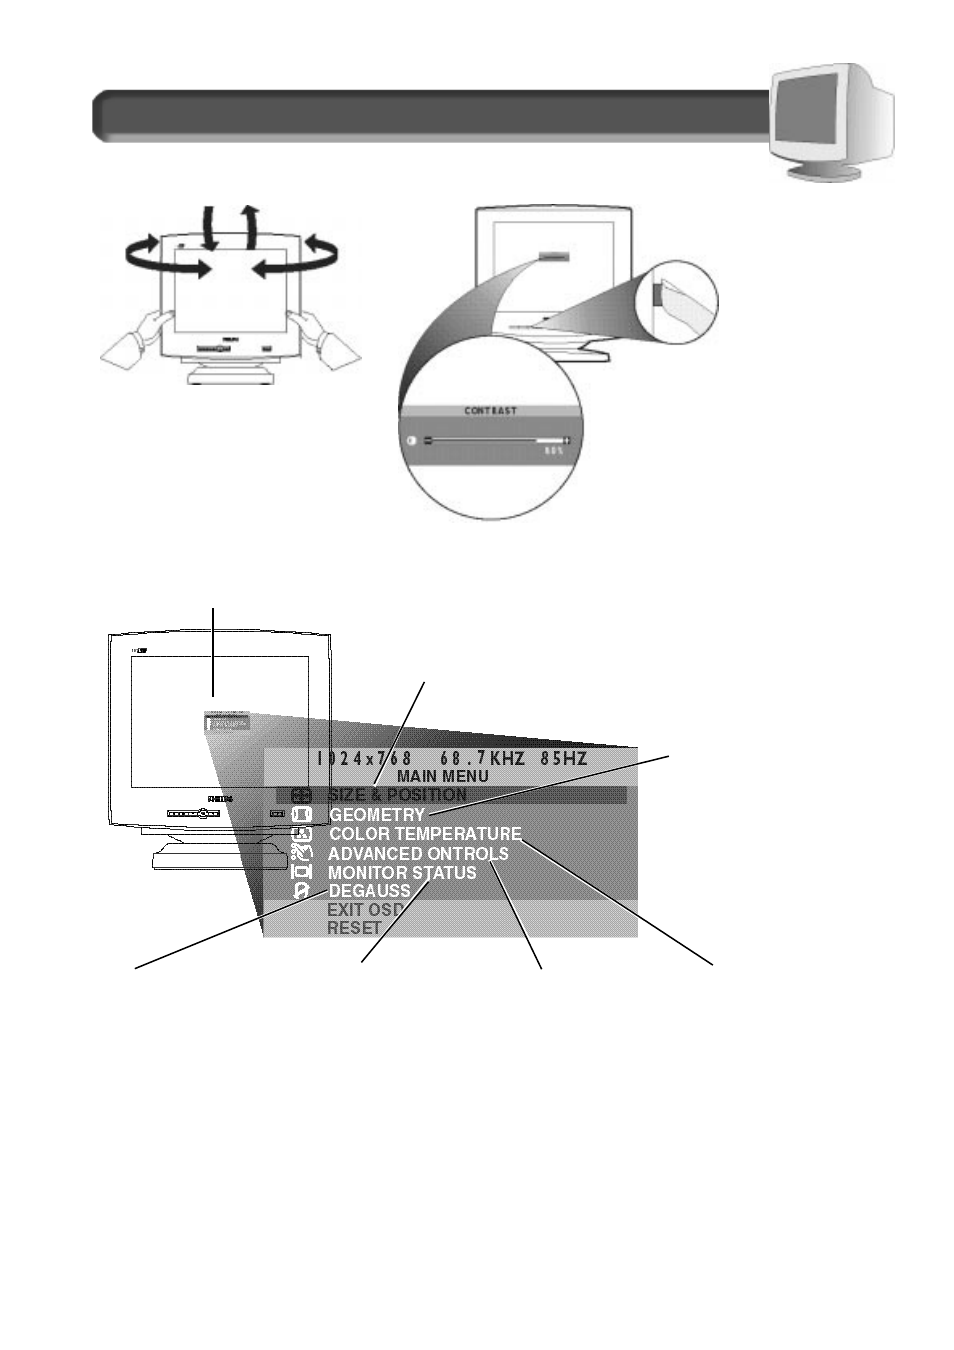
G
EOMETRY
C
ONTROLS
– This
menu item has five features:
P
INCUSHION
, B
ALANCED
P
INCUSHION
,
T
RAPEZOID
, P
ARALLELOGRAM
, and
R
OTATION
. To adjust these
features, turn to page 10.
Description of Controls
C
OLOR
T
EMPERATURE
–
Select the
temperature setting
for the best color for
your work. You can
even customize your
color settings. There
are four selections:
9300˚ K, 6500˚ K, U
SER
1, and U
SER
2. For
details, turn to pages
8-9.
O
N
S
CREEN
D
ISPLAY
– Your monitor is preset at the factory. However, you can adjust it using the O
N
S
CREEN
D
ISPLAY
button
and the "+"
OR
"-"
BUTTON
described on page 2. The way to do so is through the On Screen Display (OSD). Below is a
brief description of the seven On Screen Display windows.
A
DVANCED
C
ONTROLS
– This menu
item has six features: P
OWER
S
AVING
, L
ANGUAGE
, OS T
IMER
,and
M
OIRE
. To adjust these features,
turn to pages 6-7.
Note: L
ANGUAGE
allows you to
change the On Screen Display
from English to French, Spanish,
German, or Italian. See page 6
for details.
P
EDESTAL
– With the built-in pedestal,
you can tilt and swivel the monitor to
the most comfortable viewing angle.
To best use your monitor, always
place it at eye level.
90
0
90
0
5
0
10
0
M
ONITOR
S
TATUS
–
Lists the current
vertical and
horizontal scanning
frequencies and
tells you the serial
number of the
monitor. For details,
see page 5.
U
SING THE FRONT PANEL
BUTTONS
– Select one
of front panel
buttons, then press
"-" or "+" button to
make the
adjustment or select
an additional
feature. To adjust a
particular feature,
see the page for that
feature.
For
example, Contrast is
on page 4.
FRONT PANEL BUTTONS
PEDESTAL
D
EGAUSS
–
Demagnetizes
your screen. If
color splotches
or impurities
appear on your
screen, you
may want to
try this. For
details, see
page 5.
S
IZE
& P
OSITION
– This menu item helps you maximize the position of your
screen. It has five features: Z
OOM
, H
ORIZONTAL
P
OSITION
, H
ORIZONTAL
S
IZE
, V
ERTICAL
P
OSITION
, and V
ERTICAL
S
IZE
. To adjust these features, turn to pages 11- 12.