Basic connections, Step 3: connecting the fm and am/mw antennas, Step 4: connecting the subwoofer to the main unit – Philips HTS8100-37B User Manual
Page 16: Continued), 16 english, Fm antenna, Connect the fm antenna (supplied) to the fm 75, Jack, Connect the am/mw loop antenna to the am/mw jack
16
English
Step 3: Connecting the
FM and AM/MW
antennas
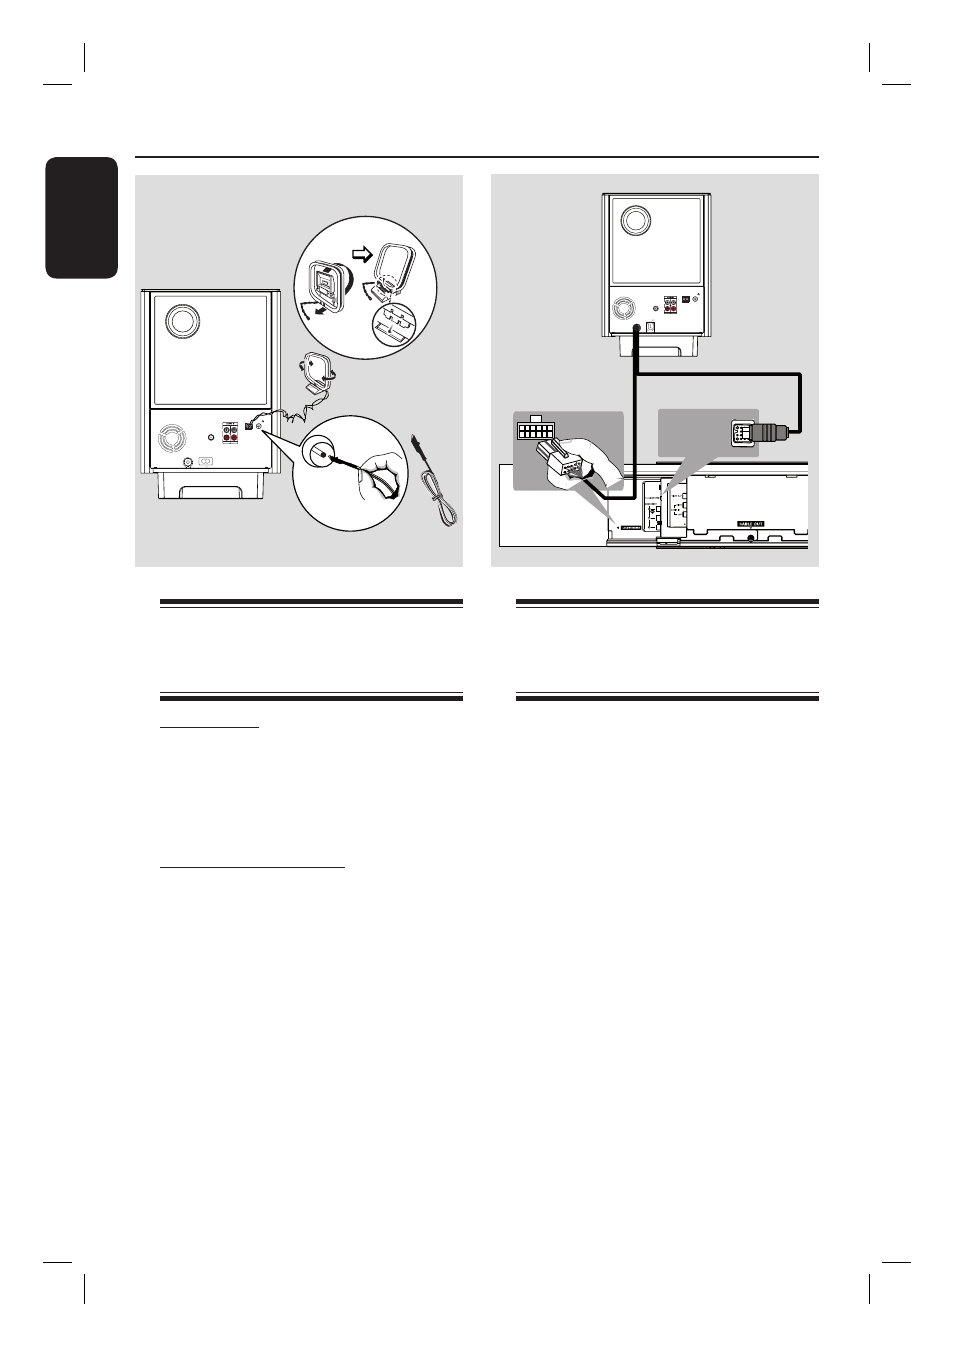
FM antenna
A
Connect the FM antenna (supplied) to
the FM 75
Ω
jack.
B
Attach the other end of the FM antenna
to a wall.
AM/MW loop antenna
A
Stand the AM/MW loop antenna upright
to fi x its claw into the slot.
B
Connect the AM/MW loop antenna to
the AM/MW jack.
C
Place the AM/MW loop antenna on a
shelf, or attach it to a stand or wall.
Helpful Hints:
– Adjust the position of the antennas for
optimal reception.
– To avoid interference, position the antenna
away from the electronic equipment.
– For better FM stereo reception, connect an
external FM antenna (not supplied.)
Basic Connections
(continued)
Step 4: Connecting the
subwoofer to the
main unit
A
Unwind the subwoofer’s TO MAIN
UNIT interconnect cable.
B
Connect the white end of the
interconnect cable to the
LOUDSPEAKERS jack on the main
unit.
C
Connect the black end of the
interconnect cable to the TO
SUBWOOFER jack on the main unit.
TO MAIN UNIT
AM/MW
FM/AM/MW ANTENNA
SPEAKERS
COAXIAL
DIGITAL IN
AUX 1
AUX 2
RIGHT
LEFT
FM 75
R
L
MAINS
fi x the claw
into the slot
FM antenna
AM/MW antenna
TO SUBWOOFER
TO MAIN UNIT
MW
FM/MW ANTENNA
COAXIAL
DIGITAL IN
AUX 1
AUX 2
FM 75
R
L
MAINS
Ñ LOUDSPEAKERS