Atio, Nstallation – Broilmaster BL48G-1 User Manual
Page 12
B101586-1-1011
Page 12
NOTICE: Assemble post before assembling grill.
The SS26P and BL26P Patio Bases are only for use with Broilmaster
Gas Grills. Before proceeding with installation read your Owner’s
Manual for the proper location and minimum clearances to com-
bustible materials for your grill and in-ground post.
Verify that all parts listed in the exploded view of this product have
been included before beginning this installation.
Recommended Tools:
•
Drill/Driver
•
Two adjustable wrenches or a socket set
•
A medium Phillips screwdriver
•
Pipe thread sealer or Teflon tape (for gas connections)
•
Soapy water solution (to test for leaks)
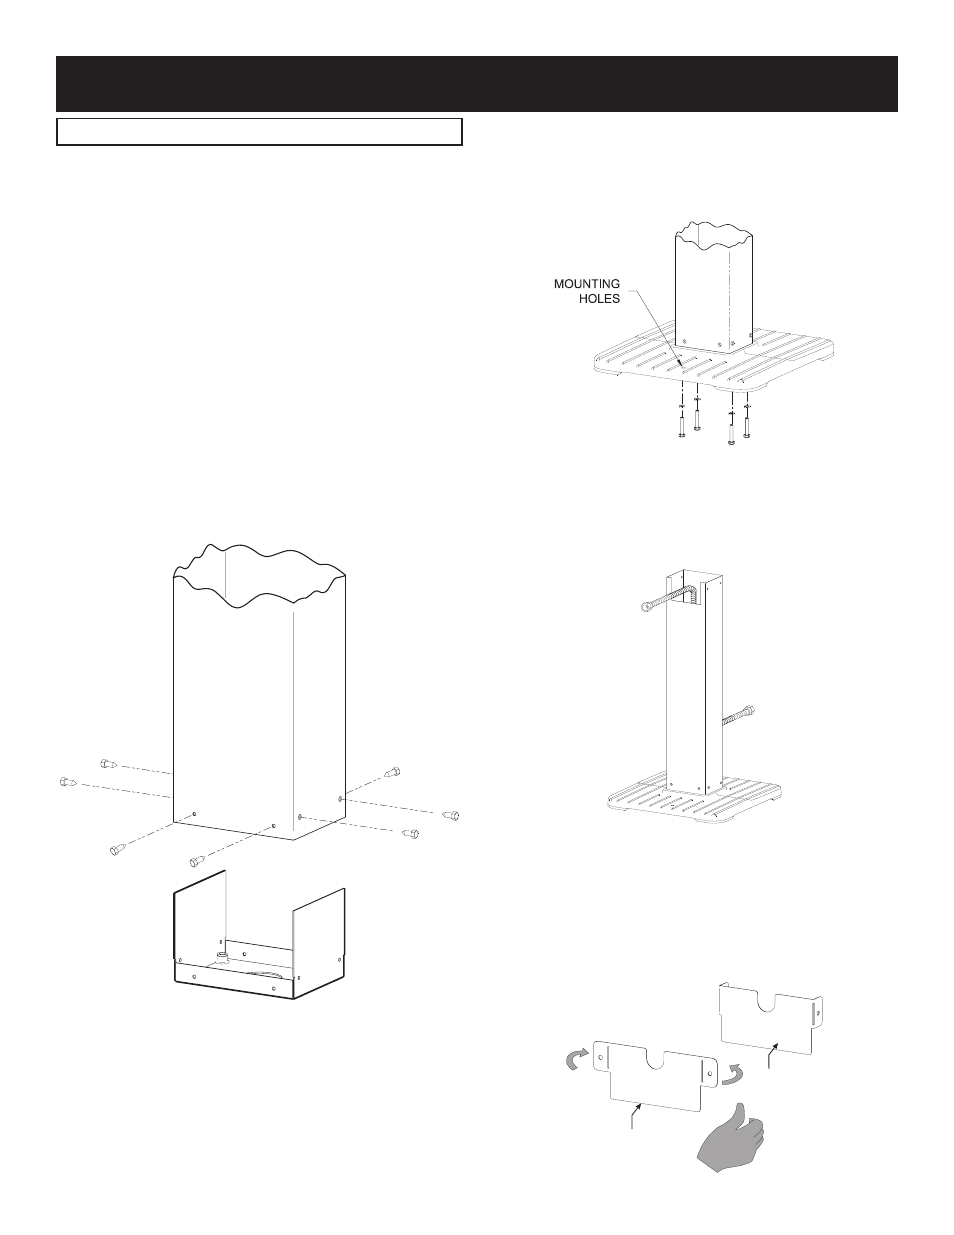
1. Attach lower bracket assembly to post with eight #10-1/2”
screws. See Figure 1.
NOTE: The large rectangular cut out is located at the front of the
post near the top.
Figure 1
p
Atio
b
ASE
i
nStAllAtion
2. Fasten the bottom of the post to the cast base using 1/4 lock
washers, and 1/4-20 hex bolts. See Figure 2. Anchor the
cast iron patio base to your patio using the two holes pro-
vided in the base. (Hardware not included)
Note: Make sure that the large rectangular cut out is facing in
the direction that you want your grill to face.
Figure 2
3. Insert the stainless steel flex tube assembly into the post. The
inlet side of the gas tubing may protrude from the bottom of
the patio base or through the large circular hole in the back of
the square post. See Figure 3. Note: Do not attempt to cut or
alter the flex tube in any way.
Figure 3
4.
For Grill Heads other than R3 Series, continue on to Step 5.
For R3 Series Grill Heads: Bend the tabs on the Post Cover
Plate to 90° as shown in Figure 4.
Note: If using the stainless steel Post Cover Plate, bend the
tabs so they face away from the protective film. Remove the
protective film after bending the tabs.
COVER PLATE
PROTECTIVE
FILM SIDE
Figure 4