Installation instructions, Power steering conversion kit – Briggs & Stratton 1687286 User Manual
Page 16
2-6
Installation Instructions
Power Steering Conversion Kit
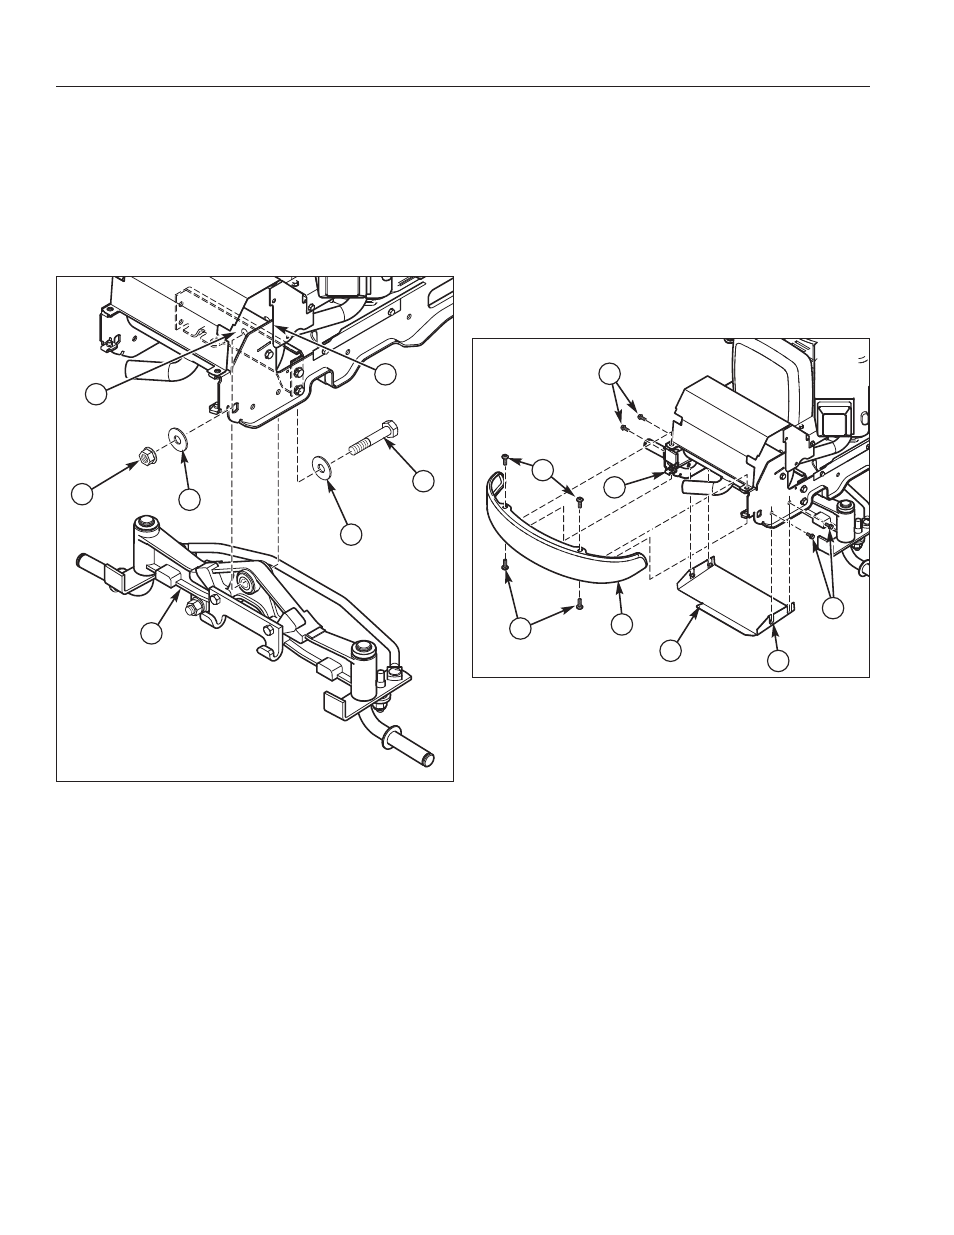
19. Install new axle (A, Figure 11) between axle support
plate (B) and frame (C) using a 5/8-11 x 3-1/2 cap-
screw (D), two 5/8 flat washers (E), and a 5/8-11
flange nut (F) as shown. Tighten flange nut to 150 ft.
lbs (204 Nm).
22. Tighten all four 3/8-16 support plate bolts
(E, Figure 2) to 19.5 Ft. lbs (26.5 Nm
A
D
C
C
D
B
C
Figure 11 New Axle Installation
A. New Axle
B. Axle support Plate
C. Frame
D. Capscrew, 5/8-11 x 3-1/2
E. Flat Washers, 5/8
F. Flange Nut, 5/8-11
21. Install heat shield (A, Figure 12) using four 1/4-20
Whiz Lock screws (B) as shown.
Tighten screws to 10 ft. lbs (13.6 Nm).
NOTE: Replace any speed nuts (E) broken or missing
from heat shield with parts from kit.
22. Install bumper (C, Figure 12) using four 5/16-18 x 7/8
Torx screws (D) as shown.
Tighten screws to 7 ft. lbs (9.75 Nm).
NOTE: Replace any speed nuts (F) broken or missing
from bumper mounts with parts from kit.
Figure 12 Bumper and Heat Shield Installation
A. Heat Shield
B. Whiz Lock Screws, 1/4-20
C. Bumper
D. Torx Head Screw, 5/16-18 x 7/8
E. Speed Nut, 1/4-20
F. Speed Nut, 5/16-18
A
C
E
F
B
B
D
D