5disposing of packaging, 6connecting the appliance, 7switching on the appliance – Liebherr KP 2620 Comfort User Manual
Page 7: 5control, 1brightness of the temperature display, 1adjusting the brightness, 5 control, Control, 5 disposing of packaging, 6 connecting the appliance
NOTICE
The stainless steel doors are finished with a high quality
surface coating and must not be treated with the enclosed care
product,
as otherwise the surface coating will be damaged.
u
Please only use a soft clean cloth to wipe the coated door
surfaces.
u
Only use a stainless steel care product on the stainless
steel side walls, applying it evenly in the direction of
polishing. Subsequent cleaning will then be easier.
u
Use only a soft clean cloth to wipe side walls and door
surfaces with a paint finish.
u
Remove the protective film from the decorative trims.
u
Remove all transit supports.
The spacers supplied with some appliances must be used to
achieve the stated energy consumption. These will extend the
depth of the appliance by approx. 35 mm. The appliance is fully
functional if the spacers are not used, but does have a slightly
higher energy consumption.*
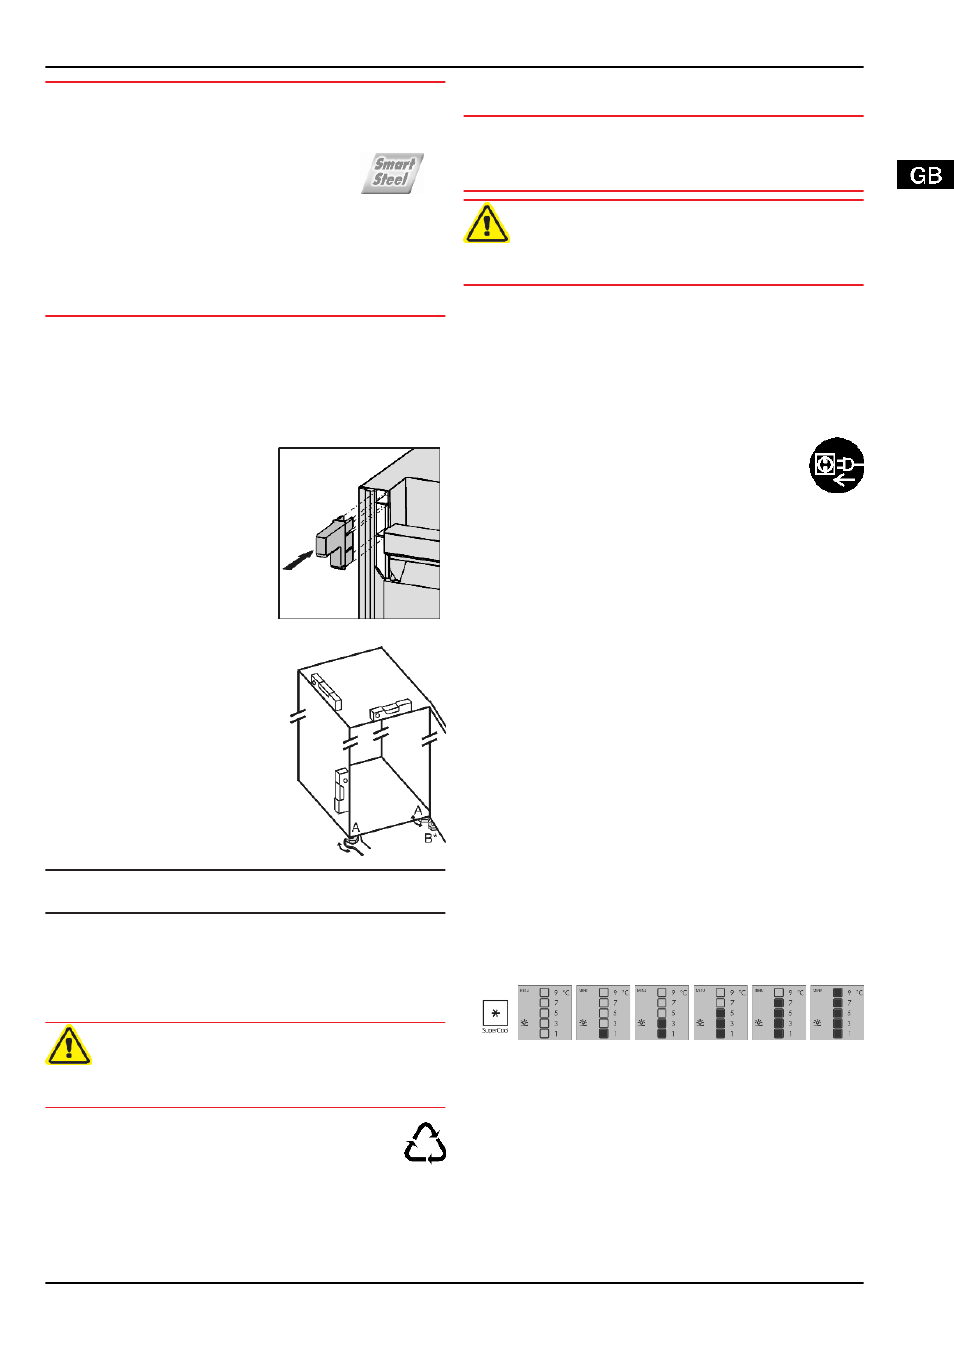
u
In the case of an appliance with
enclosed wall spacers, mount
the wall spacers on the back of
the appliance at the top left and
right.*
*
u
Dispose of packaging material (see 4.5) .
u
Align the appliance so that it
stands firmly and on a level by
applying the accompanying
spanner to the adjustable-
height feet (A) and using a
spirit level.
u
Then support the door: Extend
the adjustable foot at the turn
hinge (B) until it rests on the
floor and then make a further
90° turn.
Note
u
Clean the appliance (see 6.2) .
If the appliance is installed in a very damp environment,
condensate may form on the outside of the appliance.
u
Always see to good ventilation at the installation site.
4.5 Disposing of packaging
WARNING
Danger of suffocation due to packing material and plastic film!
u
Do not allow children to play with packing material.
The packaging is made of recyclable materials:
-
corrugated board/cardboard
-
expanded polystyrene parts
-
polythene bags and sheets
-
polypropylene straps
-
nailed wooden frame with polyethylene panel*
u
Take the packaging material to an official collecting point.
4.6 Connecting the appliance
NOTICE
Risk of damage to the electronic control system!
u
Do not use stand-alone inverters (conversion of d.c. to a.c./
three-phase) or energy saving plugs.
WARNING
Fire and overheating hazard!
u
Do not use extension cables or multiple socket outlets.
The type of current (alternating current) and voltage at the
installation site have to conform with the data on the type plate
(see Appliance at a glance).
The socket must be properly earthed and fused. The tripping
current for the fuse must be between 10 A and 16 A.
The socket must be easily accessible so that the appliance can
be quickly disconnected from the supply in an emergency. It
must be outside the area of the rear of the appliance.
u
Check the electrical connection.
u
Plug in the power plug.
4.7 Switching on the appliance
u
Press On/Off button
Fig. 3 (1)
.
w
The appliance is switched on. The temperature display indi-
cates the set temperature.
w
If all LEDs in the temperature display light up, demo mode is
activated. Please contact the after sales service.
5 Control
5.1 Brightness of the temperature
display
You can adjust the brightness of the temperature display to the
light conditions of the room in which the appliance is installed.
5.1.1 Adjusting the brightness
The backlight can either be switched off or set to one of 5
levels. The backlight is switched off ex works.
u
Activate setting mode by pressing the SuperCool button
Fig. 3 (2)
for approx. 5 sec.
w
The menu symbol
Fig. 3 (9)
lights up and thebrightness
symbol
Fig. 3 (7)
flashes.
u
Confirm the brightness function: Briefly press the SuperCool
button
Fig. 3 (2)
.
w
The brightness symbol
Fig. 3 (7)
shines.
u
Using the setting button
Fig. 3 (4)
, select either "off" or the
brightness wanted. The more display fields of the tempera-
ture display that light up, the brighter it is. If no field is lit up, it
means "off".
u
Confirm by pressing the SuperCool button
Fig. 3 (2)
.
w
The brightness symbol
Fig. 3 (7)
flashes.
w
The brightness is adjusted to the new value.
u
To deactivate the setting mode: Press the On/Off button
Fig. 3 (1)
.
-or-
u
Wait for 5 minutes.
w
The brightness symbol
Fig. 3 (7)
and the menu symbol
Fig. 3 (9)
go out.
Control
* Depending on model and options
7