MTD 190-758 User Manual
Page 8
8
3.
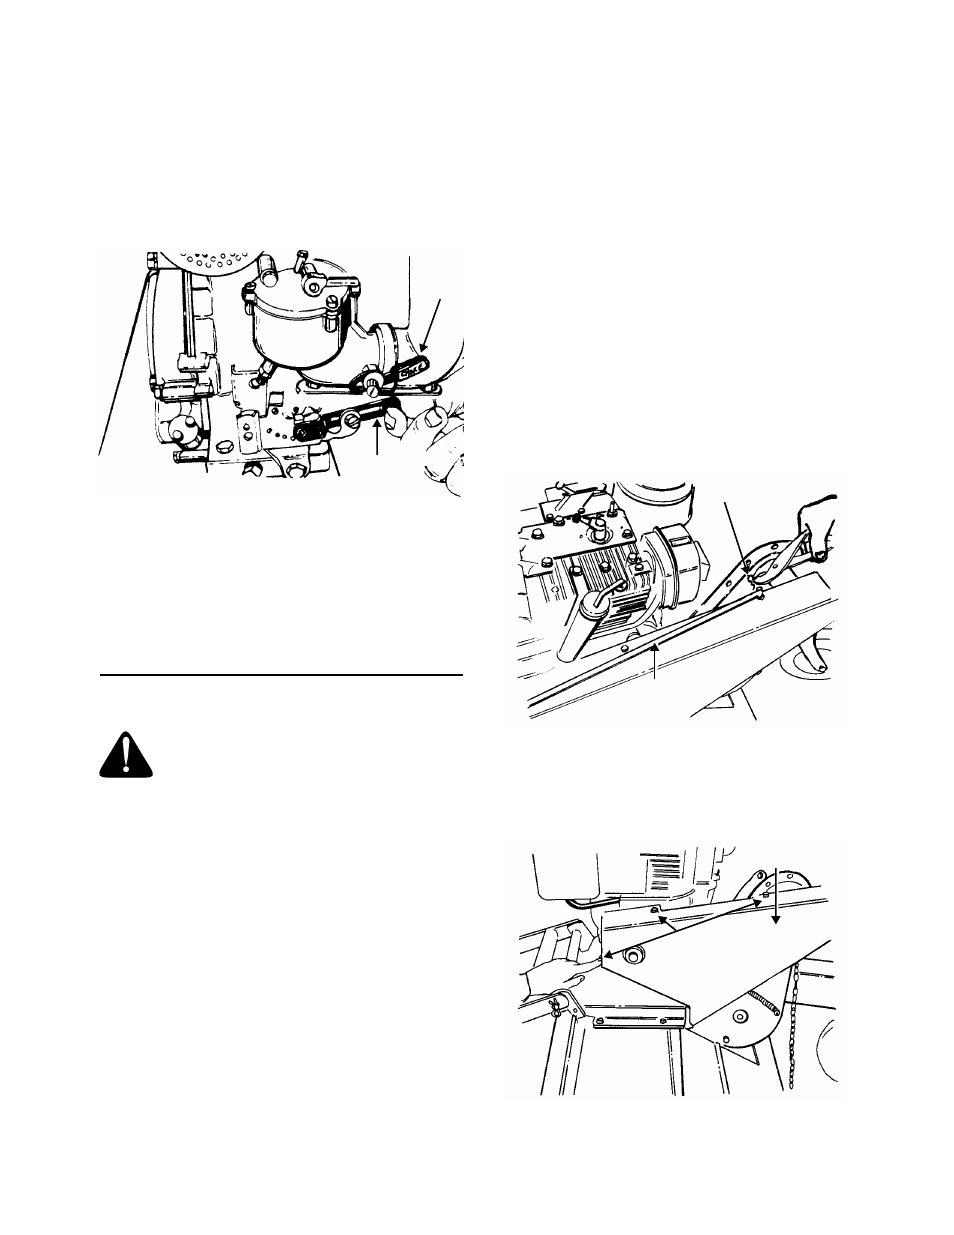
Push the CHOKE lever down all the way. Set
the throttle in the FAST position. See Figure 15.
NOTE:
A warm engine requires less choking.
4.
Grasp the recoil starter handle and pull back
rapidly, extending rope fully. Return it slowly to
the engine.
5.
After engine starts, move choke lever gradually
to OFF position.
Figure 15
TO STOP ENGINE
1.
To stop the engine, move the throttle control
lever to the STOP position.
2.
Disconnect the spark plug wire and ground it
against the engine to prevent accidental starting
while equipment is unattended.
SECTION 4: MAINTENANCE
WARNING:
Be sure to disconnect
and ground the spark plug wire before
performing any repairs or maintenance.
ENGINE
Refer to the separate engine manual for engine
maintenance instructions.
Maintain
engine oil
as instructed in the separate
engine manual packed with your unit. Read and
follow instructions carefully.
Service
air cleaner
every 25 hours under normal
conditions. Clean every few hours under extremely
dusty conditions. Poor engine performance and
flooding usually indicates that the air cleaner should
be serviced. To service the air cleaner, refer to the
separate engine manual packed with your unit.
The
spark plug
should be cleaned and the gap
reset once a season. Spark plug replacement is
recommended at the start of each season; check
engine manual for correct plug type and gap
specifications.
Clean the engine
regularly with a cloth or brush.
Keep the cooling system (blower housing area)
clean to permit proper air circulation which is
essential to engine performance and life. Be certain
to remove all dirt and combustible debris from
muffler area.
CHAIN CASE LUBRICATION
The chain case is sealed at the factory and does not
require checking or changing.
If the chain case is disassembled for repair, replace
the grease with 12 ounces of plastilube “0” grade
grease (factory number 737-0133-14 ounce
container).
BELT REPLACEMENT
1.
Remove the tine clutch rod by removing the
cotter pin in the hooked end of rod. See Figure
16.
Figure 16
2.
Slide the tine clutch rod out of the belt cover.
3.
Remove the belt cover by removing three hex
head self-tapping screws with a 3/8" wrench.
See Figure 17.
Figure 17
Choke
Lever
Throttle
Lever
Control
Tine Clutch
Rod
Cotter Pin
Belt Cover
Three Self-
Tapping Screws