MTD 190-758 User Manual
Page 7
7
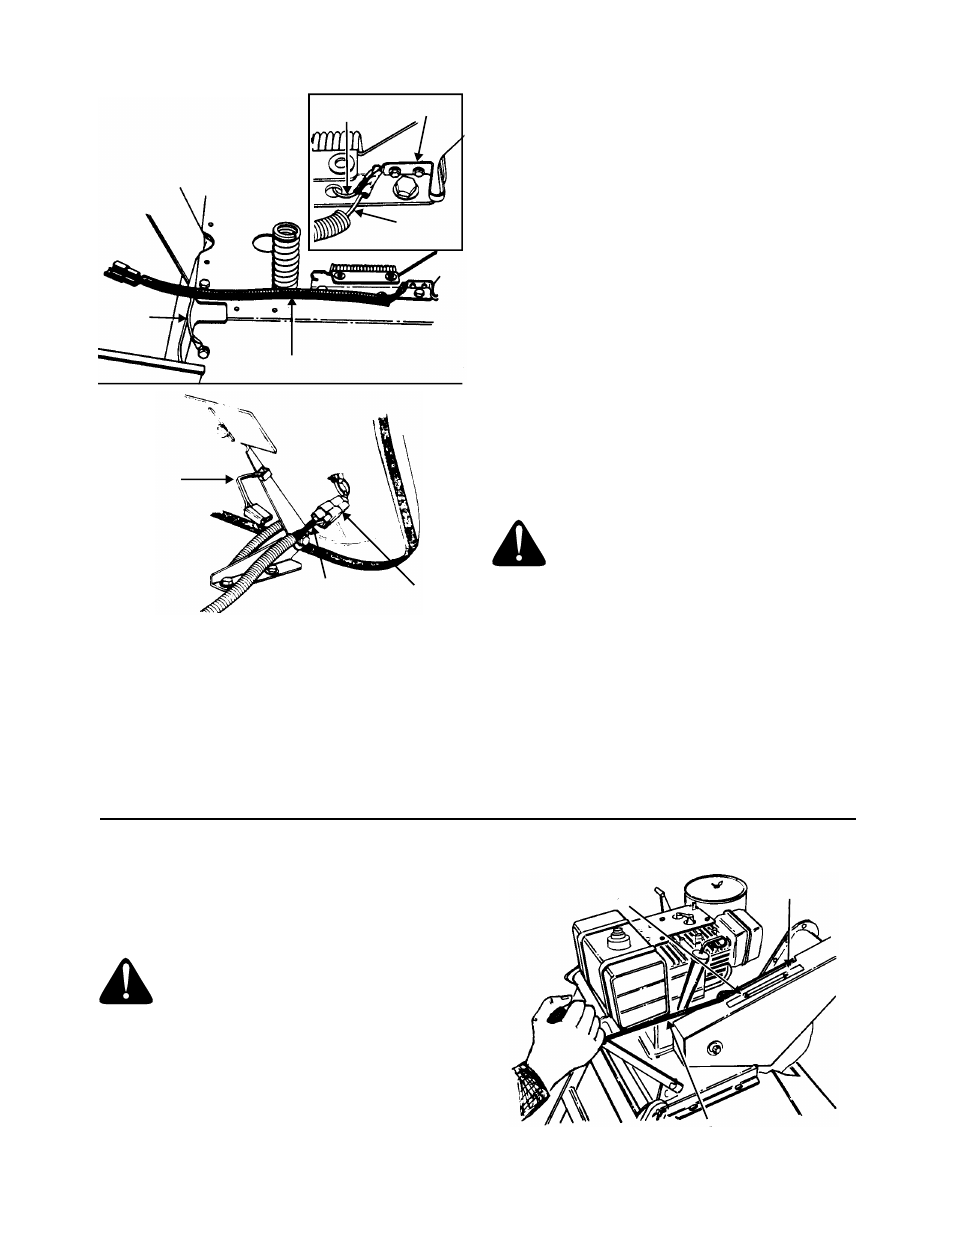
Figure 13
14. There are two different types of seat safety
switches. Refer to Figure 13A and Figure 13B.
If the seat switch on your tractor is as shown in
Figure 13A
, assemble the adapter harness as follows.
• On units with a one-piece fender, first remove
the fender from the unit by removing for self-
tapping screws from the top of the fender,
and four bolts, lock washers and nuts from
the fender and running boards.
• Unplug the wire lead from the switch located
on the right hand seat bracket. Plug the end
of the adapter harness into the switch on the
seat bracket.
• Plug the wire lead on the tractor into the
same end of the adapter harness.
• Attach the ground wire to a bolt on the tractor
frame.
• Plug the other end of the wire adapter into the
wire harness on the tiller.
NOTE:
It is not necessary to remove the wire
adapter from your unit when the tiller is removed.
If your tractor is equipped with a plug on the
seat as shown in Figure 13B
, connect the wire
harness on the tiller to the tractor as follows.
Disconnect the wire lead under the seat of the
tractor from the wire harness on the tractor.
Connect the plug on the tiller wire harness to the
wire lead on the seat. See Figure 13B.
WARNING:
When removing the tiller
attachment, make certain to reconnect
the wire lead under the seat to the wire
harness on the tractor. Failure to do so
could result in serious personal injury.
The seat switch is a safety device,
designed for your protection. Never
attempt to bypass its operation.
15. Raise and lower the tractor lift lever a couple of
times to make sure that the tiller tines are going
up and down.
This tiller attachment is not designed to be raised off
the ground by the tractor lift lever. It is designed to
trail behind the tractor. The lift lever is only used to
raise the lower the tines.
SECTION 3: OPERATION
GAS AND OIL FILL-UP
Service the engine with gasoline and oil as
instructed in the separate engine manual packed
with your mower. Read instructions carefully.
WARNING:
Never fill fuel tank
indoors, with engine running or until
the engine has been allowed to cool for
at least two minutes after running.
TO START ENGINE
1.
Attach spark plug wire to spark plug.
2.
Place the tine clutch rod in the
disengaged
position. See Figure 14.
Figure 14
Switch
Wire
Lead
Adapter
Harness
Adapter
Harness
Ground
Wire
Wire Harness
Tiller
Seat
Wire
Lead
Wire
Harness
on
Tractor
A
B
Pull Forward
To Disengage
Push Back
To Engage
Tine Clutch Rod