What’s in the box, Getting started – Philips AuxDock User Manual
Page 4
7
6
EN
G
LI
SH
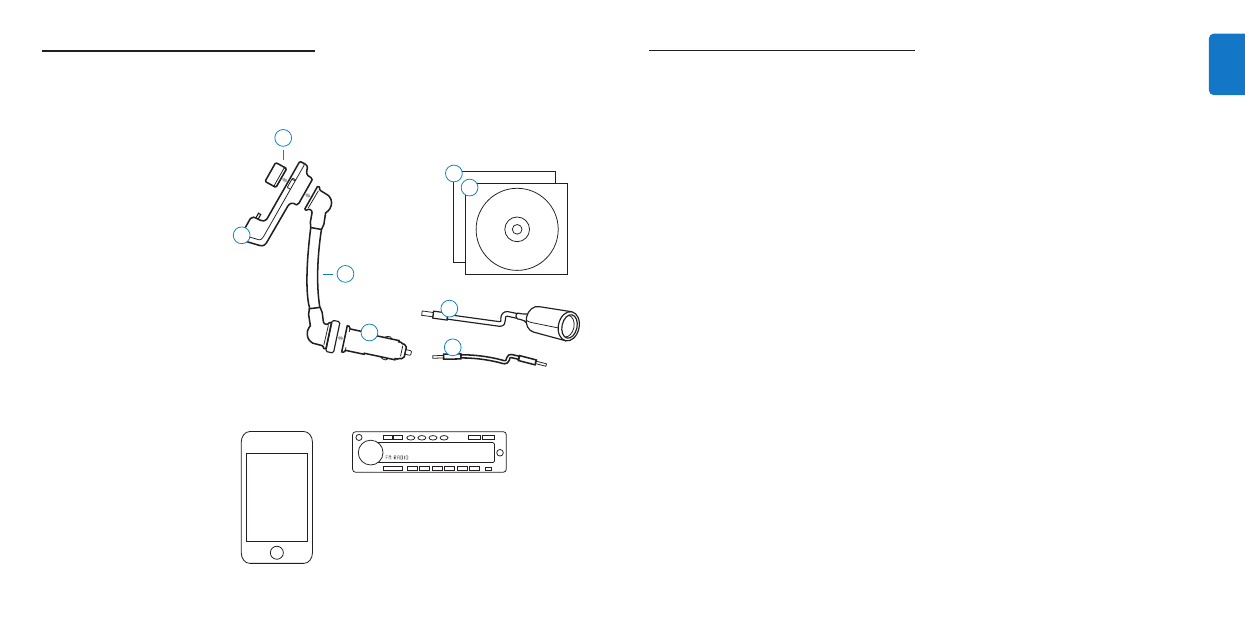
What’s in the box
Included
1.
TransDock Direct Cradle
2.
Car Power Adapter
3.
Flex Arm
4.
Detachable 12V Power Socket
5.
Aux-In Cable
6.
iPod touch Support Bracket
7.
CD ROM
8.
Quick Start Guide
What you will also need
iPod
Car stereo with aux-in capabilities
12V auto power outlet
CD-ROM
8
1
2
3
7
6
5
4
AUX
Getting started
C
Important:
Read the safety precautions carefully
before connecting your PhilipsTransDock Direct.
This section helps you with the installation of
your PhilipsTransDock Direct for the first time.
1.
Assemble yourTransDock Direct by attaching the
Flex Arm to both the Car Power Adapter and the
TransDock Direct Cradle.
2.
Insert yourTransDock Direct into your
auto power outlet.
D
Note:
The TransDock Direct Cradle shows
power status at a glance – one light when connected,
two when charging and three when fully charged.
TransDock Direct will indicate that it is receiving
power with a single light.
3.
Gently slide your iPod onto yourTransDock Direct.
Your iPod will now begin charging if your car is on.
D
Note:
TransDock Direct will indicate that it is
charging your iPod with two illuminated lights on
the front of the cradle. When the third light is
illuminated, your iPod is fully charged.
4.
Insert the included Aux-In Cable into the Aux-In Jack
on the bottom of theTransDock Direct Cradle and
connect to your car stereo’s auxiliary input.
D
Note:
The car’s aux-in port may be located on
the dashboard, alongside the stereo, under the dash
or even in the glove compartment. Consult your car’s
owner’s manual for details.
5.
Set your car stereo to AUX, then click Play on iPod
to enjoy your music over your car stereo.
D
Note:
The iPod will automatically pause
playback when yourTransDock Direct is
powered off.