Briggs & Stratton 592 User Manual
Page 5
5
SECTION 2: ASSEMBLING YOUR EDGER
IMPORTANT:
This unit is shipped WITHOUT
GASOLINE or OIL. After setting up the unit, service
engine with gasoline and oil as instructed in the Briggs
& Stratton Owner/Operator Manual packed with your
edger.
NOTE: Reference to right or left hand side of the edger
is observed from the operating position.
Contents of Carton
One Edger Assembly
One Plastic Bag Containing:
Edger Operator’s Manual
Registration Card
Engine Owner’s Guide
One Clutch Rod (747-1164) with
One Ferrule (711-0392)
Two Flat Washers (736-0264) and
Two Hairpin Clips (714-0104) in place
Grounding the Engine’s Spark Plug
•
Disconnect the spark plug wire from the spark plug
and ground it on the top of the engine by placing its
rubber boot snugly over a bolt head. See Figure 2.
Figure 2
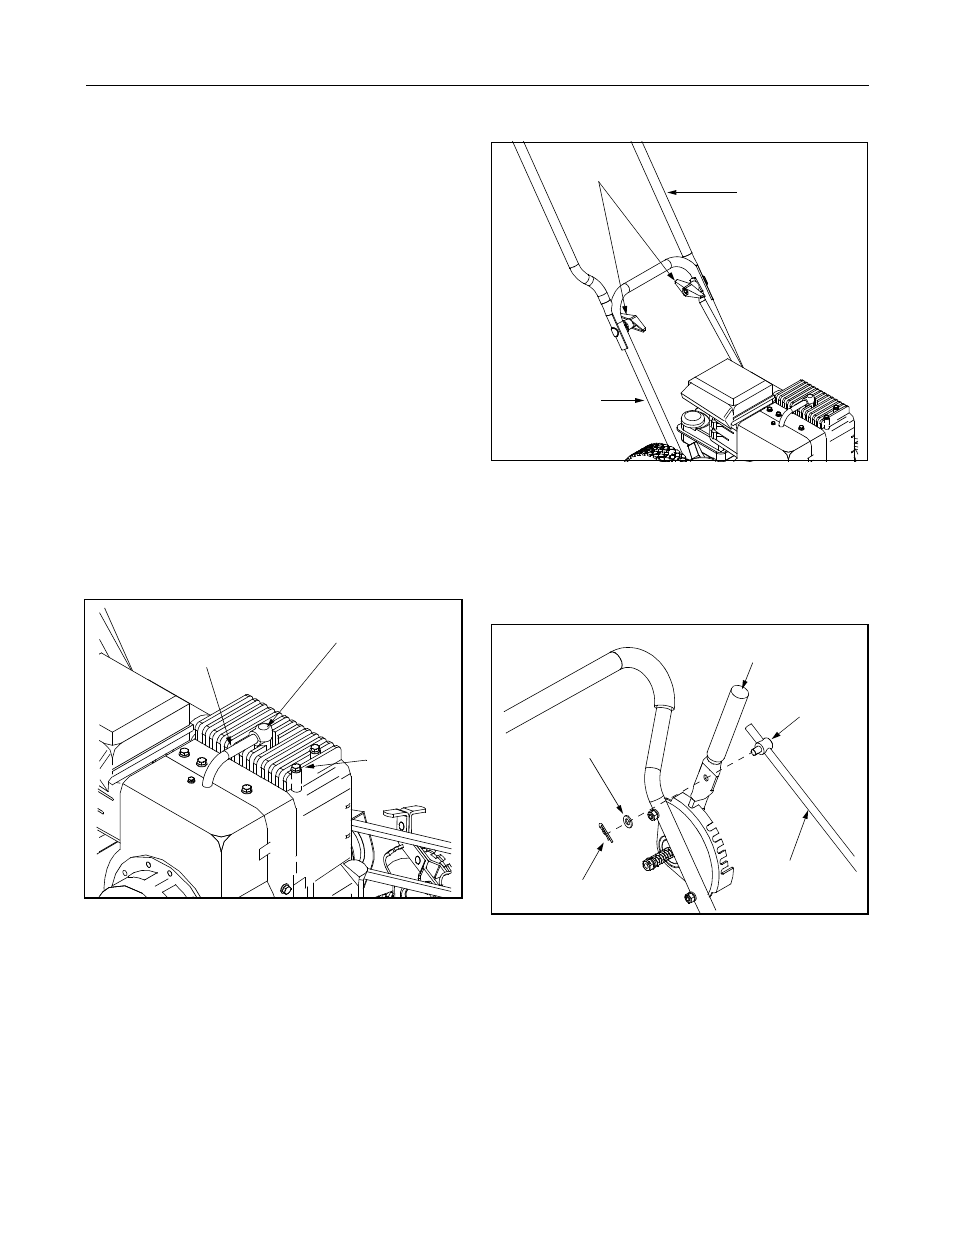
Positioning the Edger Handles
•
Remove and discard any packaging cardboard that
may be present between the upper handle and the
lower handle.
•
Pivot the upper handle upward until it snaps into
place.
•
Tighten the wing knobs which are located on both
the left and right sides of the handle. See Figure 3.
Figure 3
•
Remove the flat washer and hairpin clip from the
ferrule found on the upper portion of the clutch rod.
Save this hardware as it will be reinserted.
•
Insert the ferrule located on the upper portion of the
clutch rod into the hole on the blade clutch/depth
control lever. Secure with the flat washer and
hairpin clip removed earlier. See Figure 4.
Figure 4
•
Remove the flat washer and hairpin clip from the
lower portion of the clutch rod. Save this hardware
as it will be reinserted.
•
Insert the lower end of the clutch rod into the hole in
the pivot arm found on the left side of the edger.
•
Secure with the flat washer and hairpin clip
removed earlier. See Figure 5.
Spark Plug Wire
Rubber Boot
Bolt Head
Wing Knobs
Lower Handle
Upper Handle
Ferrule
Clutch Rod
Blade Clutch /
Depth Control Lever
Flat Washer
Hairpin Clip