De f – Britax Car Seat User Manual
Page 16
28
29
Energy-Absorbing Tether
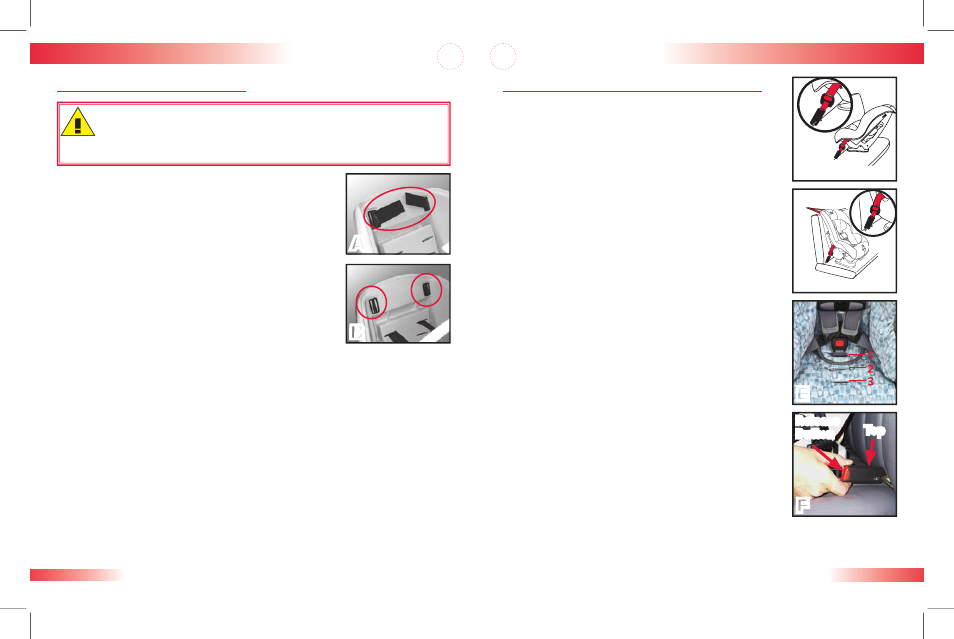
Installation: Versa-Tether
®
WARNING!
The Energy Absorbing Tether has been designed
to help indicate when this child seat has been involved in a
moderate or severe crash and replacement of the child seat is necessary.
Figure A shows the tether when the child seat
is acceptable for continued use (provided the
child seat has not been involved in a crash). The
colored stitching will be intact and the webbing
will be looped inside the shell.
Figure B shows the tether when the child seat is
unacceptable for continued use. If one or both
of the loops have pulled through the back side
of the shell and/or any of the colored stitching
has ripped on either side, the child seat is no
longer acceptable for use. Discontinue use of
the child seat.
IMPORTANT:
Regardless of whether loops have pulled through the back
side of the shell and the colored stitching has been ripped, discontinue use
of the child seat if it has been involved in a moderate or severe crash.
A
B
Switching the LATCH Connectors
The LATCH strap may need to be switched for
proper alignment in rear-facing (Fig. C) versus
forward-facing (Fig. D) installations. If a proper
connection cannot be achieved, complete the
following procedure to switch the connectors.
Lift the front of the cover to access the
LATCH connectors.
Pull the LATCH strap and connectors from
the child’s right side of the child seat.
Thread the LATCH strap and connectors
through the appropriate belt path ensuring
that the larger part of the connector is on
top for the installation procedure you wish
to use (Fig F).
Verify that the harness is not twisted.
IMPORTANT:
When installing this child seat in
rear-facing mode, the LATCH strap must rest IN
FRONT OF the child seat buckle when using buckle
slots 1 or 2 (Fig. E).
NOTE:
To ensure LATCH connector is properly
aligned with vehicle’s LATCH anchor, the connector’s
red release button should face away from vehicle seat
back, and the larger of the two connector sections is
on top (Fig. F).
Replace cover and continue with LATCH
installation procedure.
1
2
3
•
4
Child Seat Functions
Rear-Facing
Rear-Facing
C
Forward-Facing
D
E
F
Top
Release
Button
P276000_R2.indd 28-29
1/2/2008 10:16:16 AM