Nokia 6133 User Manual
Quick start guide, Check it out, Create and set a video ring tone
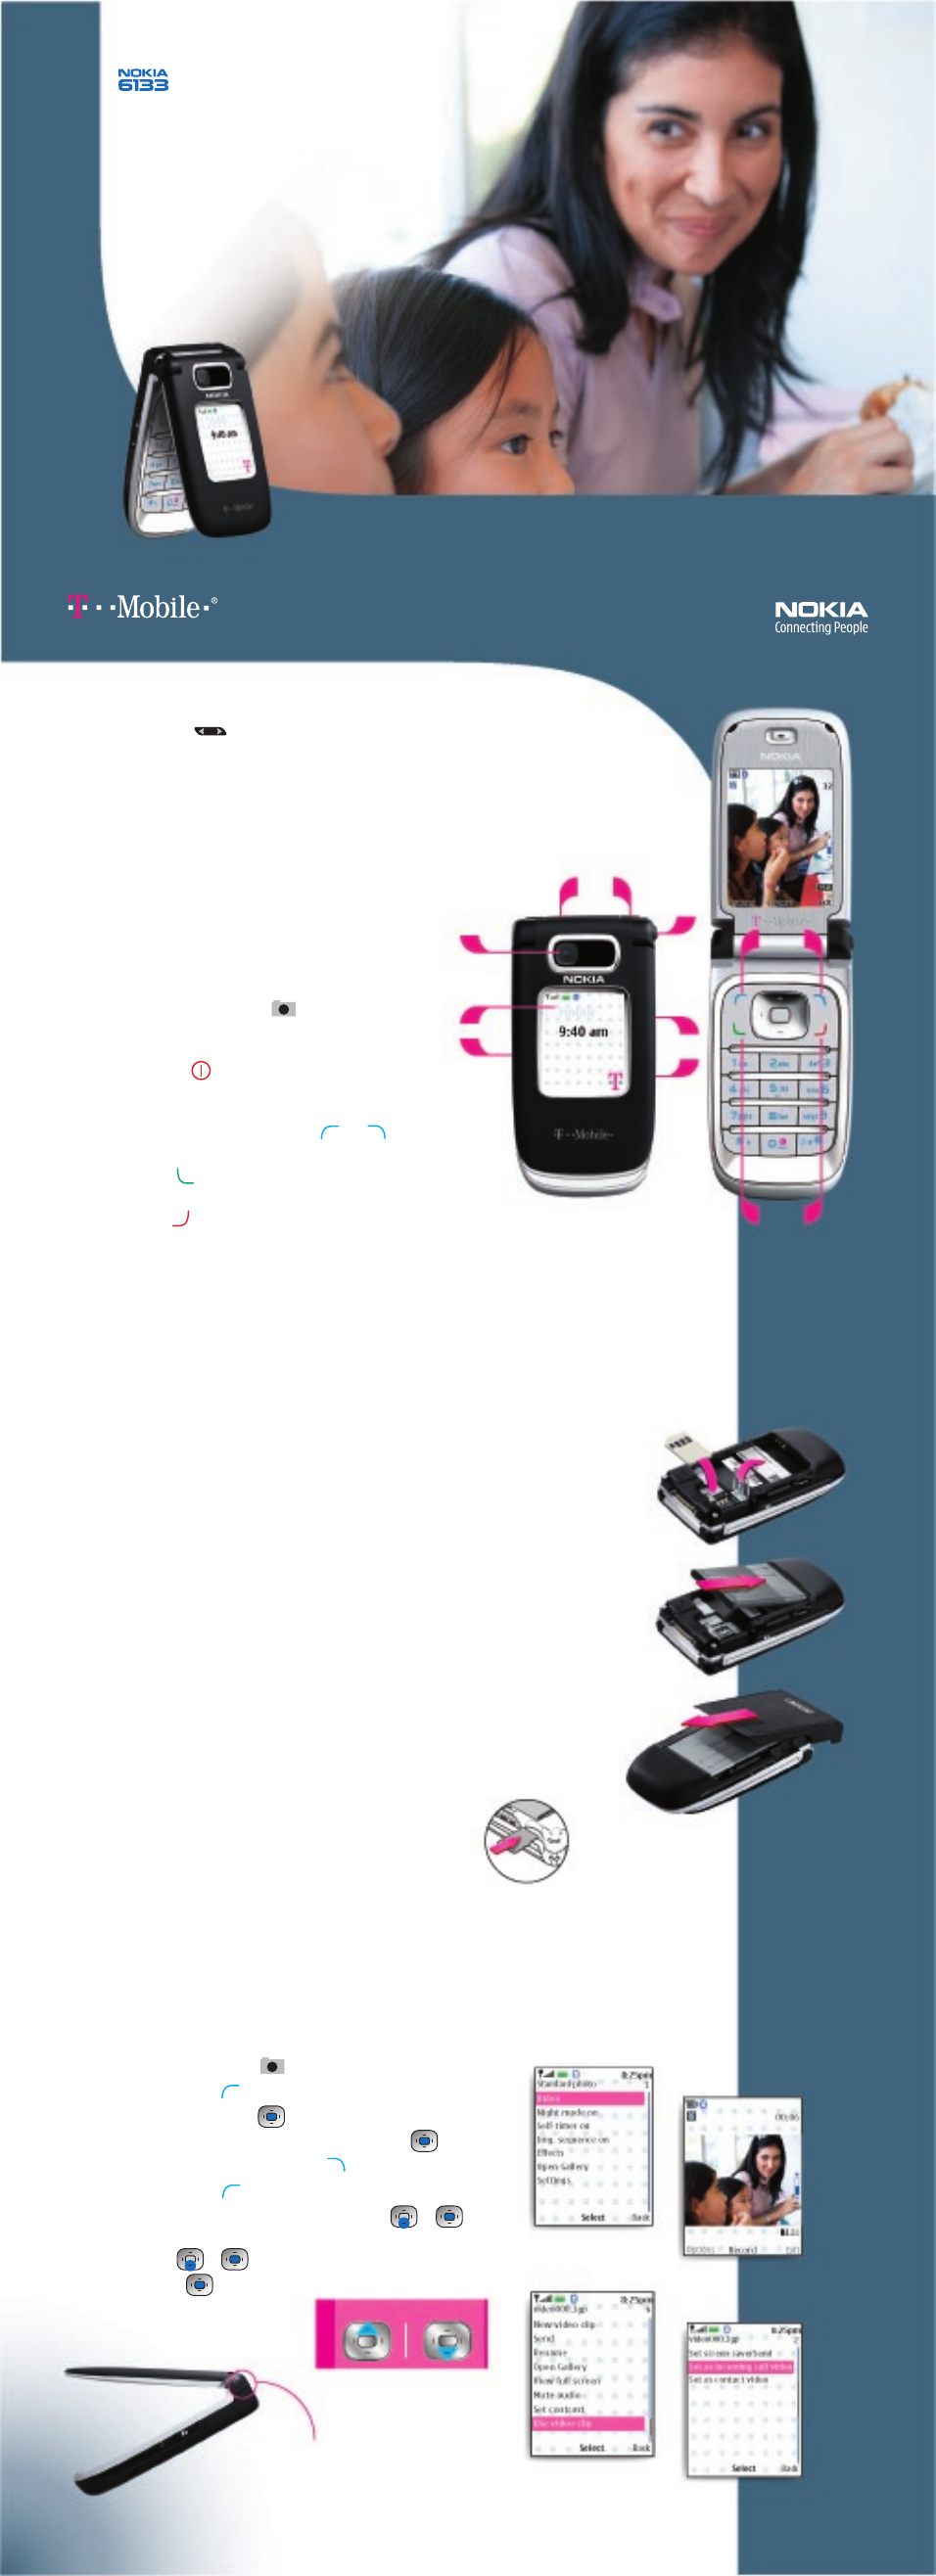
1. CHECK IT OUT!
1. Volume key
( )
In the open or closed position, press up or down to adjust the volume.
2. Mini display
View the clock, caller ID, active profile, and other information.
3. Camera lens
Lens for camera and video recorder.
4. Pop-Port™ connector
Connect a data cable to your compatible PC for exchanging data.
5. Charger port
Connect your phone charger.
6. Press-to-open button
For easy, one-hand operation, press to flip open
the phone.
7. Camera and video key
( )
Press to quickly activate the viewfinder even when
the phone is closed.
8. Power key
( )
Press to switch profiles or press and hold to turn
the phone on/off.
9. Left and right selection keys
( ) ( )
Press to access the option shown above the key.
10. Talk key
( )
Press to make a call or to answer an incoming call.
11. End key
( )
Press to end a call. When you’re not on a call, the End key will
take you back to the Start screen.
3. CREATE AND SET A VIDEO RING TONE
The dual displays on your Nokia 6133 phone will have you seeing double, in a good way. Video ring
tones and photo caller ID display on both screens when you receive a call. Switch your camera to video
mode and create a video ringing tone, or download new ones from t-zones.
Create a video ring tone
1. Press the Camera key. ( )
2. Select Options. ( )
3. Select Video (fig. 3.1). ( )
4. Aim the viewfinder and select Record (fig. 3.2). ( )
5. Select Stop to end the recording. ( )
6. Select Options. ( )
7. Scroll to and select Use video clip (fig. 3.3). ( ) ( )
8. Scroll to and select Set as incoming call video
(fig. 3.4). ( ) ( )
9. Select Yes. ( )
7
8
1
fig. 2.1a/2.1b
fig. 2.2
fig. 2.3
fig. 2.4
5
4
6
3
2
9250720. Printed in Mexico.
All screen images are simulated.
QUICK START GUIDE
Use this guide to:
• Get familiar with your phone
• Install the SIM card, battery & microSD memory card
• Take a video & save as a video ring tone
• Take a picture & send it via picture messaging
• Play your music
• Get connected
• Get support
2. GET STARTED
The SIM card
Your Nokia 6133 phone uses a convenient SIM card that holds information about your wireless service
and contact information. If you already have a SIM card, you can transfer your contacts to your new
phone by inserting the SIM card. If you do not have a SIM card or service for the phone, contact your
wireless service provider.
Insert the SIM card and battery
1. With the back of the phone facing you, remove
the back cover.
2. Release the SIM card door (fig. 2.1a).
3. Insert the SIM card with the metal contacts facing
down (fig. 2.1b).
4. Snap the SIM card door into place.
5. With the metal contacts pointed downward, insert
the battery into the slot (fig. 2.2).
6. Slide and lock the back cover into place (fig. 2.3).
The microSD memory card
The hot swappable microSD memory card offers expandable memory
to store photos, videos, music, data files and other applications.
It’s hot swappable so you can insert or remove the memory card while
the phone is on. Transfer files from your computer to the microSD
with Nokia PC Suite and USB data cable (sold separately).
Insert the memory card
1. With the back cover removed, locate the memory card slot.
2. Insert the memory card as shown (fig. 2.4).
NOTE: The memory card clicks when locked in place.
3. Replace the back cover.
9
10
11
9
Thank you for purchasing the Nokia 6133 phone!
Zoom in
Zoom out
TI
P
!
Instantly opens
with one press
of a button
fig. 3.4
fig. 3.3
fig. 3.2
fig. 3.1