Nokia 6682 User Manual
Quick start guide, Check it out
Thank you for purchasing the Nokia 6682 phone!
Use this guide to:
Get familiar with your Nokia 6682 phone
Install the SIM card and memory card
Take and send pictures
Print pictures
Get organized
Play digital music
Quick Start Guide
All screen images are simulated.
9237586
Printed in U.S.A.
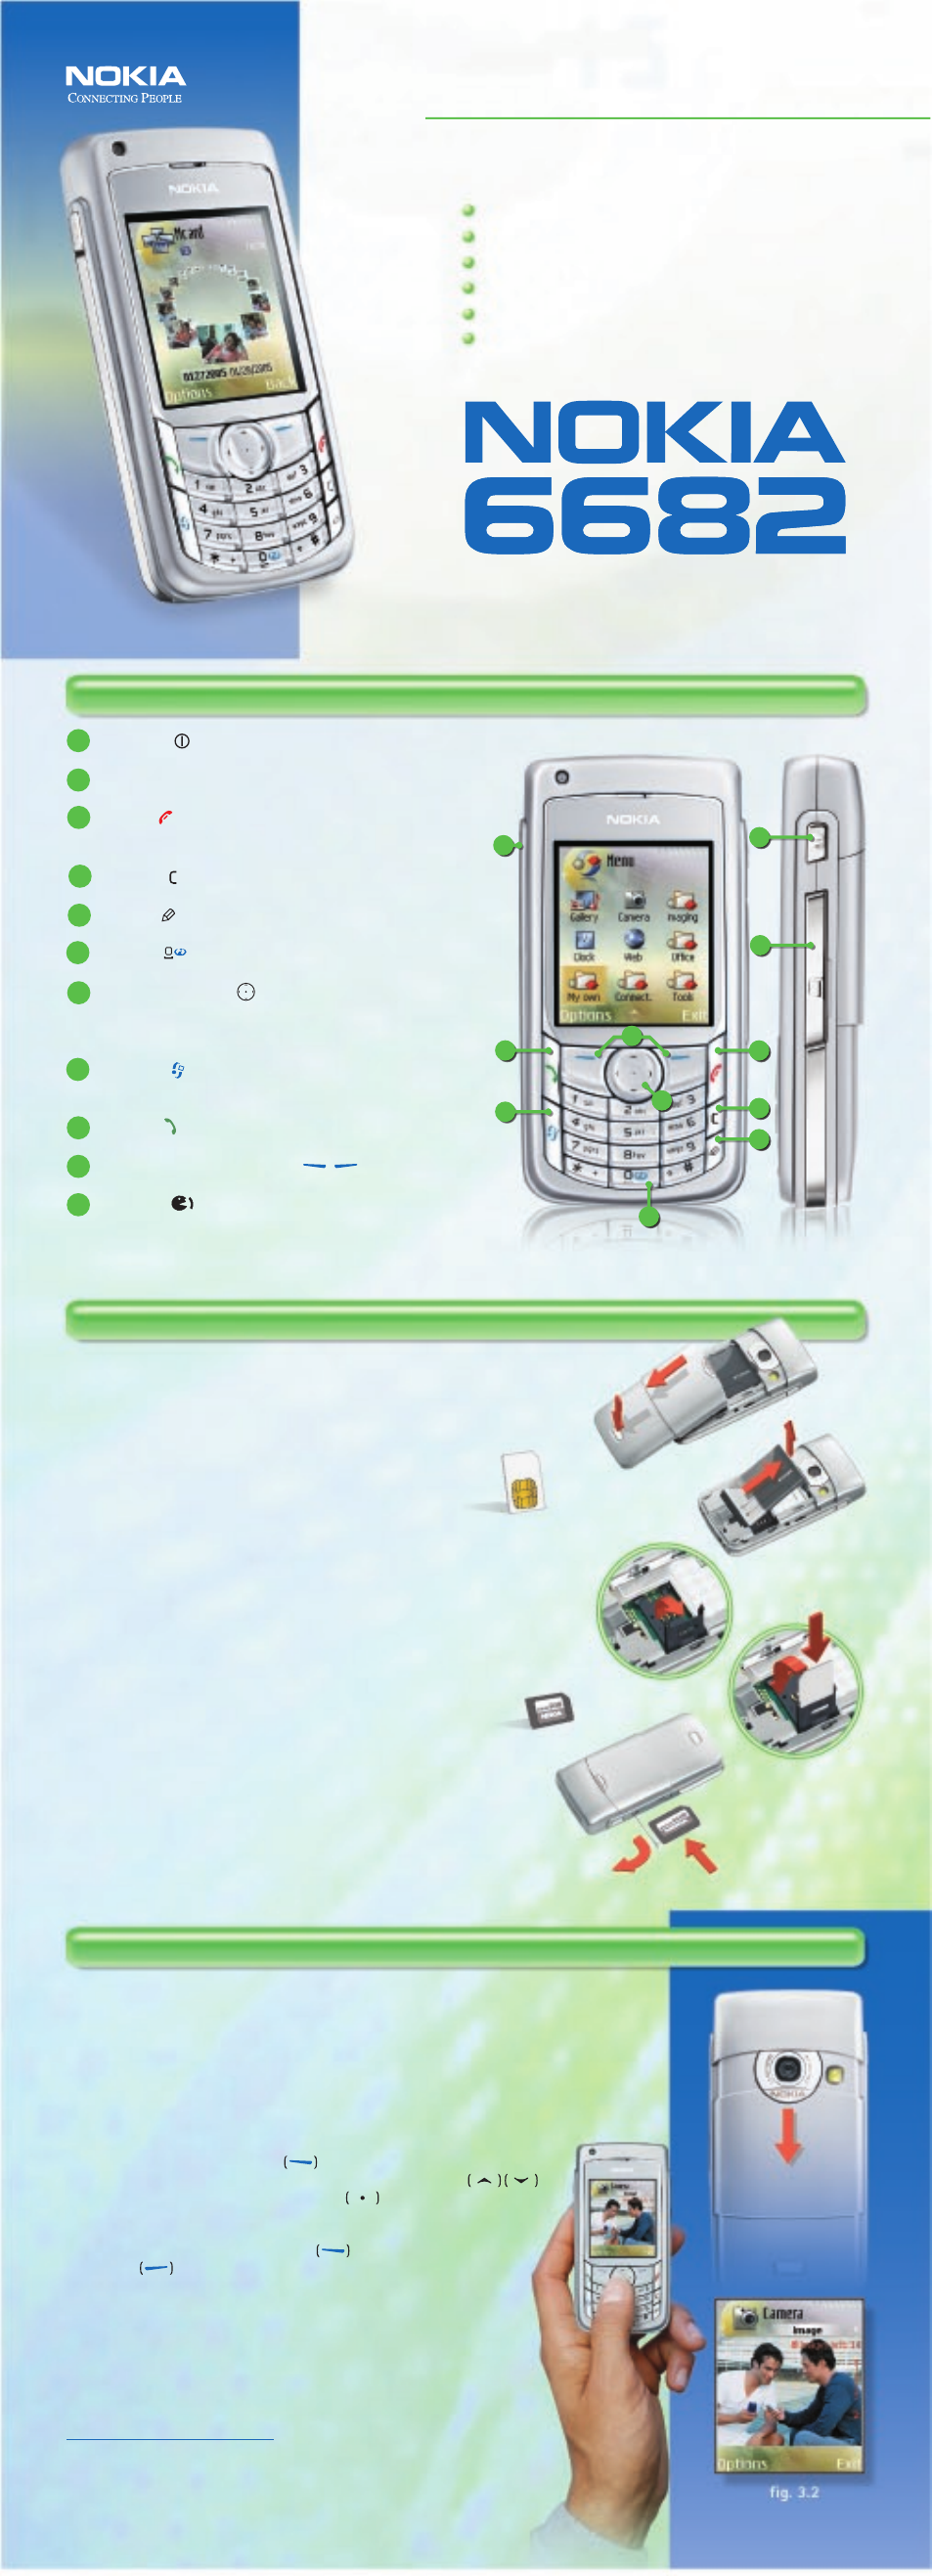
Power key
Press and hold to turn phone on/off or to switch profiles.
Memory card slot
Lift the flap for access to the memory card slot.
End key
Press to end or decline a call and return to
the Start screen from any menu.
Clear key
Press to clear the most recent keystroke.
Edit key
Use to open a list of text-editing commands during text entry.
Zero key
Press and hold to launch a Web connection.
Five-way scroll key
Press up, down, left, and right to navigate the menu system.
Press down on the middle of the scroll key to activate
the currently selected item.
Menu key
Press to open the main menu. Press and hold for a list of open
applications.
Send key
Press to answer an incoming call.
Right and left selection keys
Press to activate the menu option shown above the key.
Voice key
Press to turn on/off the loudspeaker. Press and hold to activate
voice commands.
The Nokia 6682 phone is loaded with functionality, yet it’s a snap to use. Advanced
features like the 1.3 megapixel camera (1280 x 960), video recorder, 6x continuous
zoom, flash, sequence mode, and self-timer offer immense possibilities for taking and
sharing those moments that are too good not to share!
Take a picture
1. Slide the lens cover down to open the camera (fig. 3.1).
• The camera opens with the default settings and the display screen
becomes the viewfinder (fig. 3.2).
• Press
Options to change the camera settings,
including activating the Flash.
• Use the scroll key to zoom in and out by pressing up or down.
2. Press the scroll key center to take a picture.
The light on the back of the phone will flash indicating
that you have taken a picture.
3. After taking the picture, press
Options to access picture options
or Back to return and take more pictures.
Share your story
The Nokia 6682 phone is designed to put more multimedia in your hand. Share
your images, videos, and slideshows via email or multimedia messaging (MMS).
With MMS, you can combine an image or video with text and audio, and then
send to a compatible phone or PC.
Note:
Multimedia messaging and other services are network dependent. To
configure your device settings for GPRS, MMS, Internet, or email, visit
www.nokiausa.com/support/settings
.
With your Nokia 6682 phone's battery fully charged, simply press and hold the
power key to turn the phone on. The first time the phone is turned on the current
time and date will need to be set.
The SIM Card
Your Nokia 6682 phone uses a convenient SIM card that
holds information about your wireless service and contact information. If
you already have a SIM card, you can transfer your contacts to your phone
by simply inserting the SIM card. If you do not have a SIM card or service
for the phone, contact your wireless service provider.
Insert the SIM Card
1. Turn the phone off and remove the back cover (fig. 2.1).
2. Lift and remove the battery (fig. 2.2).
3. Slide the SIM card holder out of the locked position and lift the holder up (fig. 2.3).
4. Insert the SIM card into the slot, flat edge first, with the gold-colored contacts
facing the phone.
5. Lower the SIM card into place and lock (fig. 2.4).
6. Insert the battery and replace the back cover.
The Memory Card
The hot swappable, reduced size memory card (RS-MMC)
holds photos, videos, music, data files, and other applications. Designed for
quick access, open the door and insert or remove the memory card
while the phone is on!
Insert the Memory Card
1. Open the door of the memory card slot (fig. 2.5).
2. Insert the memory card as shown (fig. 2.6).
Note: The memory card clicks when locked in place.
3. Close the memory card door.
TIP! To remove the memory card, press the memory card to release it from the slot.
fig. 2.3
fig. 3.1
1
2
3
4
5
6
7
8
9
11
10
fig. 2.4
fig. 2.6
fig. 2.5
fig. 2.2
6
7
8
9
11
1
2
3
4
5
10
Check it out!
Check it out!
Get started - Insert SIM.
Get started - Insert SIM.
2
Experience mobile imaging.
Experience mobile imaging.
3
1
fig. 2.1