Making a scan, En making a scan – Toshiba JournE Scan User Manual
Page 9
User’s Manual
9
EN
Making a Scan
CAUTION
:
Insert only one sheet at a time. Insert the next original only when the previous
one is done. Otherwise the scanner will fail to function normally.
NOTE
:
n
Do not remove the memory card or disconnect the power supply while the
indicators are blinking.
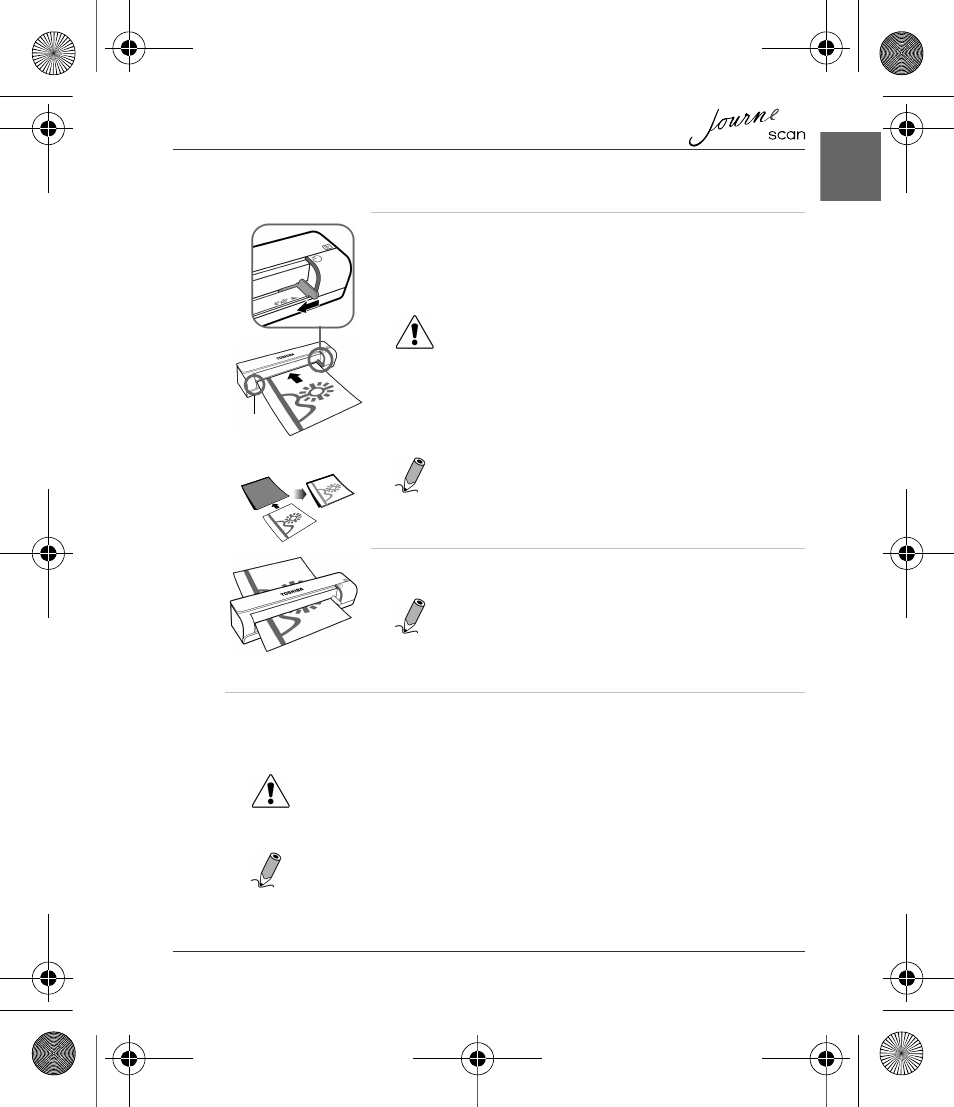
1. With the side to be scanned facing upward and in correct
orientation as indicated by the orientation mark, place one
edge of the original on the scanner and adjust the guide
lever so that the original aligns against the left side of the
feeding slot. Insert the original into the feeding slot.
CAUTION: Do not scan glossy photos in humid
environments (humidity higher than 70% RH). Otherwise
the surface of the photo will become sticky and cause the
scanner to jam.
NOTE: For your older, fragile photographs, we
suggest to use the supplied protective sheath before
scanning.
2. The original will be fed into the slot and scanned
automatically.
NOTE: If the protective sheath is used, insert it with
the folded side first into the feeding slot of the scanner.
See “More Information” on page 11 for how to insert
photos and other types of originals.
3. When scanning is completed, the Power and Status/card indicators will keep
blinking for a while, indicating that the scanner is processing the image and
storing the file. Wait until the indicators stop blinking before inserting and
scanning the next original.
Align left
UM_EEMEA_Scan_1108.book Page 9 Monday, December 15, 2008 2:26 PM