English, Installing the unit on a left-hand drive car – Pioneer FH-P6600R User Manual
Page 4
Note:
• Before finally installing the unit, connect the
wiring temporarily, making sure it is all connected
up properly, and the unit and the system work
properly.
• Use only the parts included with the unit to ensure
proper installation. The use of unauthorized parts
can cause malfunctions.
• Consult with your nearest dealer if installation
requires the drilling of holes or other modifica-
tions of the vehicle.
• Install the unit where it does not get in the driver’s
way and cannot injure the passenger if there is a
sudden stop, like an emergency stop.
• The semiconductor laser will be damaged if it
overheats, so don’t install the unit anywhere hot
— for instance, near a heater outlet.
• If installation angle exceeds 30° from horizontal,
the unit might not give its optimum performance.
(Fig. 3)
Fig. 3
• The cords must not cover up the area shown in the
figure below. This is necessary to allow the ampli-
fiers to radiate freely. (Fig. 4)
Fig. 4
30˚
Do not close this area.
Installation using the screw holes on the side of the unit
Fastening the unit to the factory radio mounting bracket. (Fig. 5) (Fig. 6)
Select a position where the screw holes of the bracket and
the screw holes of the head unit become aligned (are fit-
ted), and tighten the screws at 3 or 4 places on each side.
Use either binding screws (5
× 6 mm) or flush surface
screws (5
× 6 mm), depending on the shape of the screw
holes in the bracket
.
Fig. 5
Fig. 6
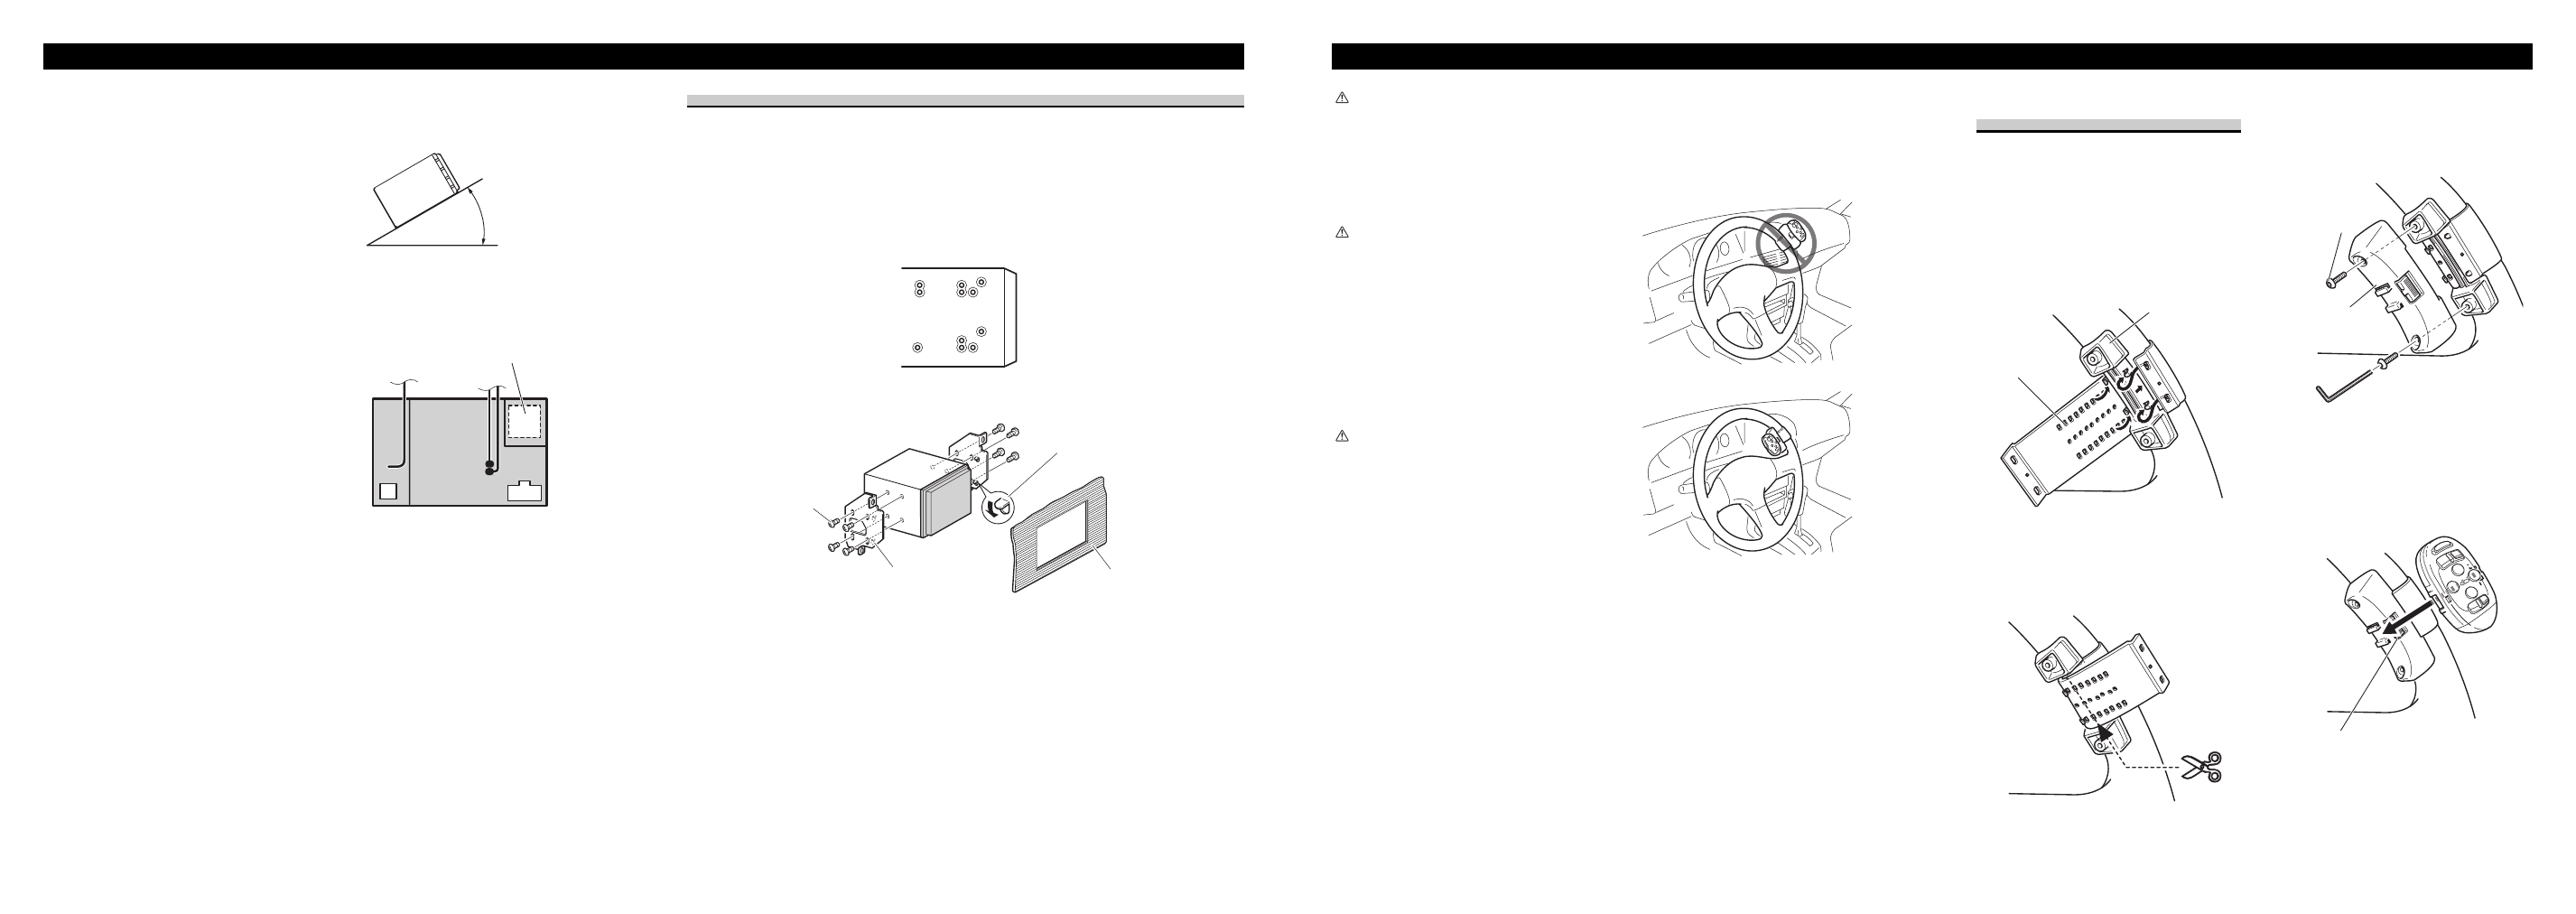
Installing the Remote Control Unit
Installation
WARNING
• Avoid installing this unit in such a location where
the operation of safety devices such as airbags is
prevented by this unit. Otherwise, there is a danger
of a fatal accident.
• Avoid installing this unit in such a location where
the operation of the steering wheel and the
gearshift lever may be prevented. Otherwise, it may
result in a traffic accident.
CAUTION
• Installation of this unit requires specialized skills
and experience. Installation of this unit should be
entrusted to a dealer from whom you purchased
this unit.
• Install this unit using only the parts supplied with
this unit. If other parts are used, this unit may be
damaged or could dismount itself, which leads to
an accident or trouble.
• Install this unit as required by this manual. Failure
to do so may cause an accident.
• Do not install this unit near the doors where rain-
water is likely to be spilled on the unit. Incursion
of water into the unit may cause smoke or fire.
WARNING
• Fix this unit securely to the steering wheel with the
belt attached to the unit. If this unit is loose, it dis-
turbs driving stability, which may result in a traffic
accident.
• Do not attach this unit to the outer circumference
of the steering wheel. Otherwise, it disturbs driving
stability, causing a traffic accident. Always attach
this unit to the inner circumference of the steering
wheel as shown. (Fig. 7)
Note:
• Do not install this unit in such a place as may
obstruct the driver’s view.
• Since interior layout differs depending on the type
of vehicle, the ideal installation location for the
unit also differs. When installing the unit, select a
location that assures optimum transmission of sig-
nals from the unit to the car stereo.
Fig. 7
Dashboard or Console
Factory radio mounting bracket
If the pawl gets in the
way, bend it down.
Screw
Be sure to use the screws
supplied with this product.
Installing the Unit on a Left-Hand
Drive Car
Note:
• When the unit is installed on a right-hand-drive
car, the horizontal positions are inverted.
1. Secure inner holder to the inner cir-
cumference of the steering wheel
with belt. (Fig. 8)
• Fit the inner holder to the steering wheel so
that the arrow-marked side faces the driver as
shown below.
Fig. 8
2. Cut the extra portion of the belt at
the center of the inner holder.
(Fig. 9)
• Keep the cut-off portion of the belt as a spare.
Fig. 9
3. Install outer holder on the inner
holder and secure with screws.
(Fig. 10)
• Tighten the screws with the supplied hexago-
nal wrench.
Fig. 10
4. Install the remote control unit in the
holder. (Fig. 11)
• When removing the remote control unit from
the holder, move the corrugated release sec-
tion toward the steering wheel and slide the
remote control unit toward you.
Fig. 11
Release Section
Screw
Outer holder
Belt
Inner holder