Using the menu, Three types of setting operations, Set the mode dial to a position other than a – Olympus 9000 User Manual
Page 3: Press the button, Press the button to complete the setting
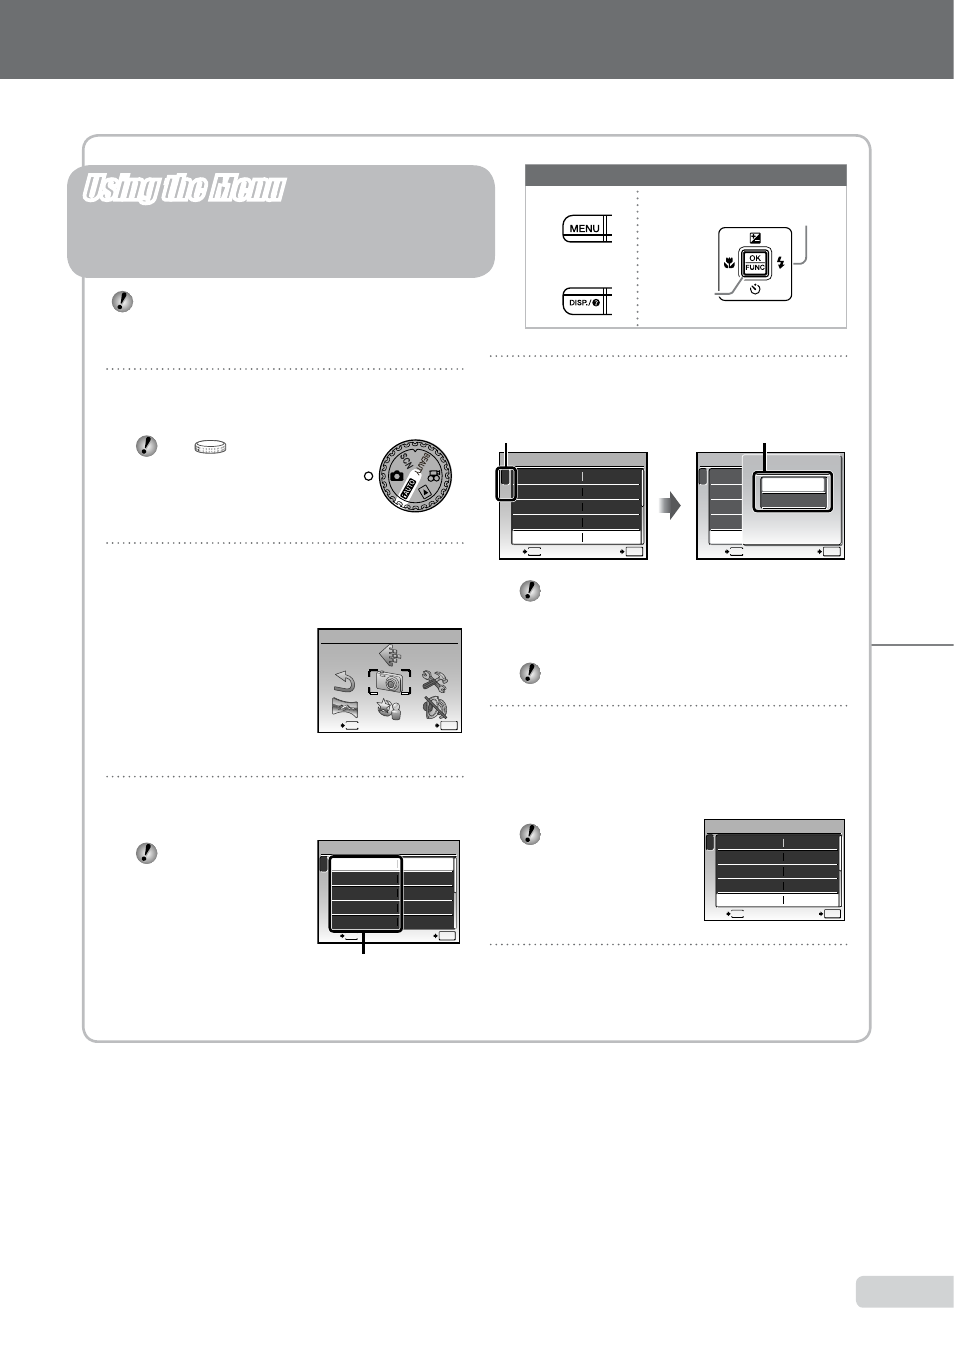
1
Set the mode dial to a position other
than
A.
The
symbol in “Menu
Settings” (p. 26 to 45)
indicates available shooting
modes.
2
Press the
button.
This example describes how to set the
[DIGITAL ZOOM].
MENU
EXIT
SET
OK
CAMERA MENU
Shooting mode top menu
3
Use
klmn to select the desired
menu, and press the
n button.
Pressing and
holding the E
button displays
an explanation
(menu guide) of the
selected option.
ISO
OFF
OFF
1
2
CAMERA MENU
SET
OK
AUTO
o
FINE ZOOM
DIGITAL ZOOM
DRIVE
AUTO
WB
MENU
EXIT
Submenu 1
●
Please read “Menu Settings” (p. 26 to 45) while referring to this page.
button
Arrow pad
n button
Buttons in use
4
Use
kl to select the desired
Submenu 1, and press the
n button.
1
2
ISO
OFF
OFF
CAMERA MENU
AUTO
o
FINE ZOOM
DIGITAL ZOOM
DRIVE
AUTO
WB
MENU
EXIT
SET
OK
1
2
ISO
OFF
OFF
CAMERA MENU
AUTO
o
FINE ZOOM
DIGITAL ZOOM
DRIVE
AUTO
WB
MENU
SET
OK
BACK
DIGITAL ZOOM
OFF
ON
Page tab
Submenu 2
To quickly move to the desired submenu,
press
m to highlight the page tab, and then
use
kl to move the page tab. Press n to
return to the Submenu 1.
Some menus include submenus that appear
by pressing the
n button.
5
Use
kl to select the Submenu 2,
and press the
n button.
Once a setting is adjusted, the display returns to
the previous screen.
There may be
additional operations.
“Menu Settings” (p. 26
to 45)
6
Press the
button to complete the
setting.
●
Three Types of Setting Operations
E
button
Using the Menu
Various camera settings can be accessed through the
menus, including functions used during shooting and
playback and the date/time and screen display.
There may be unavailable menus depending on the
other related settings or the selected
mode
(p. 30).
1
2
ISO
OFF
ON
CAMERA MENU
AUTO
o
FINE ZOOM
DIGITAL ZOOM
DRIVE
AUTO
WB
MENU
EXIT
SET
OK
EN