Assembly – Bosch MX25E User Manual
Page 8
-8-
Disconnect the plug from
the power source before
making any assembly, adjustments or
changing accessories. Such preventive
safety measures reduce the risk of starting the
tool accidentally.
For all work or when
changing
accessories
always wear protective gloves. Such
preventive safety measures reduce the risk of
injury from sharp edges of the accessories.
Application tools can become very hot while
working. Danger of burns!
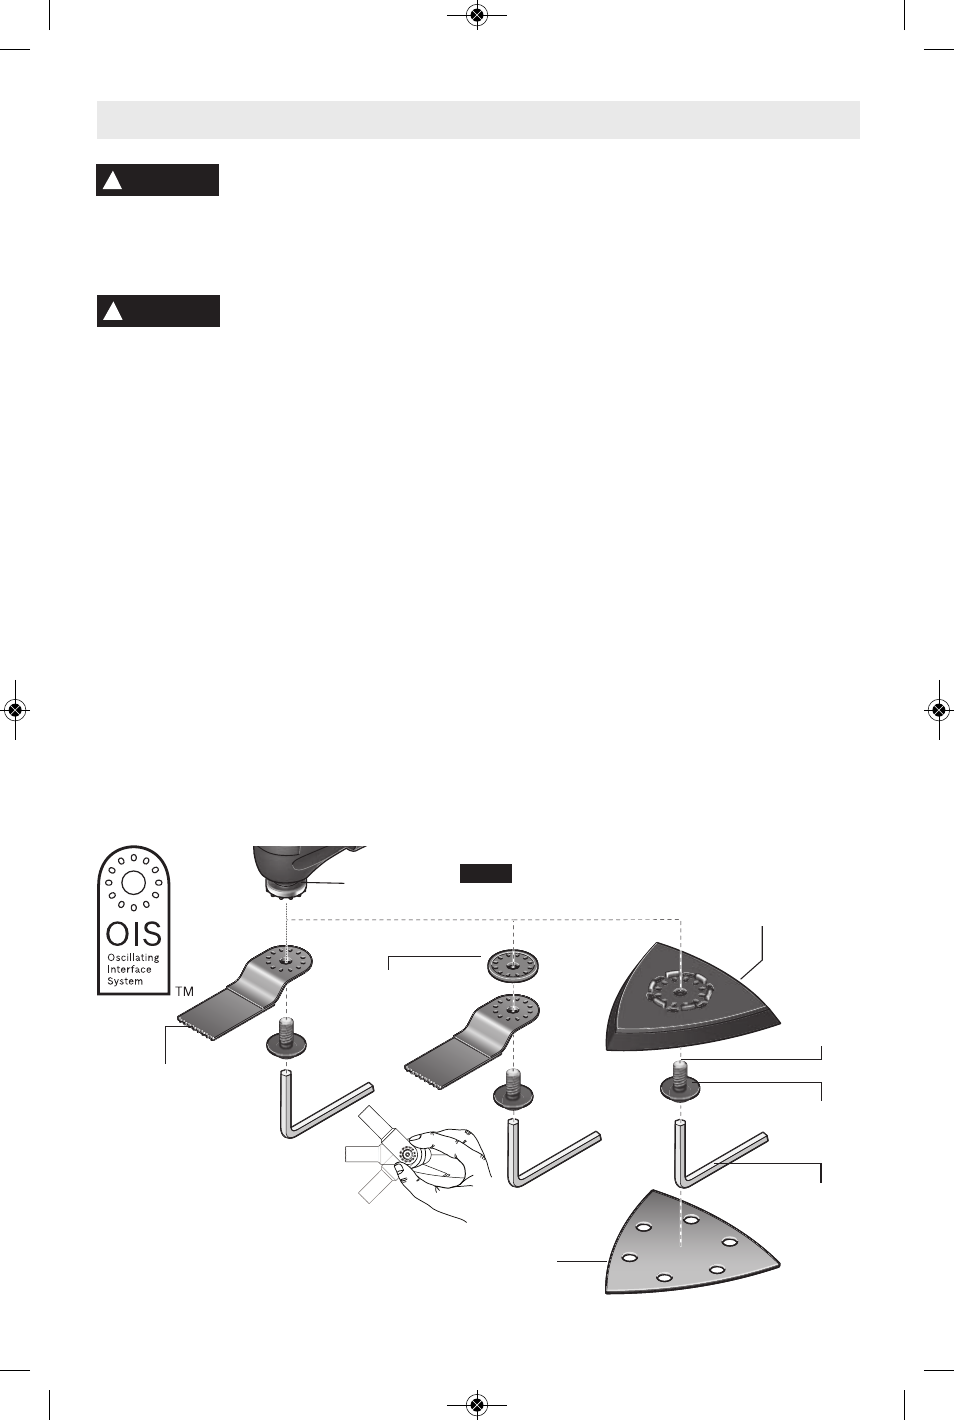
INSTALLING AND REMOVING
ACCESSORIES
1. Loosen the hex bolt and blade washer using
the hex wrench provided (Fig. 2).
2. Clean OIS accessory holder, accessory and
the hex bolt with a clean cloth.
3. Place the accessory onto the accessory
holder making sure the accessory engages
all pins in the holder and the accessory is
flush aganist the OIS accessory holder.
The OSCAD1 adapter is provided to allow you
to attach the accessory in intermediate
positions. Use of adapter will also allow you to
use many competitor accessories.
4. Securely tighten the hex bolt and blade
washer with the hex wrench (Fig. 2).
5. To remove accessory, loosen and remove
hex bolt and blade washer, then remove
accessory from holder (Fig. 1).
NOTE: Some accessories, such as scrapers or
blades, may be mounted either straight on the
tool, or at an angle to enhance usability (Fig. 2).
INSTALLING AND REMOVING
SANDING SHEETS
Your backing pad uses hook-and-loop backed
accessories, which firmly grip the backing pad
when applied with moderate pressure.
1. Align the sanding sheet and press it onto the
sanding plate by hand.
2. Firmly press the power tool with the sanding
sheet against a flat surface and briefly
switch the power tool on. This will promote
good adhesion and helps to prevent
premature wear.
3. To change, merely peel off the old sanding
sheet, remove dust from the backing pad if
necessary, and press the new sanding
sheet in place.
After considerable service the backing pad
surface will become worn, and the backing pad
must be replaced when it no longer offers a firm
grip. If you are experiencing premature wear
out of the backing pad facing, decrease the
amount of pressure you are applying during
operation of the tool.
For maximum use of abrasive, rotate pad 120
degrees when tip of abrasive becomes worn.
Assembly
!
WARNING
!
WARNING
RUBBER
BACKING PAD
SANDING
SHEET
OIS
ACCESSORY
HOLDER
OSCAD1 ADAPTER
(only if necessary)
PLUNGE CUT
BLADE
HEX
BOLT
5 MM
HEX
WRENCH
FIG. 2
BLADE
WASHER
DM 2610958399 10-10:DM 2610958399 10-10 10/5/10 10:55 AM Page 8