Firmware update, Ddns settings – Addtron Technology IP Power 9258 User Manual
Page 9
_____________________________________________________________________________
IP POWER PAGE 17 OF 24
6. Firmware Update
Warning: If you have not been advised to update the IP Power’s firmware and do not have
a new firmware file, please do not go to this page.
Firmware updates are periodically released to update the functionality of the IP Power. To update
the IP Power’s firmware, select Firmware Update from the left hand menu.
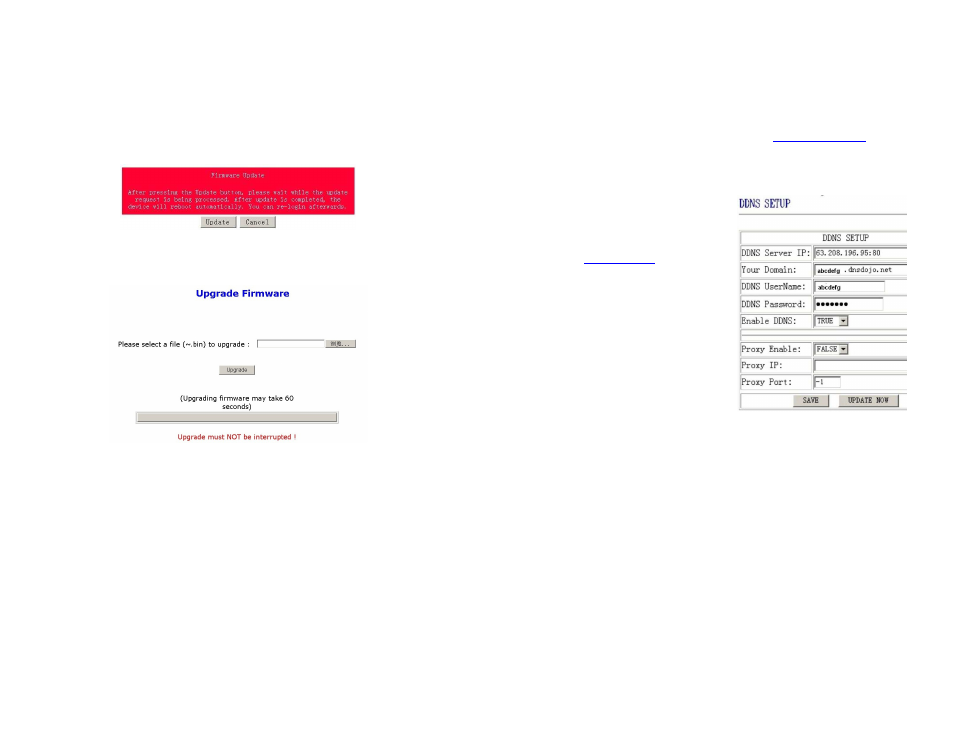
1)
The following warning is displayed:
Warning: Do not click Update if you do not have a firmware update file.
2)
Click Update, the following window is displayed:
3)
Click Browse and locate the firmware update file. Click Update to begin the update.
Note: When the update is complete, you must wait at least one minute before you restart
the IP Power.
NOTE
Before updating the IP Power’s firmware, ensure the IP Power control web pages’ TCP port is set
to 80 (this is the default), otherwise the update may fail.
_____________________________________________________________________________
IP POWER PAGE 18 OF 24
7. DDNS Settings
When connecting to the Internet, the IP address you gain from ISP may be dynamically allocated,
so it may change each time the Internet connection reconnects. This may result in the IP Power
becoming uncontactable to remote clients, as the new address is unknown.
Dynamic DNS addresses this issue by updating DNS records whenever the IP address changes.
The IP Power can utilize the free service provided by DynDNS (
http://www.dyndns.com
) for this
purpose. The IP Power will always be contactable using its DynDNS address (e.g.
ippower.dyndns.org), regardless of its IP address.
First, create a DynDNS account and create an account. Create a dynamic DNS host for the IP
Power, e.g. ippower.dyndns.org.
On the IP Power, select DDNS from the left hand
menu. Enter the IP address and port of the
DynDNS server. You can find this out on your PC
by selecting Start
Run then type in cmd
and typing ping
www.dyndns.com
. Enter the
number in brackets (e.g. 63.208.196.66) followed
by :80 to denote the port.
In Your Domain, enter the IP Power’s DynDNS
address, e.g. ippower.dyndns.org. Enter the
Username and Password for the DynDNS
account you created. Ensure Enable DDNS is set
to TRUE. Click Save.
Now, each time the IP Power is powered on or
Update Now is clicked, the DynDNS address will
be updated to the IP Power’s current IP address.
Note that the change may take several minutes to
propagate to your local DNS server.
If the IP Power cannot reach the DynDNS server without going through a proxy server, select
TRUE next to Proxy Enable. Enter the IP address of the proxy server in Proxy IP and the port in
Proxy Port.
NOTE
The first time you configure DDNS, click Update Now to set the DynDNS address.