Installation – Audiovox Terk SIRMarine User Manual
Page 5
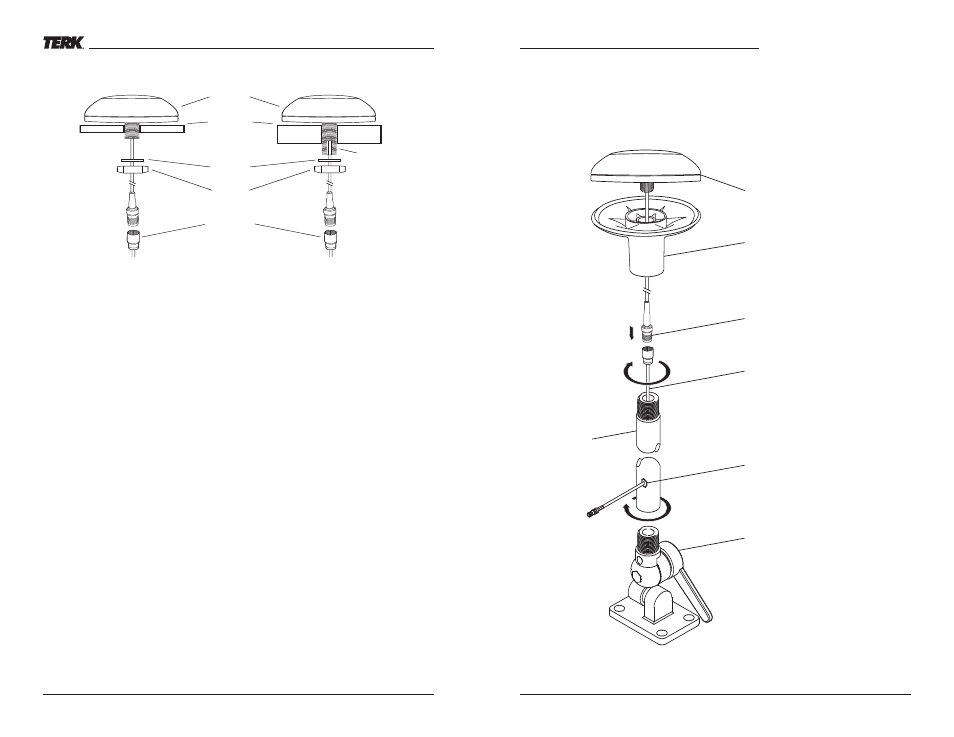
Figure 9. SIRMarine Antenna with Threaded Flange Adapter for Mast mounting.
SIRMarine Owner’s Manual
Installation
9
Installation
(continued)
Mast or Bracket Mounting
The Terk SIRMarine Satellite Radio Antenna is easy to install on any standard mast or brackets that
have a 1”-14 thread.
1. Attach the Threaded Flange Adapter to the SIRMarine by first passing the TNC connector on the
6 inch antenna cable lead through the adapter as shown in Figure 9 on the next page. Next
thread the adapter on to the threaded extension of the SIRMarine and tighten securely. (Note: do
not use the supplied Slotted Threaded Adaptor in this application.
2. Connect the TNC connector on the 6 inch antenna cable lead to the mating TNC connector on
the 25 foot cable and tighten securely. The 25 foot cable can be routed through the provided
access holes and grommet that are located on the mast or bracket. Since the SMB connector
has a much smaller diameter it is recommended that you route this connector through any
access hole necessary. Many masts have grommets that can be removed which makes it easier
to route the cable through the access hole. The grommet can be placed over the SMB connector
and put back in place for a neat install.
3. Secure the SIRMarine antenna and adapter to the mast or bracket by tightening onto the 1”-14
thread securely. All mast and brackets should be installed on the boat per manufacturers speci-
fications. If needed, adjust the tilt so that the antenna is perpendicular to the horizon.
Connecting to your Sirius Radio
1. Connect the SMB connector to the Sirius Satellite Receiver. Turn on the Sirius system and tune
the radio to channel 184 (i.e., the preview channel) to verify that the antenna is properly
installed. If there are any problems, review the installation steps and verify that each one was
performed correctly. Also see Troubleshooting on the next page.
2. After the system has been tested successfully, continue dressing the cable from the antenna to
the receiver for best appearance and complete any remaining installation. Use cable tie wraps
where needed to secure cables from flagging in the wind and catching on objects. Seal any
holes in the bulkheads with a marine grade RTV or silicon adhesive.
Note: For additional help with cable routing, consult your local marine audio dealer.
8
Installation
SIRMarine
Antenna
Lock
Washer
Mounting
Surface
Hex nut
25 ft Cable
Slotted
Threaded
Adapter
SIRMarine Antenna
Antenna
Extension
(optional – length
determined
by application)
Mounting Bracket
(optional)
TNC Connector on 6” cable
Threaded Flange Adapter
25’ Coax Cable
Removable gromet to be placed over
small connector then pressed back
into mast extention
Figure 7 .
Surface Mounting
on surfaces up
to 1/4 inch thick
Figure 8 .
Surface Mounting on
surfaces 1/4 inch
thick to 1 inch thick