Removing the optical drive – Lenovo G550 Notebook User Manual
Page 43
Chapter 6. Upgrading and replacing devices
35
To make sure that the SO-DIMM is installed correctly, do as follows:
1
Turn the computer on.
2
Hold F2 during startup. The BIOS Setup Utility screen opens. The Total Memory item
shows the total amount of memory installed in your computer.
Removing the optical drive
- - - - - - - - - - - - - - - - - - - - - - - - - - - - - - - - - - - - - - - - - - - - - - - - - - - - - - - - - - - - - - - - - - - - - - - - - - - - - - - - - - - - -
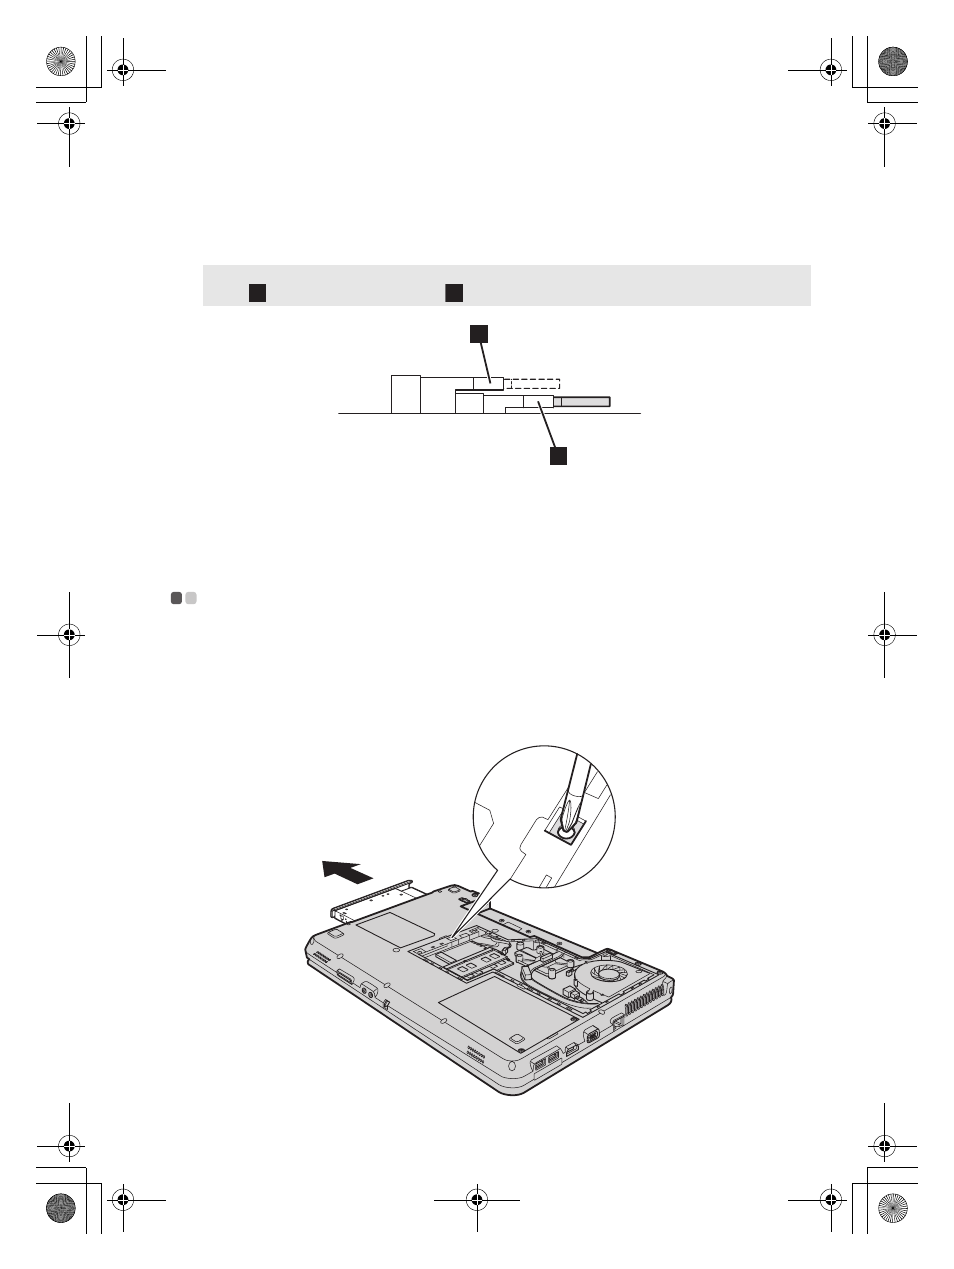
To remove the optical drive, do the following:
1
Remove the Memory/Wireless module/CPU (central processing unit) compartment cover.
2
Remove the screw shown in the figure
.
3
Gently pull the optical drive out
.
Note:
If only one DIMM is used on the computer you are servicing, the card must be installed in SLOT-0
(
: lower slot), but not in SLOT-1 (
: upper slot).
a
b
b
a
a
b
b
a
Lenovo G450-550 UG V2.0_en.book Page 35 Wednesday, September 2, 2009 9:29 AM