Argox OS-214 plus User Manual
Page 41
76
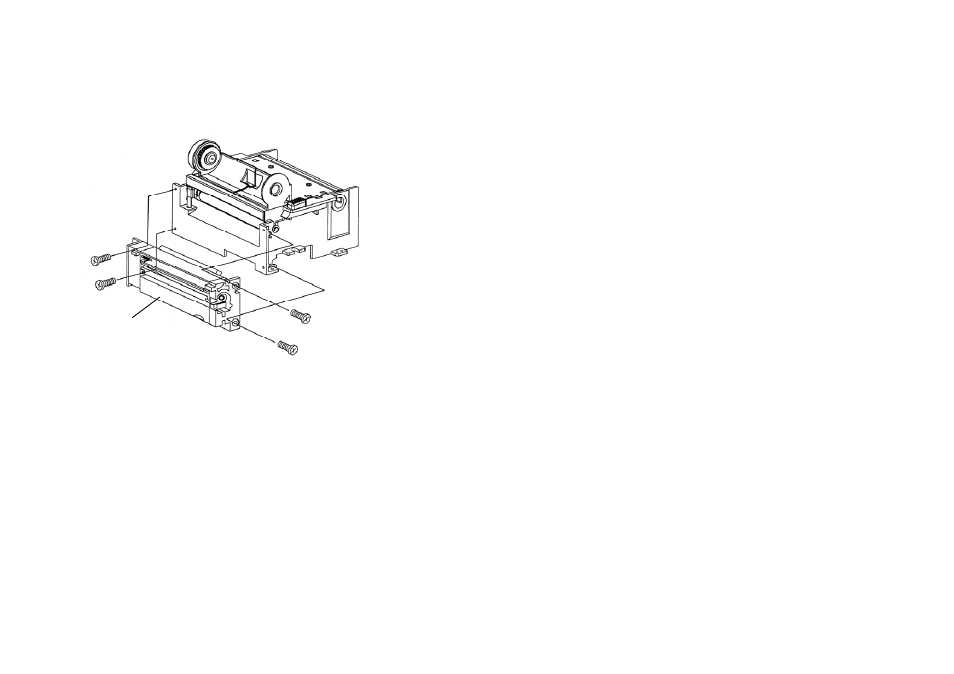
6. Secure the four screws attaching the cutter.
7. Plug the cutter's connector into the PCB's header
connector (JP16).
8. Reattach the print head assembly by securing the 4
screws.
9. Click back the middle cover.
10. Secure the two screws for the base housing.
11. Click the top cover into place.
Cutter