Ascii table, Top cover, Appendix i - installing dispenser kit – Argox OS-214 plus User Manual
Page 37
68
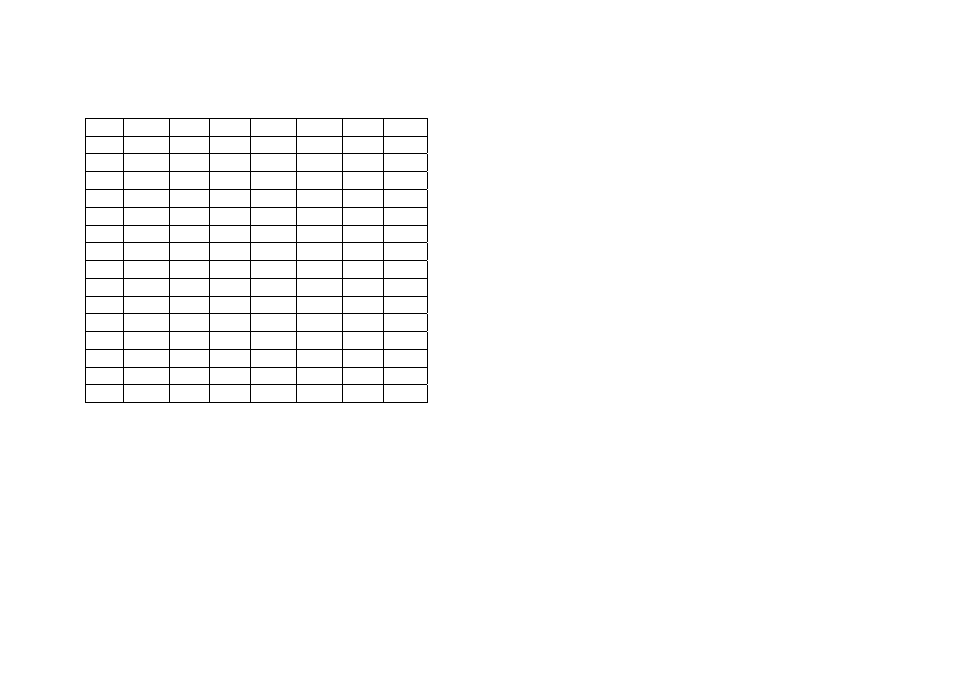
ASCII TABLE
NUL 0 @ P ' P
SOH
XON
! 1 A Q a q
STX " 2 B R b r
XOFF
# 3 C S c s
$
4 D T d t
NAK
% 5 E U e u
ACK & 6 F V f v
BEL ‛ 7 G W g w
BS ( 8 H X h x
)
9 I Y i y
LF * : J Z j z
ESC
+ ; K [ k {
FF , < L \ l I
CR - = M ] m }
SO
RS . > N ^ n ~
SI US / ? O _ o DEL
69
Appendix I - Installing Dispenser Kit
1. Turn off the printer power and unplug the printer.
2. Unwrap the dispenser kit and take out screws, the shaft,
the plastic roller, the dispenser bar, the direction label, and
the peeler sensor cable.
Top Cover
3. Take off the top cover of the printer.
4. The peeler sensor cable has a sensor board at one end
and a connector at the other end.
5. Mount the two little holes of the sensor board on the two
spines at left upper corner inside the top cover, keeping
the cable at the left.
6. Route the peeler sensor cable through the guides along
the left side of the top cover.
7. Fix the sensor cable and sensor board with Loctite-444
instant adhesive or equivalent.