Vogels PFW 6831 User Manual
Page 4
Page 4
Installation Instructions
Installation Instructions
Ease of Installation
Vogel’s has designed this mount with installer ease-of-installation in mind.
Tilt/Flat Display Orientation
With the PFW 6831, you can mount your display to the wall, or, if you choose, there is a variable tilt feature on the
PFW 6831. This will allow you to tilt your display forward for a more optimized viewing angle.
Side to Side Lateral Shift
Centering the display has never been easier. The PFW 6831 features ±3” built-in side to side lateral shift. This feature will
FOLLOW THE INSTRUCTIONS
PROVIDED BY THE MANUFACTURER
WHEN LIFTING THE DISPLAY.
PERFORM ALL STRUCTURAL
REINFORCEMENTS
BEFORE ATTACHING
THE DISPLAY TO THE WALL.
USE THE APPROPRIATE LIFTING DEVICE WHEN LIFTING THE DISPLAY INTO PLACE.
THE WALL STRUCTURE
MUST BE CAPABLE OF SUPPORTING 907 KG. IF NOT, THE WALL
STRUCTURE
MUST BE REINFORCED.
PROPER INSTALLATION
PROCEDURE
BY A QUALIFIED
SERVICE
TECHNICIAN,
AS OUTLINED IN THE INSTALLATION
INSTRUCTIONS,
MUST BE
ADHERED TO. FAILURE
TO DO SO COULD RESULT IN SERIOUS PERSONAL INJURY,
OR EVEN DEATH. USE SUITABLE CONCRETE ANCHORS FOR 3000PSI POURED CONCRETE WALLS.
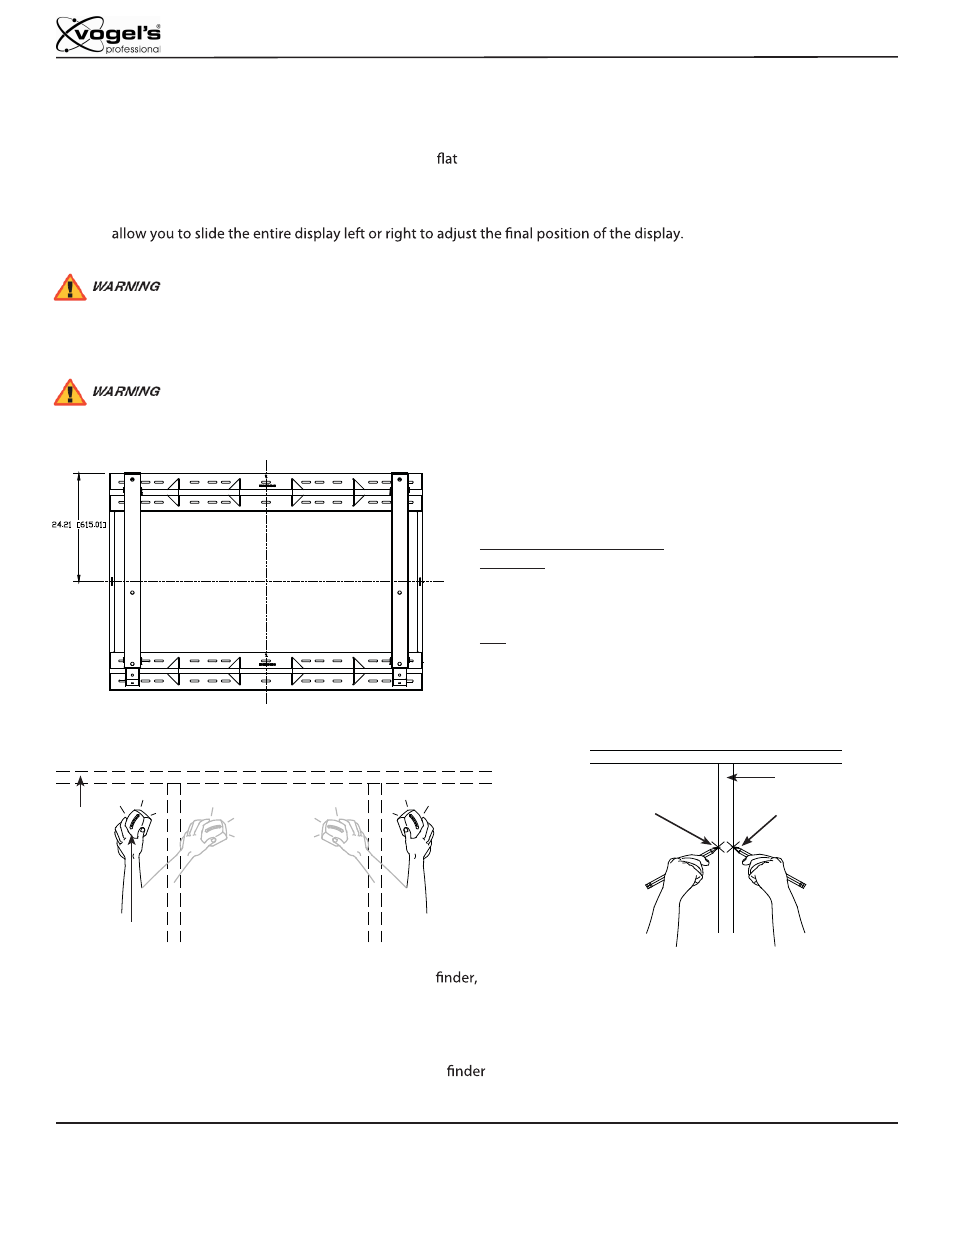
Step 1. Determine and mark where the ideal viewing center of
the display will be located on the wall.
Step 2. Measure up 24.21” (615.01mm) and mark this location
with a pencil.
STUD CENTER SPACING
16” to 18” - A total of four (4) studs will be used, which
means that you will have a total sixteen (16) mounting points.
Eight (8) will be used for the upper wall plate and eight (8) will be
used for the lower wall plate.
24” - A total of three (3) studs will be used, which means
that you will have a total twelve (12) mounting points. Three (3)
will be used for the upper will plate and three (3) will be used for
the lower wall plate.
Step 3. Using a commercially available stud
place it against the wall, and swing it from left to right,
while engaging the button.
Step 4. When the lights illuminate, or a buzzer sounds, mark that
spot on the wall using a pencil.
Step 5. Repeat Step 2, but this time swing the stud
in from the other side, swinging in from right to
left.
Step 6. When the lights illuminate, or a buzzer sounds,
mark that spot on the wall using a pencil.
Step 7. Now that the edges of the wall stud
have been located, use your tape measure
and determine the center point between
the two marks. This will be center of the
stud. Mark this point with your pencil.
Step 8. Repeat the previous steps to determine the location
of all wall studs.
Mark 1
Mark 2
Stud
Structure
Stud Finder
Stud
Structure
Locating the Stud Center
PFW 6831