Rear panel connections – Audiovox VE926 User Manual
Page 12
14) VOLUME UP (X) BUTTON – Press this button to raise the volume.
15) VOLUME DOWN (W) BUTTON – Press this button to lower the volume.
16) SEEK BUTTONS (TS-Right Side) – Press these buttons to go to next available channel with
sufficient signal strength.
17) CHANNEL BUTTONS (TS-Left Side) – Press these buttons to go to next available channel.
18) DISPLAY WINDOW – Displays the channel/station number, time, and selected source.
19) REMOTE INFRARED SENSORS – These sensors receive infrared command signals from the
hand held remote control unit.
20) MICROPHONE – Used for hands-free speakerphone operation.
21) SCREEN LOCK BUTTON – Used to lock screen in place.
22) Disc Insertion Slot
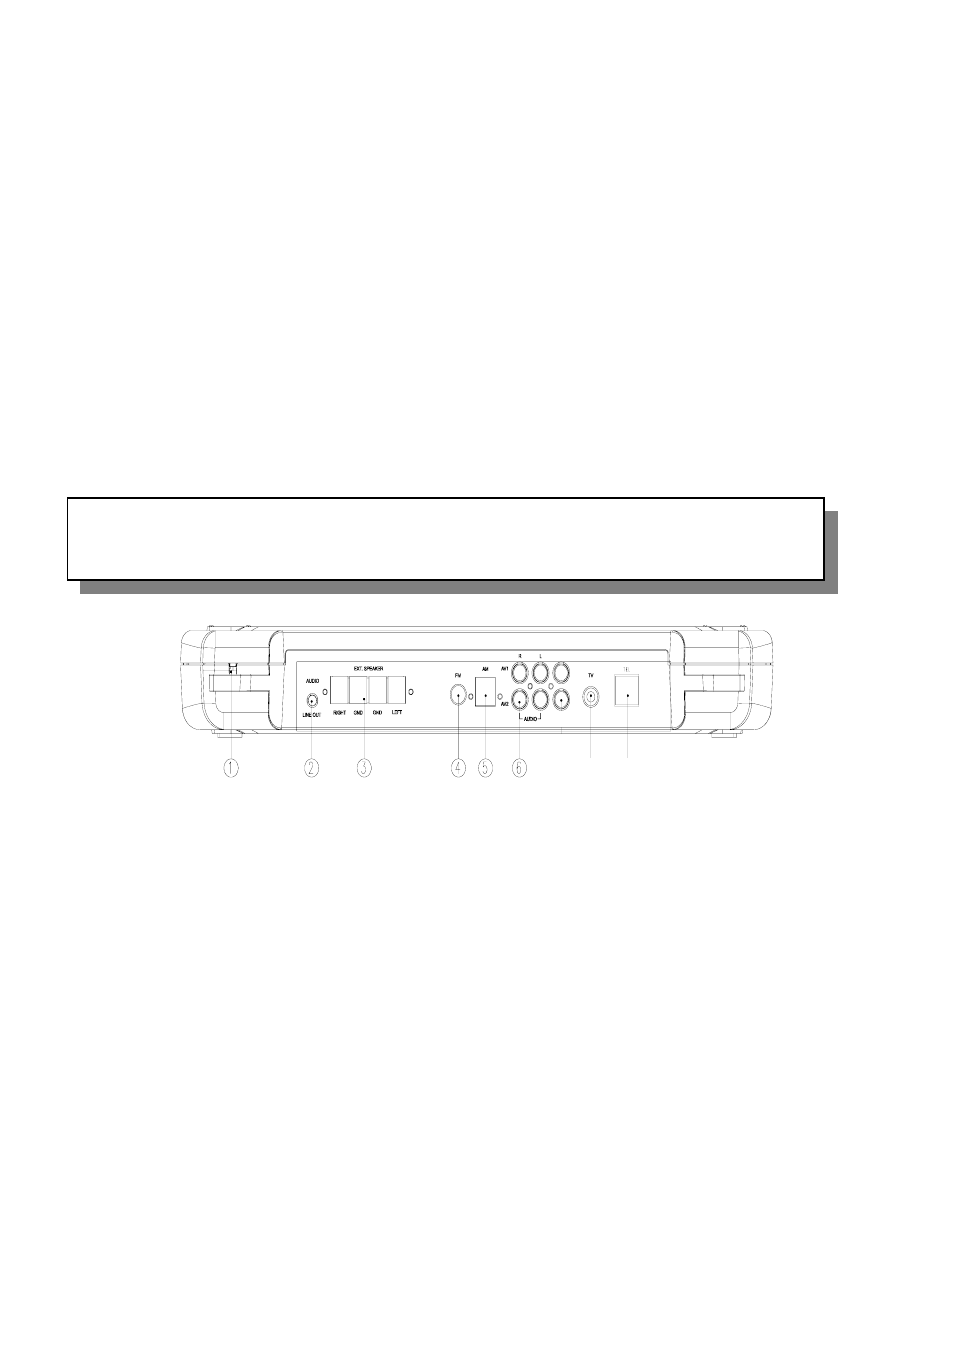
1) AC LINE CORD – Connects to AC outlet
2) AUDIO LINE OUT – Connect to low-level input of stereo system or low-level input of computer
speaker
REAR PANEL CONNECTIONS
7 8
3) SPEAKER OUT TERMINAL – Connect to external speakers (min. 8ohms)
4) FM ANTENNA – Allows the VE926 to be connected to a 75-Ohm external antenna for the
reception of FM broadcast signals.
5) AM ANTENNA - Allows the VE926 to be connected to an external antenna for the reception of
AM broadcast signals.
6) A/V (AUDIO/VIDEO) INPUT CONNECTORS – Connect to A/V OUTPUT of a VCR or
Camcorder.
7) TV ANTENNA (75 OHM ANTENNA CONNECTOR) -Allows the VE926 to be connected to a
75-ohm external coaxial antenna or cable TV system.
8) TEL JACK – Connect to telephone jack (not supplied) for hands-free speakerphone.
11