4operator’s manual for the pressure injection cell, Maintenance – Next Advance PC8500 User Manual
Page 4
4
Operator’s Manual for the Pressure Injection Cell
BE SAFE. ALWAYS MAKE SURE THAT THERE IS NO PRESSURE IN THE CELL BEFORE
LOOSENING THE BOLTS, AND THAT THE BOLTS ARE SECURELY FASTENED BEFORE
APPLYING PRESSURE TO THE CELL. USERS MUST ALWAYS WEAR PROTECTIVE
APPAREL, INCLUDING EYEWEAR AND MUST BE TRAINED IN WORKING WITH HIGH
PRESSURE.
knob on the 3-way valve so that it
points toward the vent.
This depressurizes the injection cell.
Now you can loosen the nut over the
ferrule and remove the capillary, loosen
the three bolts, remove the top, and
remove your sample tube
.
Use a wrench to tighten the nut, forcing the
ferrule to squeeze tightly around the capillary.
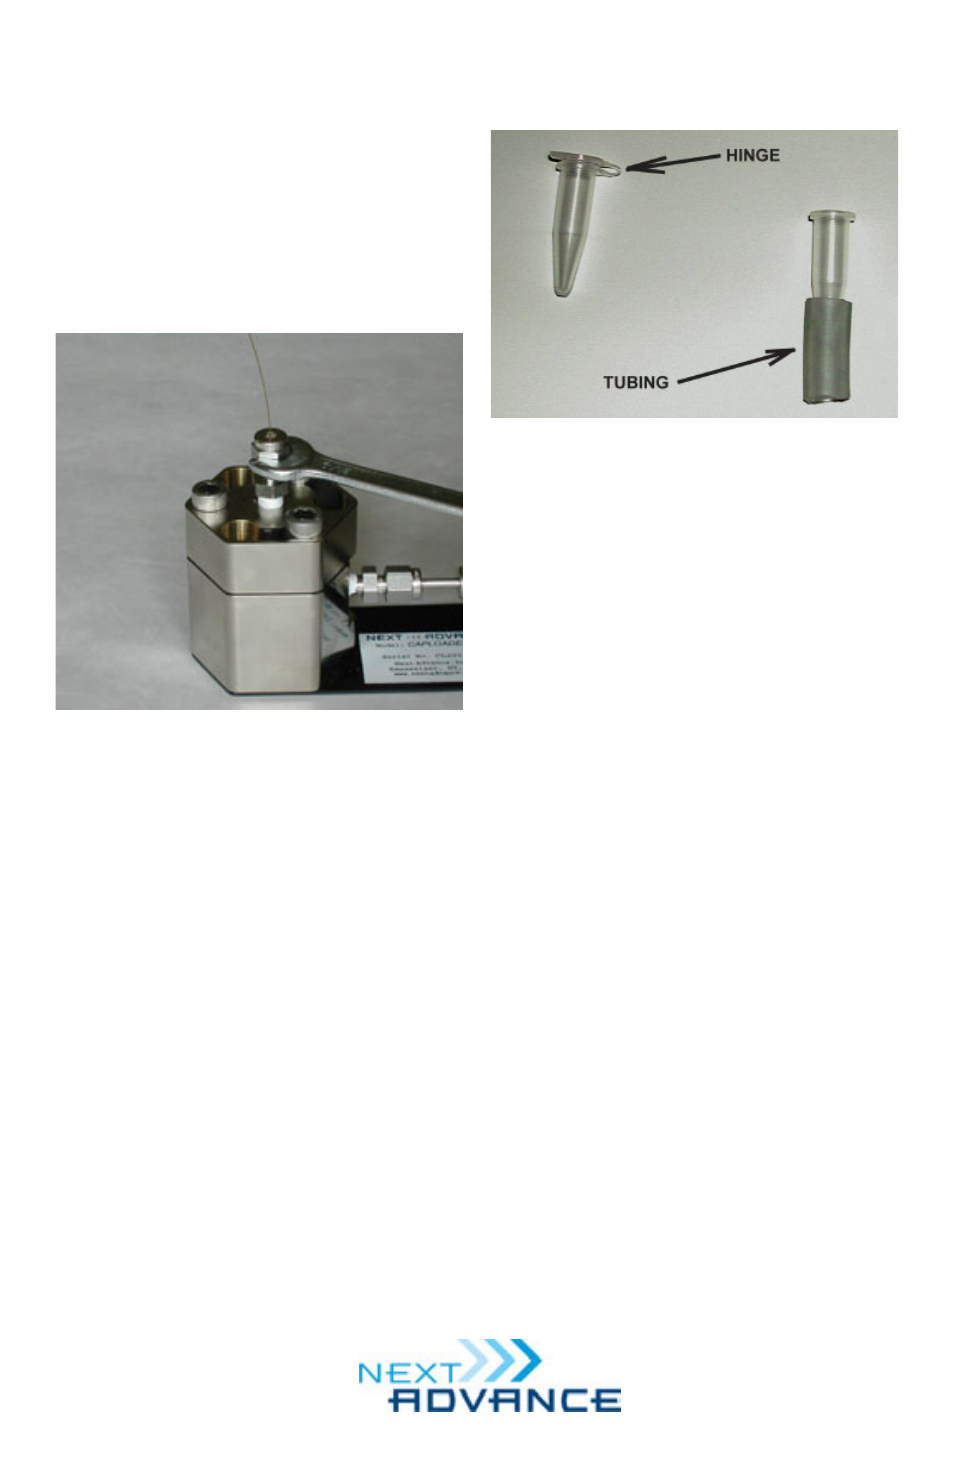
USE OF ADAPTER FOR 1 ML
TUBES
We supply one adapter with the
pressure injection cell so that 1 ml tubes
are as easy to work with as taller tubes.
Photograph of a 1 ml tube with a hinged cap
(left) and of a 1 ml tube with the hinge cut off
and the bottom placed in an adapter
composed of soft tubing (right).
The central hole in the base of the
pressure injection cell is sized so that
1.5 or 2 ml sample tubes will protrude
above the surface, making placement
and retrieval easy. A (surprisingly)
simple adapter will enable 1 ml
microcentrifuge tubes to protrude, too.
The adapter is a piece of soft tubing
(1/4 inch inside diameter, 3/8 inch
outside diameter). As with any tube
with a hinged cap, first cut off the hinge
so that the top of the tube will fit in the
recess in the top of the pressure
injection cell. Next, slide the adapter
onto the bottom of the 1 ml sample
tube, as shown in the figure below.
MAINTENANCE
Periodically, the Teflon ferrule
should be replaced. Simply remove the
nut covering the ferrule, remove the