3operator’s manual for the pressure injection cell – Next Advance PC8500 User Manual
Page 3
3
Operator’s Manual for the Pressure Injection Cell
BE SAFE. ALWAYS MAKE SURE THAT THERE IS NO PRESSURE IN THE CELL BEFORE
LOOSENING THE BOLTS, AND THAT THE BOLTS ARE SECURELY FASTENED BEFORE
APPLYING PRESSURE TO THE CELL. USERS MUST ALWAYS WEAR PROTECTIVE
APPAREL, INCLUDING EYEWEAR AND MUST BE TRAINED IN WORKING WITH HIGH
PRESSURE.
opened to release any pressure inside
the cell, loosen the three bolts securing
the top, 2 turns each. Rotate the top
counterclockwise by 60 degrees so that
the hexagonal sides are even. Then lift
off the top.
INSERTING THE SAMPLE
Place the sample tube in the main
hole of the base. The tube should not be
capped. If the cap is hinged, you must
cut off the hinge (with scissors). There
is a recess in the top so the tube can
protrude from the base, but a hinged
cap will not fit in the recess.
The sample tube protrudes from the base for
easy insertion and removal.
REPLACING THE TOP
Confirm that the black O-ring is
seated in its groove. Slip the top onto
the base, rotate the top 60 degrees
clockwise, and then tighten the three
bolts using a hex wrench.
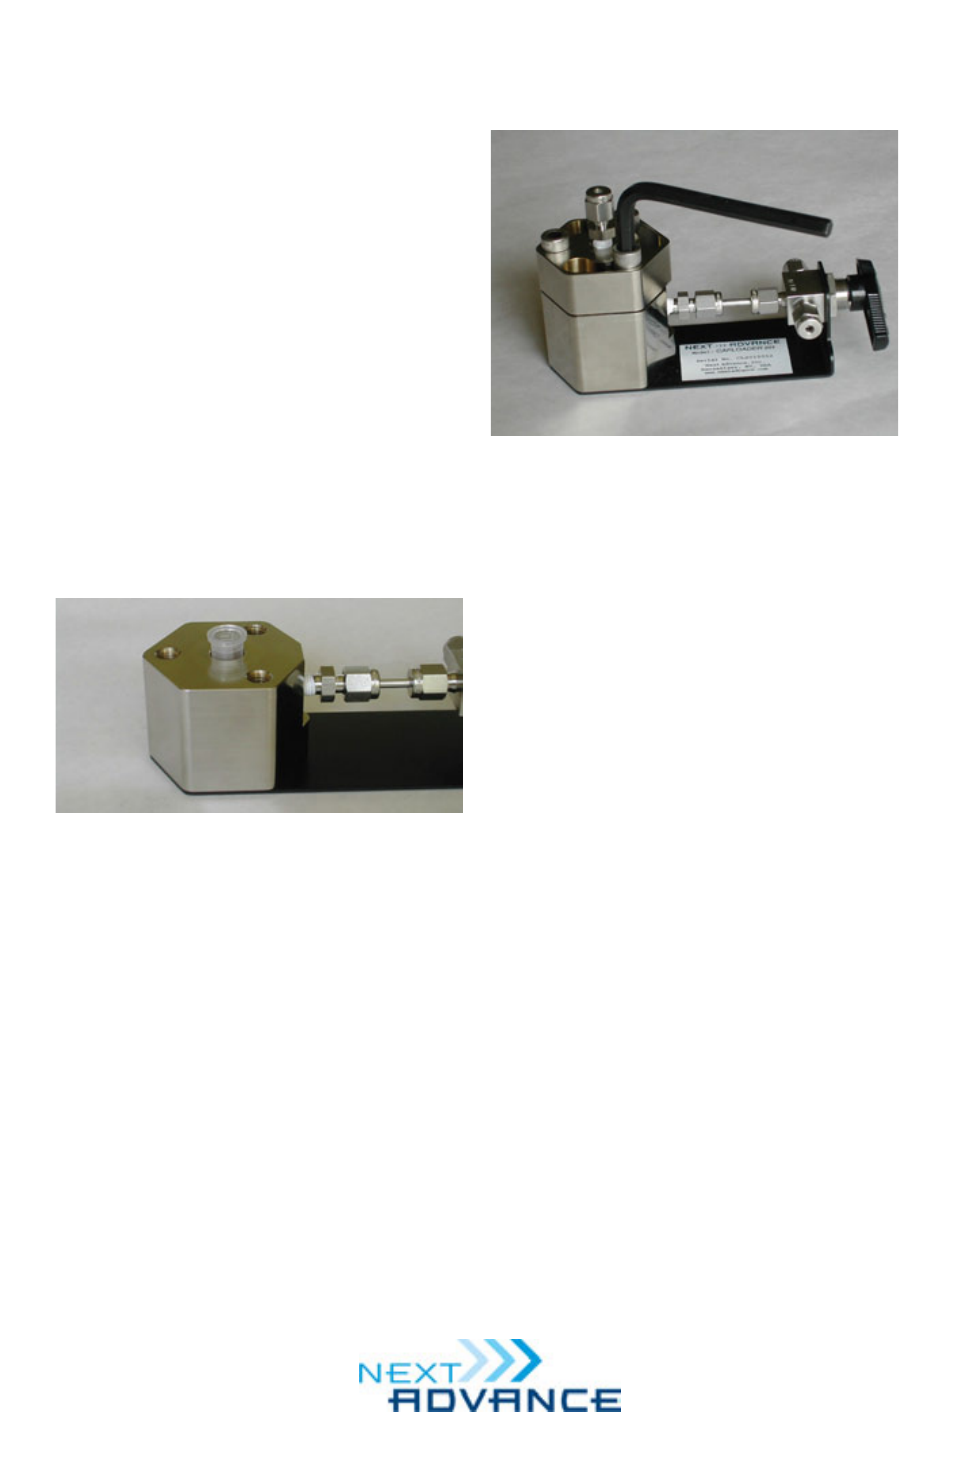
Use a hex wrench to tighten the three bolts.
INSERTING A CAPILLARY
Loosen the nut covering the white
ferrule using a wrench. Slide the
capillary through the small hole in the
ferrule, until it reaches the bottom of
the sample tube. Tighten the nut,
thereby squeezing the ferrule tightly
around the capillary.
To remove the capillary, loosen the
nut and slide the capillary out.
INJECTING A SAMPLE
First point the knob on the 3-way
valve towards the stainless steel tubing
connected to the gas tank. Then, while
looking away from the gas tank gages
and with your hand covering them (in
case they explode when the pressure is
turned on) open the gas tank valve.
Adjust the pressure regulator to the
desired pressure.
When the injection is finished,
close the gas tank valve. Then turn the