Operator’s manual for the pressure injection cell, Setting up your pressure injection cell, Using your pressure injection cell – Next Advance PC8500 User Manual
Page 2
Operator’s Manual for the Pressure Injection Cell
BE SAFE. ALWAYS MAKE SURE THAT THERE IS NO PRESSURE IN THE CELL BEFORE
LOOSENING THE BOLTS, AND THAT THE BOLTS ARE SECURELY FASTENED BEFORE
APPLYING PRESSURE TO THE CELL. USERS MUST ALWAYS WEAR PROTECTIVE
APPAREL, INCLUDING EYEWEAR AND MUST BE TRAINED IN WORKING WITH HIGH
PRESSURE.
2
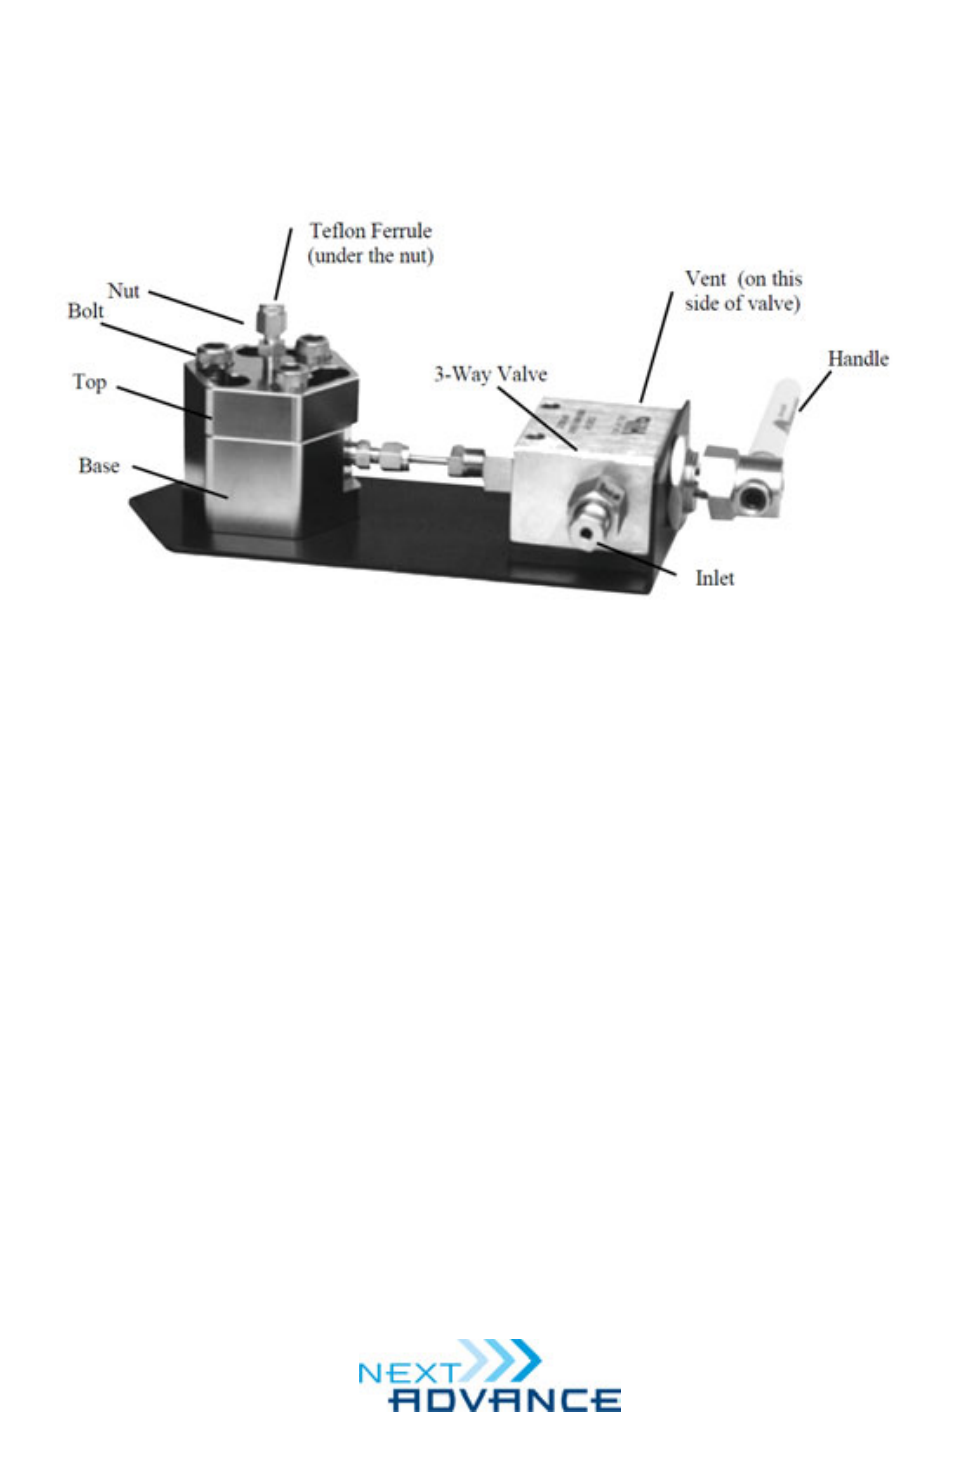
PARTS OF THE PC8500 PRESSURE INJECTION CELL
SETTING UP YOUR
PRESSURE INJECTION CELL
Setting up the Pressure Injection
Cell consists of attaching it to 1/8 inch
(outside diameter) thick walled stainless
steel tubing (not supplied with the
PC8500 Pressure Injection Cell). First,
slide the tubing through the inlet nut
until it hits a stop. Finger-tighten the
nut and then tighten it with a wrench for
1-1/4 turns. Connect the other end of
the tubing to a pressurized gas tank. It
is now set up.
USING YOUR PRESSURE
INJECTION CELL
OVERVIEW
Using the pressure injection cell
requires removing the top, inserting
your sample, replacing the top, and then
inserting a capillary. Next, inject the
sample using pressurized gas to force
the sample through the capillary. After
the injection, close the gas tank valve
and open the 3-way valve to release the
pressure.
REMOVING THE TOP
With the valves at the pressure
source turned off and the 3-way valve