Tee installation instructions – DuraVent DuraFlex AL Installation User Manual
Page 9
9
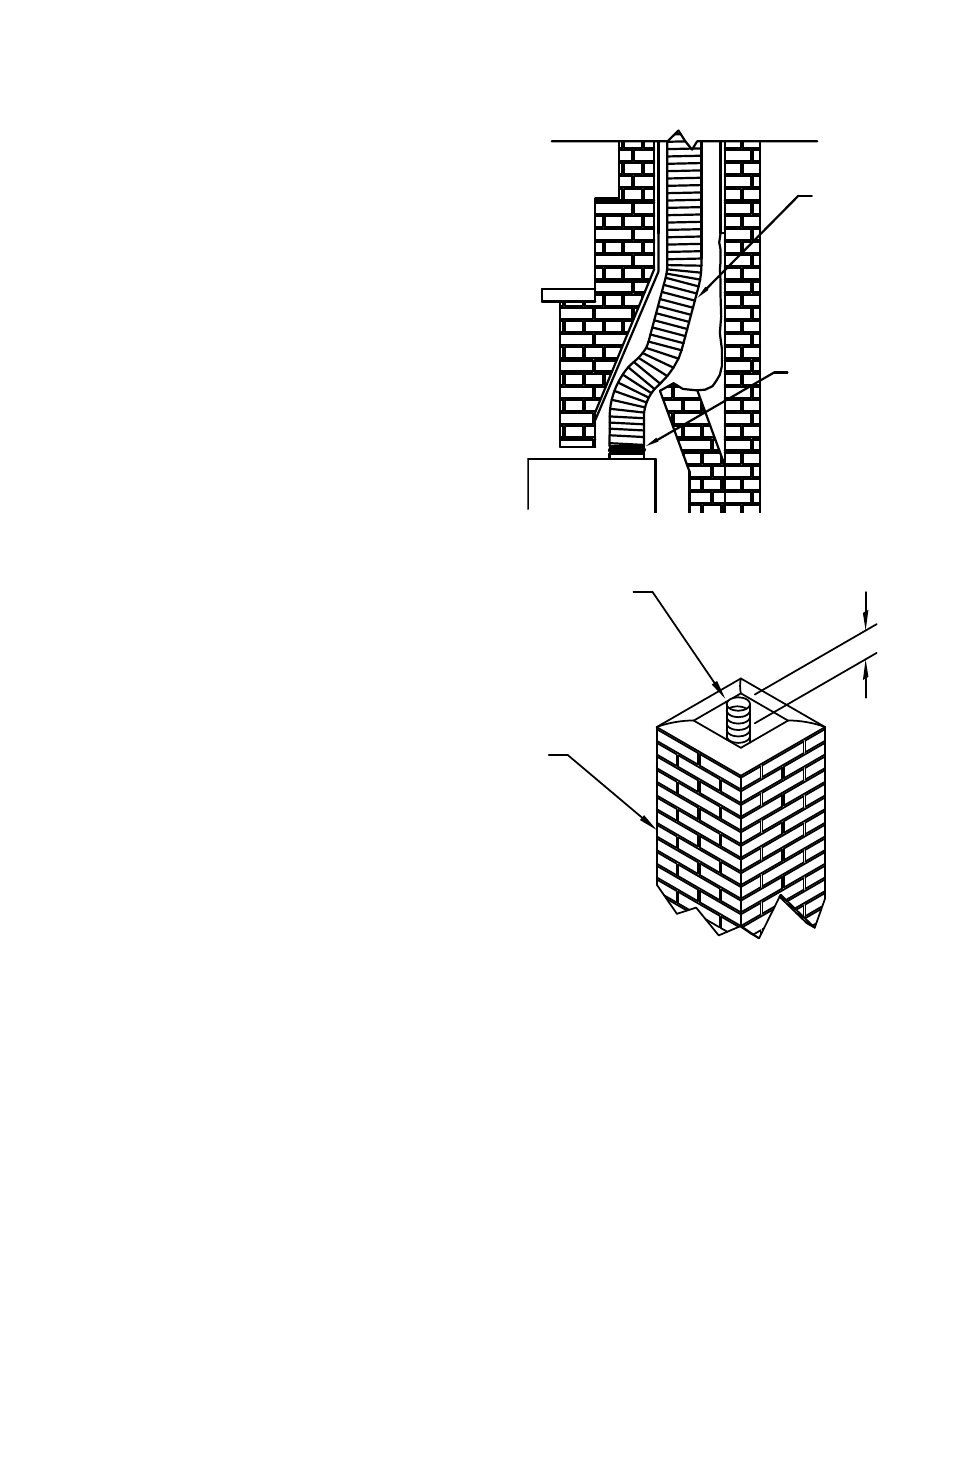
Figure 12
FLex
LINeR
FLex
COUPLING
Figure 13
4-5 INCHeS
FLex LINeR
exISTING
MASONRy
CHIMNey
space between the sleeve/pipe and
the masonry may be filled with grout.
Step 7. The Flex Liner should extend
at least 2 inches beyond the flange
on the Mortar Sleeve. If Type B Gas
Vent or the DuraConnect Flexible
Vent Connector is to be used between
the appliance and the chimney liner,
slide the Flex Coupling or B-Vent
Female Adaptor over the Flex Pipe,
and secure with either a nut & bolt or
sheet metal screw, as appropriate.
Refer to Figure 8. If a single-wall
galvanized steel Vent Connector is
to be used between the appliance
and the chimney liner, attach the Flex
Coupling or B-Vent Female Adaptor
to the Flex Liner. Crimp the end of the
Vent Connector and attach to the Flex
Coupling or B-Vent Female Adaptor.
TEE INSTALLATION INSTRUCTIONS
Step 1. If a Tee application is required,
and the masonry chimney has no
offsets, attach the body of the Tee
to the Flex as shown in Figure 9, by
tightening the fast connect band.
Attach the other end of the Tee to the
Flex Puller, and proceed as described
in Step 4 of the previous section.
Step 2. If the masonry has an offset,
pull the Flex down as in Step 4 of the
previous section, so the end is even
with the opening in the chimney wall.
Disconnect the Flex Puller. Remove
the Tee Branch and attach the Tee to
the Flex Liner (Figure 10). Attach the
Tee Cap to the bottom of the Tee.
Step 3. When the Tee is in its final
location, attach the Branch to the
main body of the Tee using the strap
provided on the Branch. Wrap the
strap around the Tee, and insert the
strap on the inside of the branch.
Secure the branch by tightening the
fast connect band (Figure 11).
Step 4. After the Tee and Branch
are installed, Type B Gas Vent or
DuraConnect Flexible Vent Connector
can be attached directly to the Tee
branch with a minimum of three