DuraVent DuraFlex AL Installation User Manual
Page 10
10
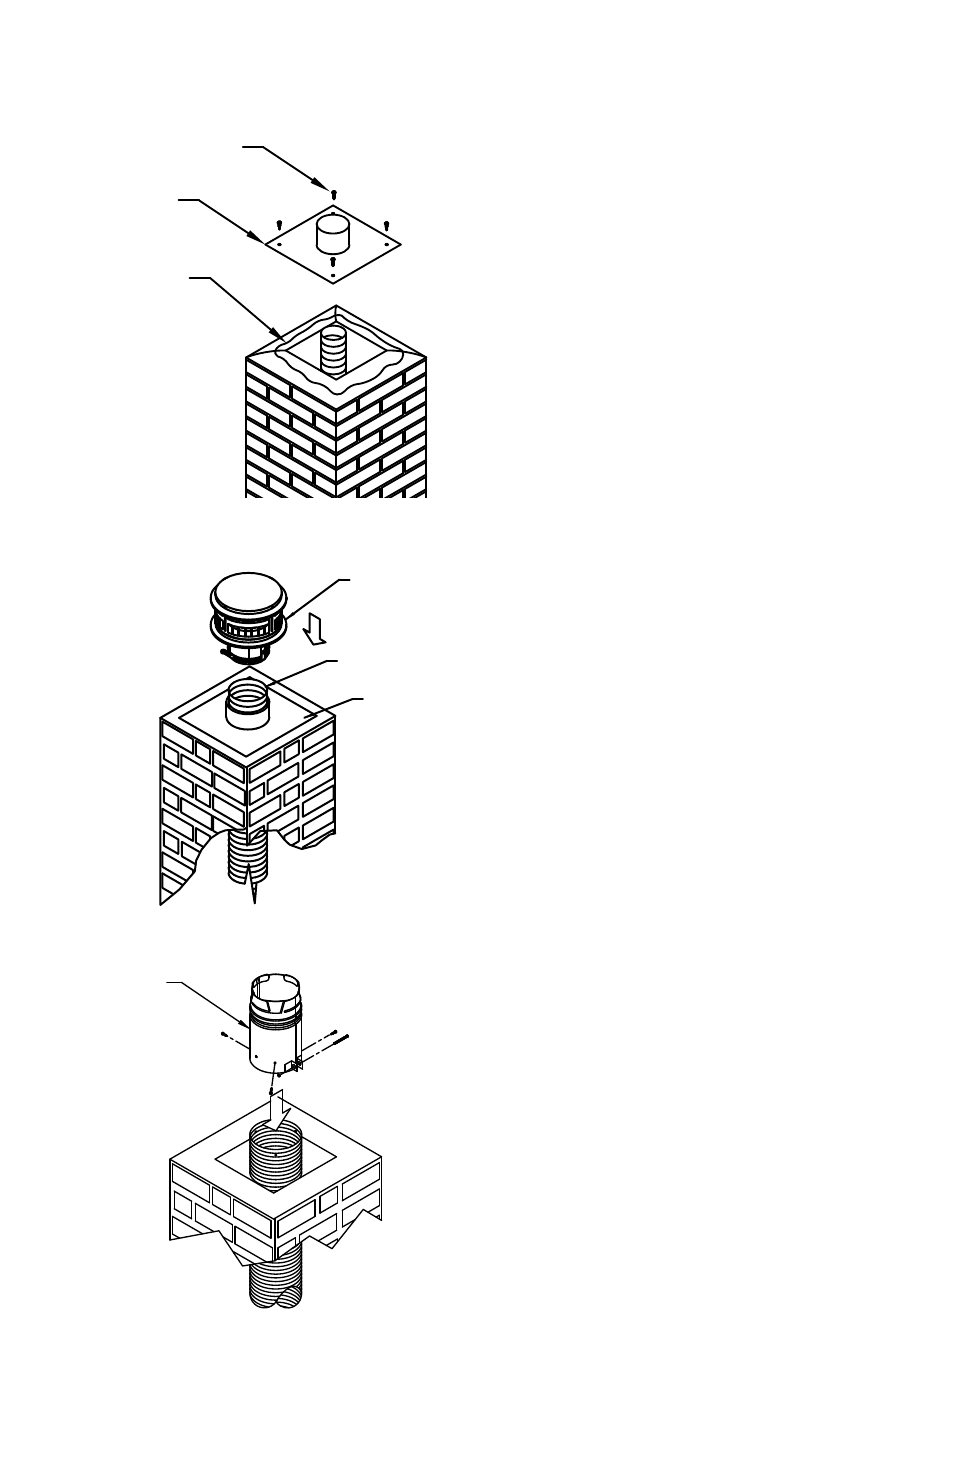
Figure 14
Figure 15
Figure 16
SeALANT
exISTING
MASONRy
CHIMNey
MASONRy
ANCHORS
TOP PLATe
CAP
TOP PLATe
FLex
LINeR
B- VeNT
MALe
ADAPTeR
screws. Slide the Mortar Sleeve
over the connector and branch, and
fill in around the Mortar Sleeve with
grout, keeping the Tee centered in the
masonry chimney, and the flange of
the Mortar Sleeve even with the wall
of the chimney.
Step 5. Complete the Vent Connector
attachment to the gas appliance.
RELINING INSTRUCTIONS FOR A
GAS FIREPLACE VENTING INTO AN
EXISTING MASONRY FIREPLACE
AND CHIMNEY
Step 1. Measure and record the
interior dimensions of the masonry
chimney and the height of the chimney
from the top, down to the top of the
fireplace.
Step 2. extend the Flex Liner from
its compressed length to its normal
length by pulling at the ends. Do not
extend flex liner beyond its normal
length. Attempting to do so may result
in damage to the liner.
Step 3. Secure a rope to the Flex
Puller and attach the Flex Puller to the
DuraFlex Liner. One person should
feed the liner through the chimney
from the top, while another should pull
the liner from the bottom, as shown
in Figure 5. The reason for using two
people is that care must be taken not
to tear the aluminum flex liner.
Step 4. After the Flex Liner is pulled
through the damper area, attach the
Flex Coupling to the end of the Flex
with sheet metal screws, then connect
it directly to the flue outlet on top of
the gas fireplace (Figure 12).