Cleaning and maintenance – DuraVent Multi-fuel venting system UL 641 User Manual
Page 14
14
bead of non-hardening sealant around the
outside top edges of the Support Box so as
to make a seal between the box and the roof.
Clean out any combustible material or debris
from inside the Support Box.
8. Place the Pipe Clamp, (which comes as a
component of the Support Box) around the
top of the hole in the bottom of the Support
Box (Figure 23).
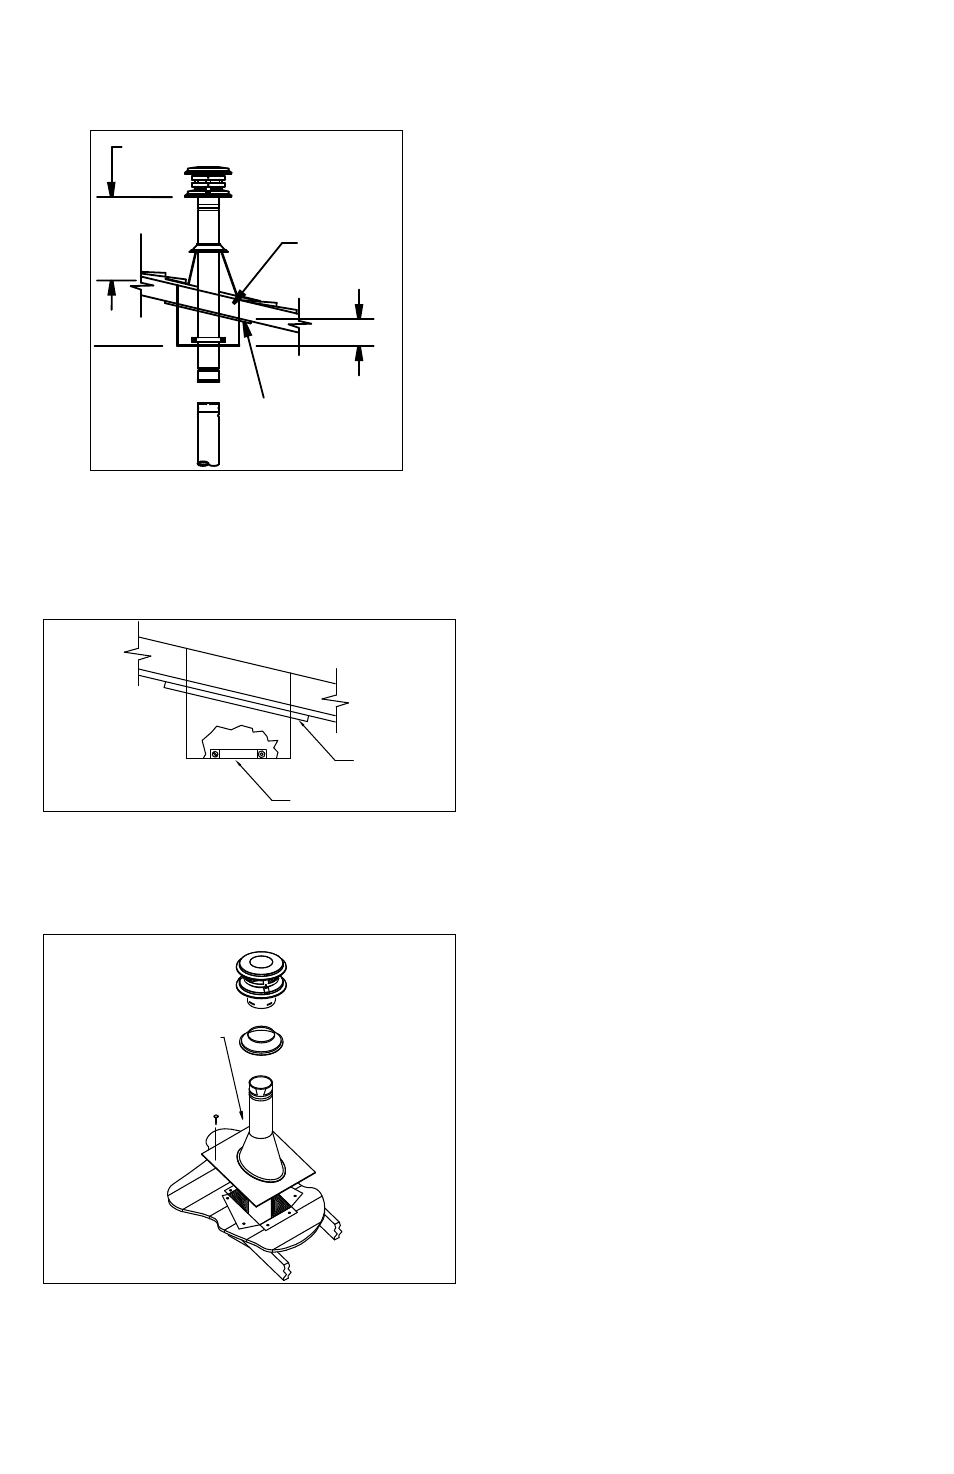
9. Connect the necessary amount of pipe
sections to reach the stove at a point where
the Cap will be at least 12" above the roof
(Figure 22).
10. Run the assembled pieces of pellet
vent pipe down through the Clamp of the
Support Box and connect to the appliance
with a Pipe Adapter. Using a level, make slight
adjustments in the position of the appliance
until the pipe is truly vertical. Tighten the
bolts in the Clamp. Note that the overall
length of the pellet vent pipe as assembled,
can be no longer than 42 feet.
11. Slip the Flashing over the pipe section(s)
protruding through the roof. Secure the base
to the roof with roofing nails as shown in
Figure 24. Insure that the roofing material
overlaps the top edge of the Flashing (Refer
to Figure 2).
CLEANINg AND MAINTENANCE
1. Have your system cleaned by a certified
chimney sweep if you have doubts about
your ability to clean it. Use a plastic or flexible
steel brush. Do not use a stiff brush that
will scratch the stainless steel liner of your
system.
2. PelletVent systems must be installed so
that access is provided for inspection and
cleaning.
3. The pellet vent should be inspected at
least once every month during the heating
season.
4. Do not use chemical cleaners. They can
damage the vent pipe.
5. To increase pellet vent life, coat all
Figure 22
TRIM
2” BELOW
FINISHED
CEILING
CATHEDRAL
CEILING
SUPPORT BOX
LEVEL
12” MINIMUM
Figure 23
Figure 24
USE NONHARDENING
SEALANT
WHERE STORM
COLLAR SITS
ON FLASHING
CLAMP
TRIM