Kramer Electronics VP-108 User Manual
Page 12
KRAMER: SIMPLE CREATIVE TECHNOLOGY
Connecting the VP-108 1:8 XGA / Balanced Stereo Audio DA
8
6.2 Controlling via RS-232 (for example, using a PC)
To connect a PC to the
VP-108 unit(s), using the Null-modem adapter
provided with the machine (recommended):
Connect the RS-232 9-pin D-sub rear panel port on the
VP-108 unit to the
Null-modem adapter and connect the Null-modem adapter with a 9-wire
flat cable to the RS-232 9-pin D-sub port on your PC
To connect a PC to the
VP-108 unit, without using a Null-modem adapter:
Connect the RS-232 9-pin D-sub port on your PC to the RS-232 9-pin
D-sub rear panel port on the
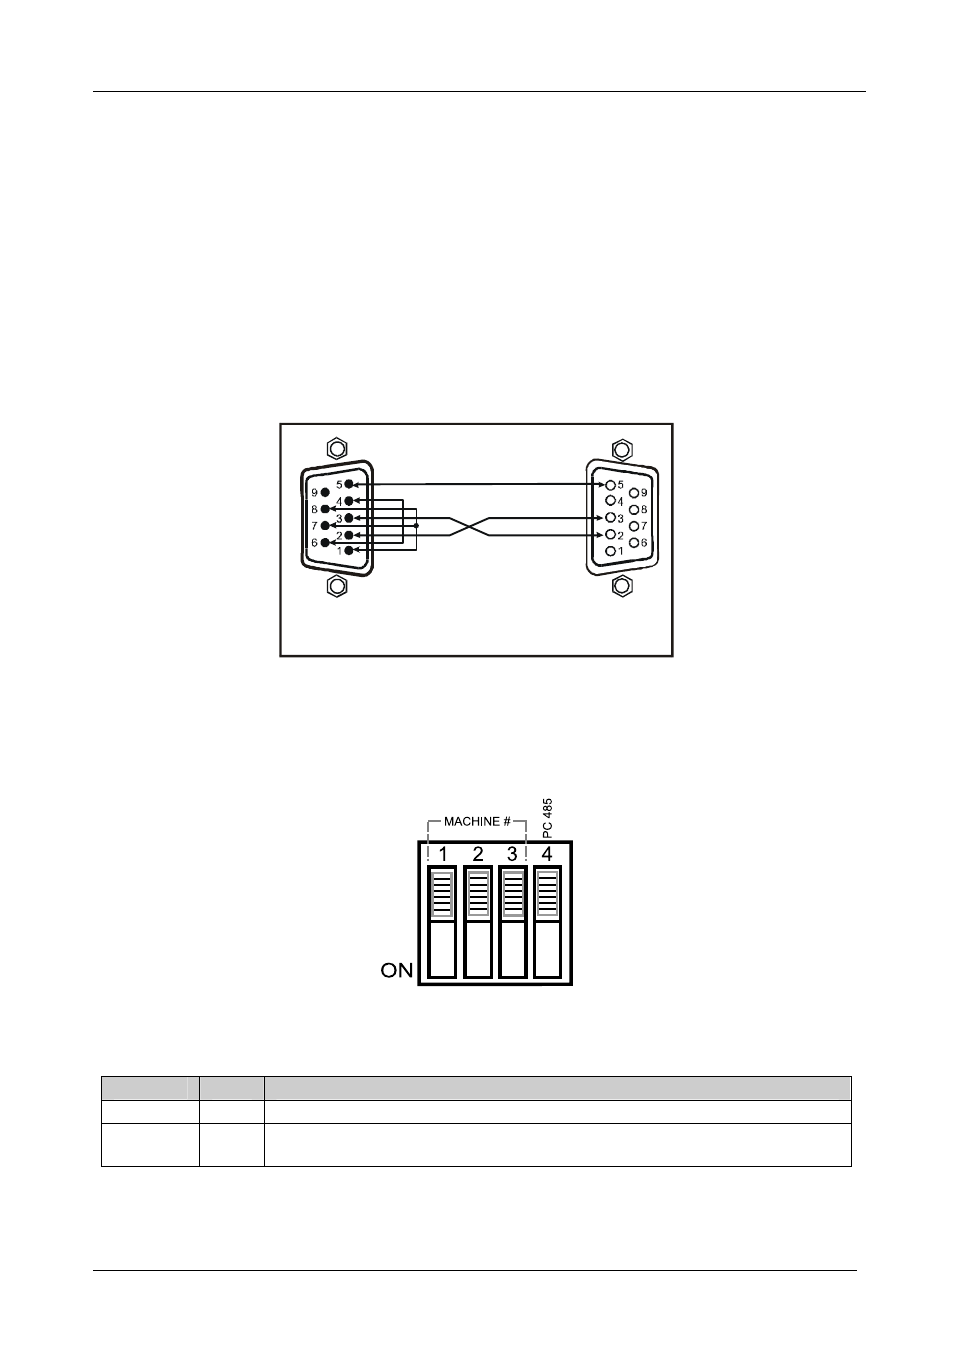
VP-108 unit, as Figure 7 illustrates
9-pin D-sub
(From PC)
9-pin D-sub
(Male)
If a shielded cable is used, connect the shield to PIN 5
PIN 4 is connected to PIN 6
PINs 8, 7, 1 are connected together
PIN 5 Connected to PIN 5 (Ground)
PIN 3 Connected to PIN 2
PIN 2 Connected to PIN 3
Figure 7: Connecting a VP-108 Unit to a PC without using a Null-modem Adapter
6.2.1
Setting the Dipswitches
Figure 8 illustrates the factory default SETUP dipswitches:
Figure 8: SETUP Dipswitches
Table 3: Dipswitch Settings
Function
DIPS
Description
Machine #
1, 2, 3 Determines the position of a unit in the sequence (refer to section 0)
PC 485
4
Set ON when connecting the PC (or other controller) via the RS-485 port, set
OFF when connecting the PC via the RS-232 port or when not connecting a PC