Instructions – Quick Cable Quick Crimp Pneumatic Crimper User Manual
Page 4
4
Instructions
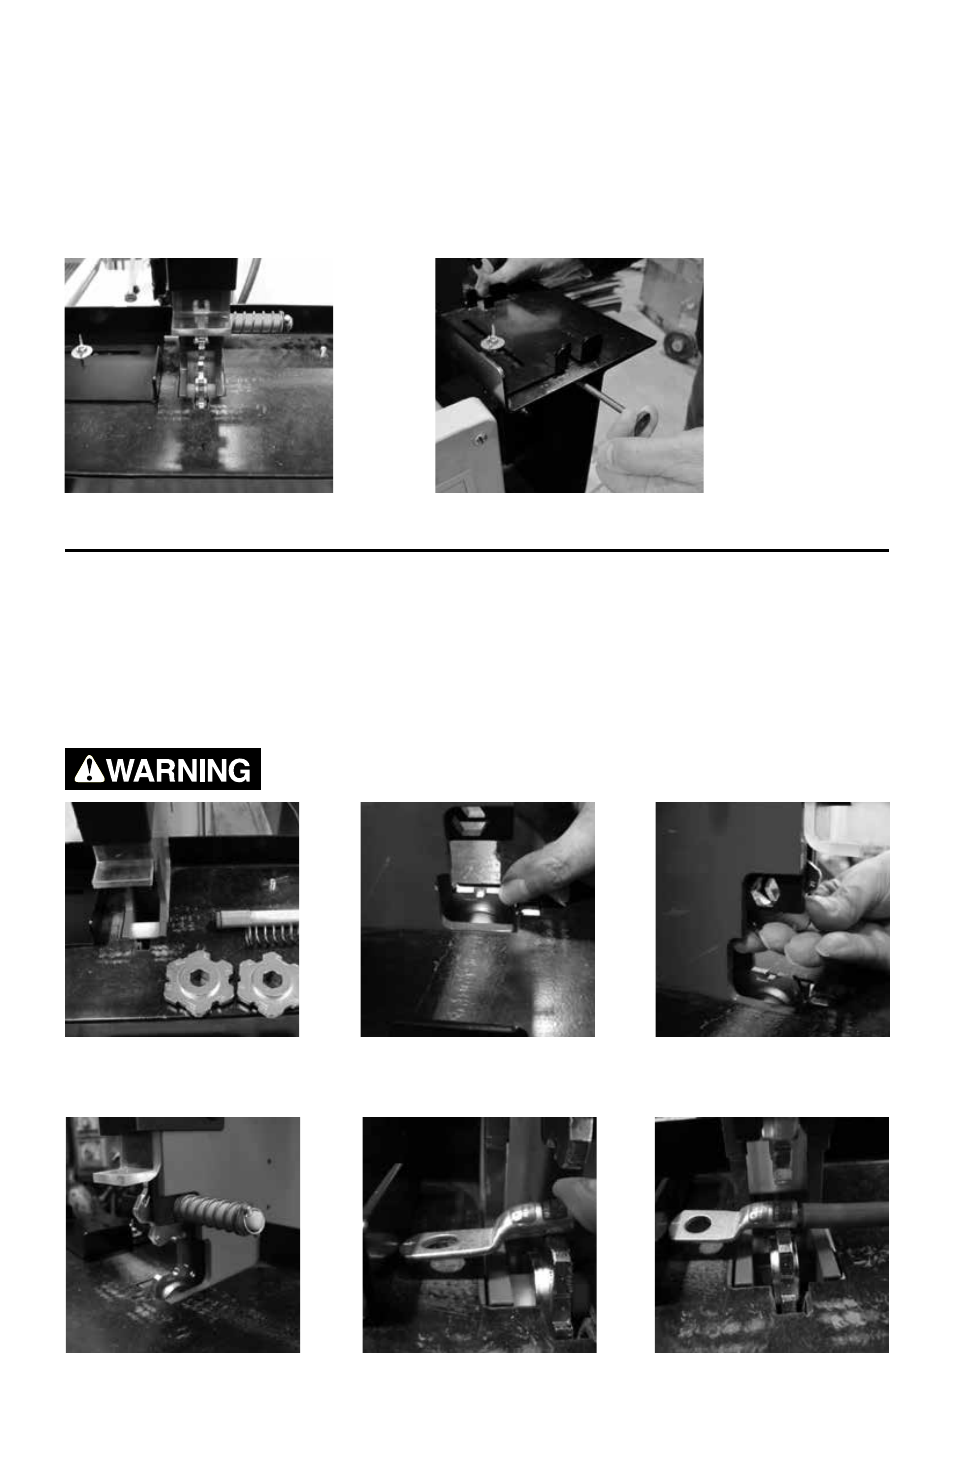
Using Universal Hex Dies (4255UDA & 4255UDB)
A. Adjustable guide plate on left.
B. Spring loaded upper die retainer.
1. Select the dies required to
crimp the gauge and type of
connector you want to crimp.
4. Completed die installation.
2. Install one die in lower
position.
5. Adjust guide plate so that
connector is positioned in die
set for 1st crimp.
3. Install other die in upper
position.
6. Insert cable in connector.
Spring loaded lower die retainer.
The Quick Crimp Pneumatic Crimper has an adjustable guide plate, a spring-loaded lower
die retainer, and a spring-loaded upper die retainer. The guide plate is used to position the
connector so that the crimp area is centered within the die area. The lower die retainer can be
pulled back using the knob on the left side of the machine. Die retainers have a round forward
shank and a hex toward the rear where they engage the die. Pulling back part way allows you
to rotate the die into position on the round part of the shaft, and then the hex end engages to
hold the die in place.
Our universal hex dies are used to crimp cast copper, heavy-wall copper tube and standard
copper tube lugs as well as brazed seam lugs, SB, SBX and DIN contacts. Refer to the supplied
die settings chart to identify the correct die settings for the particular gauge and type of connector
that you intend to crimp. There are four dies in the universal die set, two A dies and two B dies.
This provides die settings using two A dies, an A die and a B die, or two B dies. Once you have
determined which dies to use for the connector you want to crimp, follow these steps:
Disconnect air supply before changing dies or making adjustments.