11 control groups, 11 control groups -22, Sd8 - getting started – DiGiCo SD8 User Manual
Page 26
SD8 - Getting Started
1-22
1.11 Control Groups
Any number of input channels and output channels can be connected to one or more of the 12 Control Groups. They can then all
be operated from a single worksurface channel. Changes to the Control Group fader, mute or solo or controls will affect all
channels connected to the group.
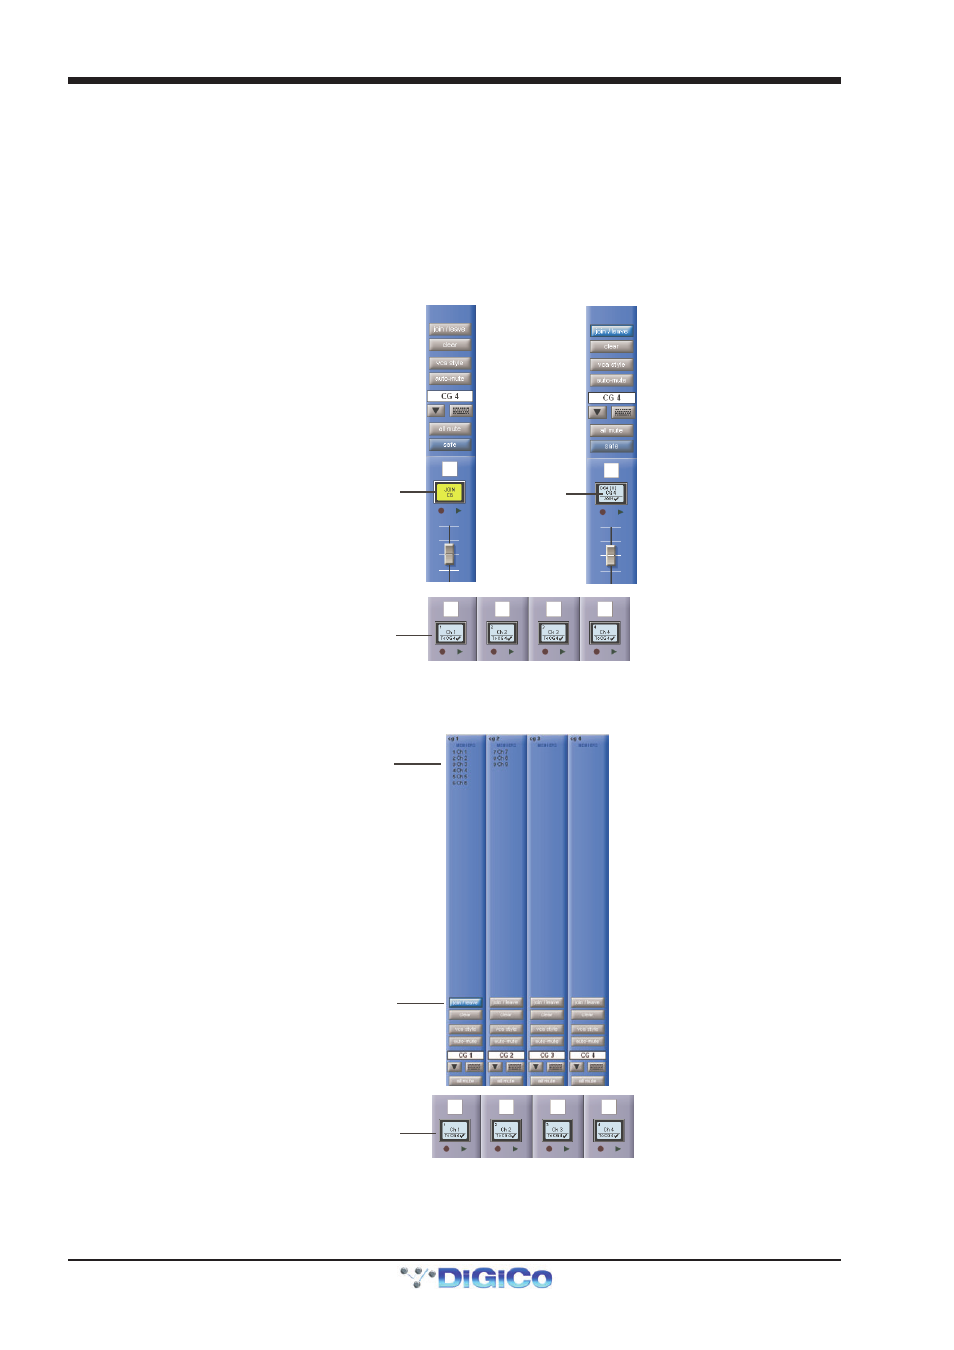
There are 2 methods to set up Control Groups:
1) Press the LCD Function button on a CG fader bank (normally found in the centre section)
Press the JOIN CG button
Press the channel select button for the CG that you want to use
Press the channel select buttons for each of the channels that you want to make members of the CG
Release the JOIN CG button and return to standard Solo mode by pressing the channel select button beneath the LCD display
labelled SOLO
Press LCD Function
Button then JOIN CG
Select CG to JOIN
Press Channel LCD buttons
to Assign Members
2) Press the on screen JOIN/LEAVE button for the required CG channel
Press the channel select buttons for each of the channels that you want to make members of the CG
Release the JOIN/LEAVE button
Press Channel LCD buttons
to Assign Members
Press Join/Leave button
on the required CG screen
List Of Members
A list of all the connected channels and their names is displayed above each Control Group display.
You can also clear all the channels from a Control Group by pressing Clear.
When a channel is a member of a Control Group, its own controls can still be adjusted independently of the other Group members.
Adjustments to fader levels are transmitted to the Group members as dB changes, so that a level increase of 2dB on the Control
Group fader will increase all the member levels by 2dB, irrespective of the relative levels of the individual channel faders.