Bike file – American Bicycle Security Company Bike File Rack User Manual
Page 4
American Bicycle Security Company
P.O. Box 7359
Ventura, CA 93006
Ph: (800) 245-3723 or (805) 933-3688
Fax: (805) 933-1865
Bike File
*Tools Needed for Wall Mount Installation
9/16” Wrench/Socket
3/4” Wrench/Socket
1/4” Drill Bit or 3/8” Masonry Drill Bit (depending
on anchor type)
Tape Measure
Drill (Hammer Drill Recommended)
Hammer
Level
Saw for cutting track
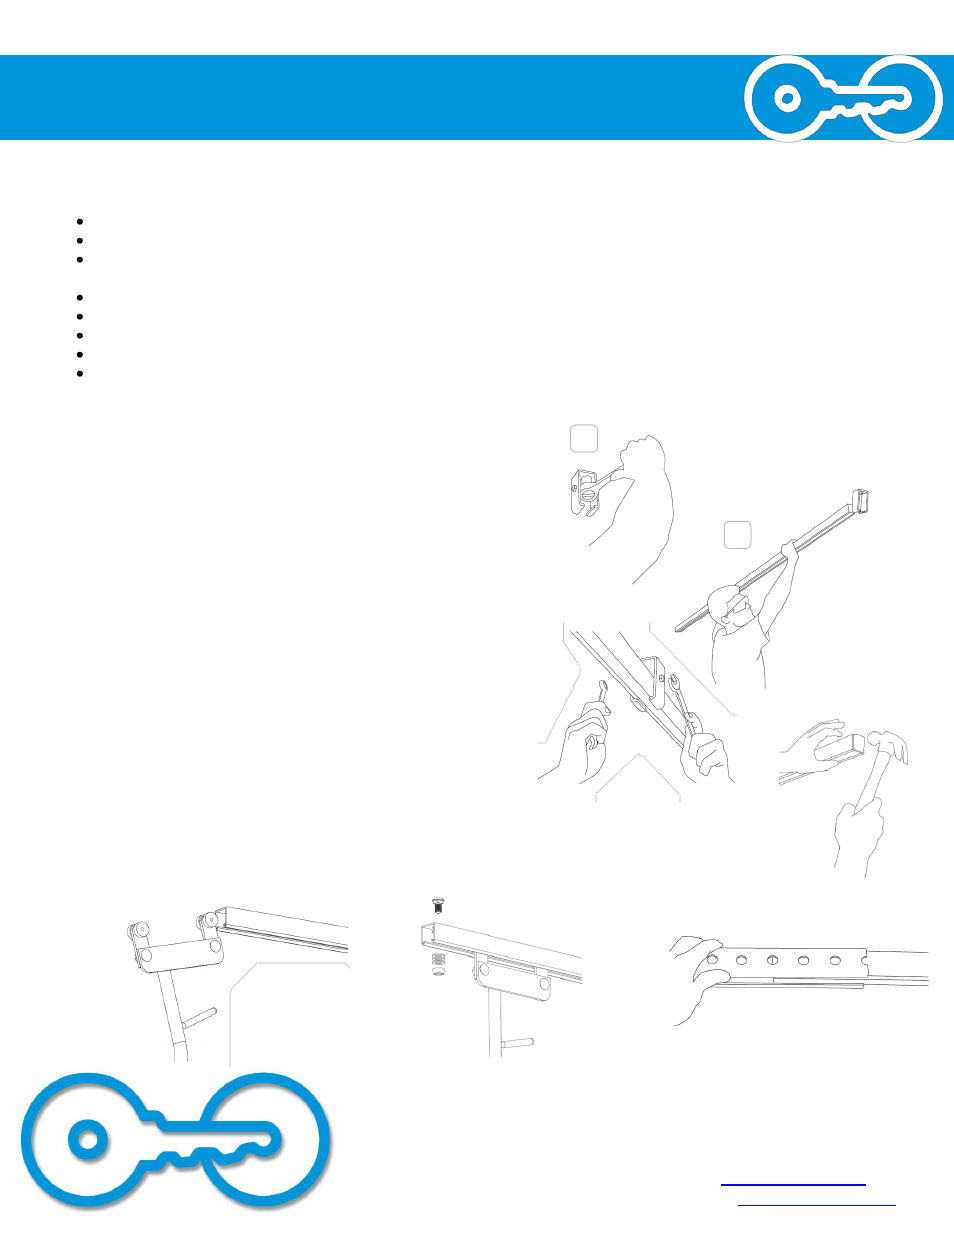
1. Mount Channel Trolley Supports in ceiling with appropriate
anchors so that the centers of the brackets are 2 feet from
each end of the 96” Slotted Track and 4 feet apart from
each other.
2. Slide 96” Slotted Track through the Channel Trolley
Supports so that the centers of the brackets are 2 feet
from the end of the Slotted Track.
3. Secure the Channel Trolley Supports onto the 96” Slotted
Track by tightening the Hex Head Cap Screws and Flange
Nuts through the holes in the Channel Trolley Supports.
4. Hammer an End Cap into one end of the 96” Slotted
Track.
5. Insert the Trolleys into the open end of the 96” Slotted
Track.
6. If no more Bike Files are going to be spliced together,
hammer in another End Cap in the open end of the Slotted
Track to close it up.
7. If splicing an additional length of track, slide the Splice
Slotted Track over the last 6” of the 96” Slotted Track.
Ceiling Mount – Installation
Installation Steps:
Recommended Base Materials:
Note: if installing a ceiling mounted Bike File, continue with the
assembly by following the directions below. If installing a wall
mounted or floor mounted model, assemble those units
according to their instructions first.
Before installing, make sure the ceiling is strong enough to
accommodate the rack fully loaded with bikes. Compare parts
shipped with rack to the parts list on the previous page. Contact
us if any parts are missing. Make sure the 96” Slotted Track will
fit in your space. If necessary, cut the Slotted Track to the
required length.
1.
2.
3.
4.
5.
6.
7.