Operation, Introduction, Properly preparing the skewers – Power Soak 33529 Skewer Wash Owner's Manual User Manual
Page 13: Loading the skewer rack
9
Operation
Introduction
Dirty skewers should be brought to the Skewer Wash as soon after the
cooking process as possible. Do not allow the skewers to sit and air
dry. The sooner the skewers are brought to the Skewer Wash and put
in the wash tank, the easier they are to clean!
Properly preparing the skewers
Excess soils should be removed from the skewers prior to placing them
in the rack located in the wash sink.
Dispose of the excess soils by placing them into a garbage can.
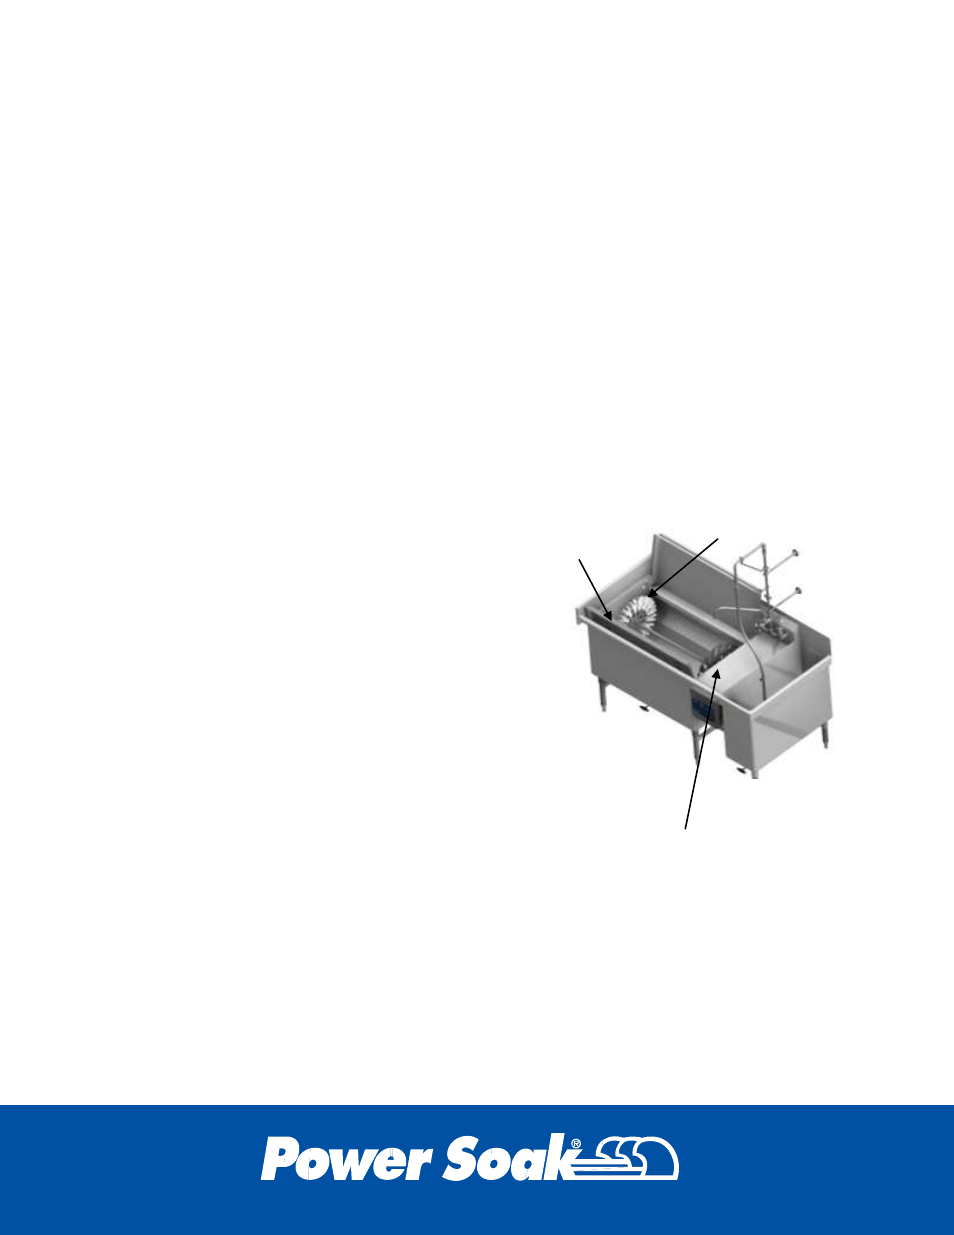
Loading the Skewer Rack
The skewer rack will lift out of the machine if
necessary. When placed in the machine, it
should be oriented as shown in the
illustration with the shaft ends inserted into
the bearing blocks that are attached to the
walls of the sink.
The ends of a skewer are not shaped the
same and the skewer must be oriented
properly to fit into the skewer rack.
1. Insert the end of the skewer that does
not have the round shaft into the sheet
metal disk by aligning the shape of the
skewer with the shape of the cutout in
the sheet metal.
2. Snap the end with the round shaft into
the opening o
f the “Y” shape of a single
retainer clip that is in line with the sheet
metal opening. (When properly
installed the skewer will be straight
across the wash tank.)
3. Repeat steps one and two until all the slots in the skewer rack are
filled. If there are not enough skewers to fill the rack, evenly space
the skewers so that the rack is balanced. The water flow will not
rotate the rack if it is too heavy on one side or does not have
enough skewers loaded into the rack.
Sheet metal disk with
cutouts holds the end of the
skewer that has the
matching shape.
Disk with “Y” shape clips
is oriented toward this
end in the wash sink.
Work Tray
for cleaning
and rinsing