General operation – Nor-Lake LABORATORY REFRIGERATORS AND FREEZERS User Manual
Page 2
2 08/07 Rev. A 123952
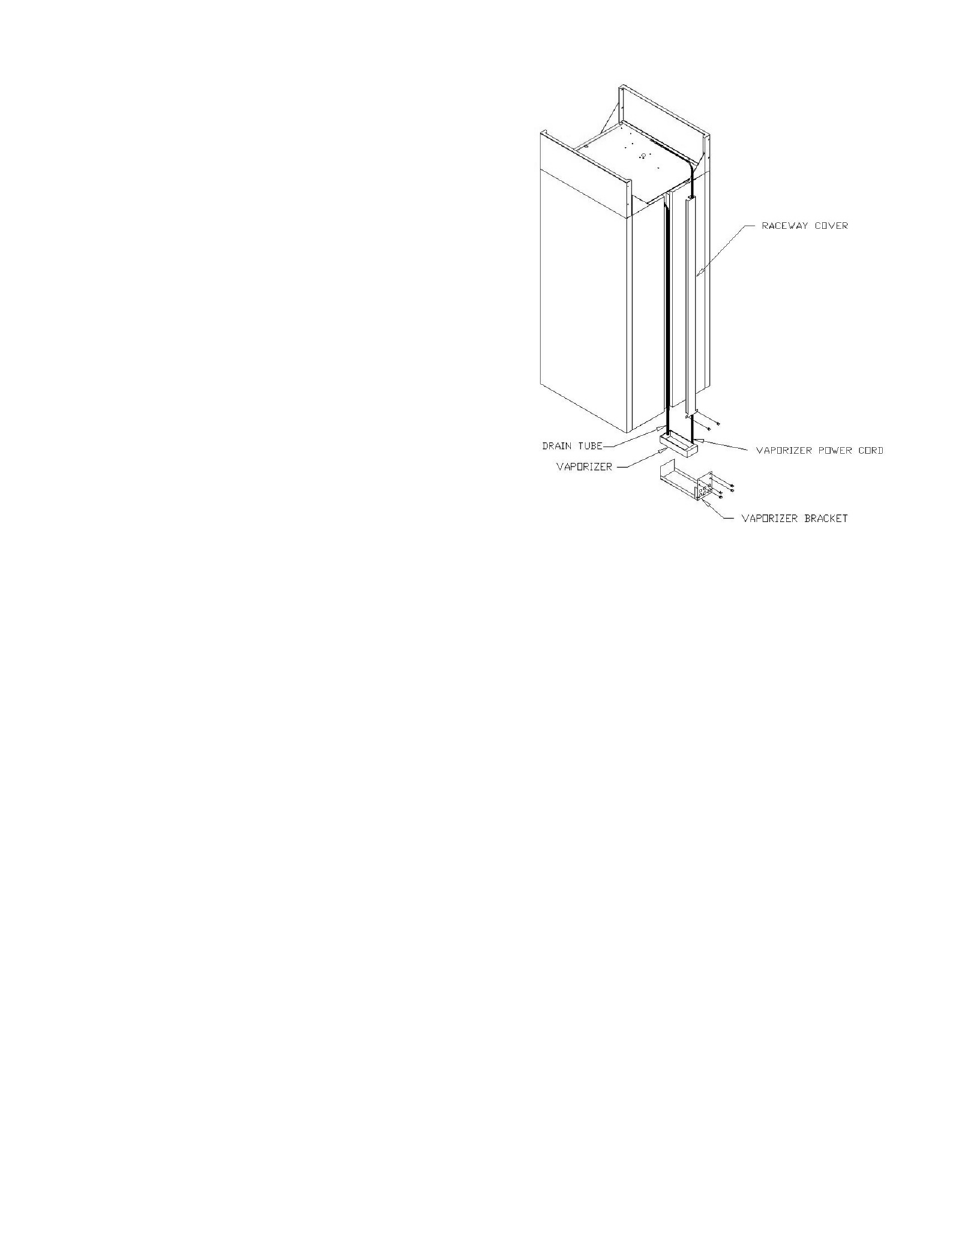
Note: Disconnect power prior to installation.
1. Connect the power cord to the vaporizer and
place it in the vaporizer bracket.
2. Attach the vaporizer bracket to the back of the
unit using the four screws as shown, making sure
the plastic drain tube is in the vaporizer pan.
LOCATION
The refrigeration system located at the top of the
cabinet requires free air access for proper operation.
Allow a minimum four (4) inch clearance on the top,
rear, and sides of the cabinet. The cabinet should
also be leveled when it is placed in its permanent
location. Refer to the serial tag for complete physical
specifications.
View
1
ELECTRICAL
Check the proposed outlet to be used to insure that the voltage, phase, and current carrying
capacity of the circuit from the electrical panel correspond to the requirements of the cabinet.
NEVER use an extension cord to wire any unit. On permanently connected units, those not
furnished with a plug-in service cord, all inter-wiring between the electrical panel and the unit must
be done in accordance with the National Electric Code and all state and local codes. Refer to the
serial tag for all pertinent electrical information.
Observe all Warning Labels. Disconnect power supply to eliminate injury from electrical
shock or moving parts when servicing equipment.
GENERAL OPERATION
The laboratory refrigerators and freezers employ a unit cooler evaporator located inside the cabinet
as the heat removing source. Through the refrigeration process, heat is captured in the evaporator,
transferred to the condensing unit on top of the cabinet, and expelled to the surrounding outside air.
It is extremely important to allow a four (4) inch clearance on the top, rear, and sides of the unit for
the refrigeration process to function properly.
These refrigerators and freezers utilize a programmable controller to control the temperature and
defrost settings. The controller, which is located on the facade of the unit, is factory set. Please see
the default settings sheet and separate instructions that are included on the operation of this
controller.