Installation guide, Electrical connections – EXONIC 500 User Manual
Page 10
EN - 9
Antenna
(Black)
Front Line-out
(Brown)
(Grey)
Sub-out
(Green)
Amp Remote Out
ACC (+)
BATTERY (+)
INSTALLATION GUIDE
Installation Procedures
First complete the electrical connections, and
check for correctness.
Reset
When the installation and connections are
completed, be sure to press the RESET with a
ball-point pen, etc.
Note: Press the RESET button will erase the
clock and stored stations.
Installation Opening
This unit can be installed in any dashboard
having an opening as shown below. The
dashboard should be 4.75mm - 5.56mm thick
in order to be able to support the unit.
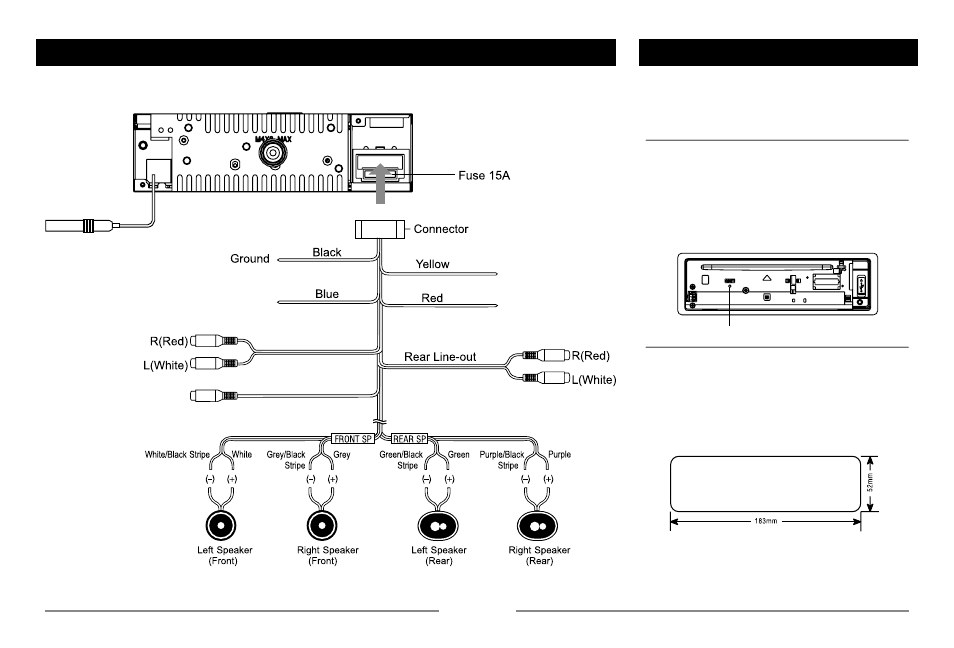
ELECTRICAL CONNECTIONS
Wiring Diagram
Reset