Wall mounting, Unit mounting, Parts list – COOK CAC User Manual
Page 6: Cac-w / cac-wo, Cac-p / cac-po, Cac-m, Troubleshooting, Cac-w / cac-wo parts list, Cac-p / cac-po parts list, Cac-m parts list
6
2
3
4
1
6
5
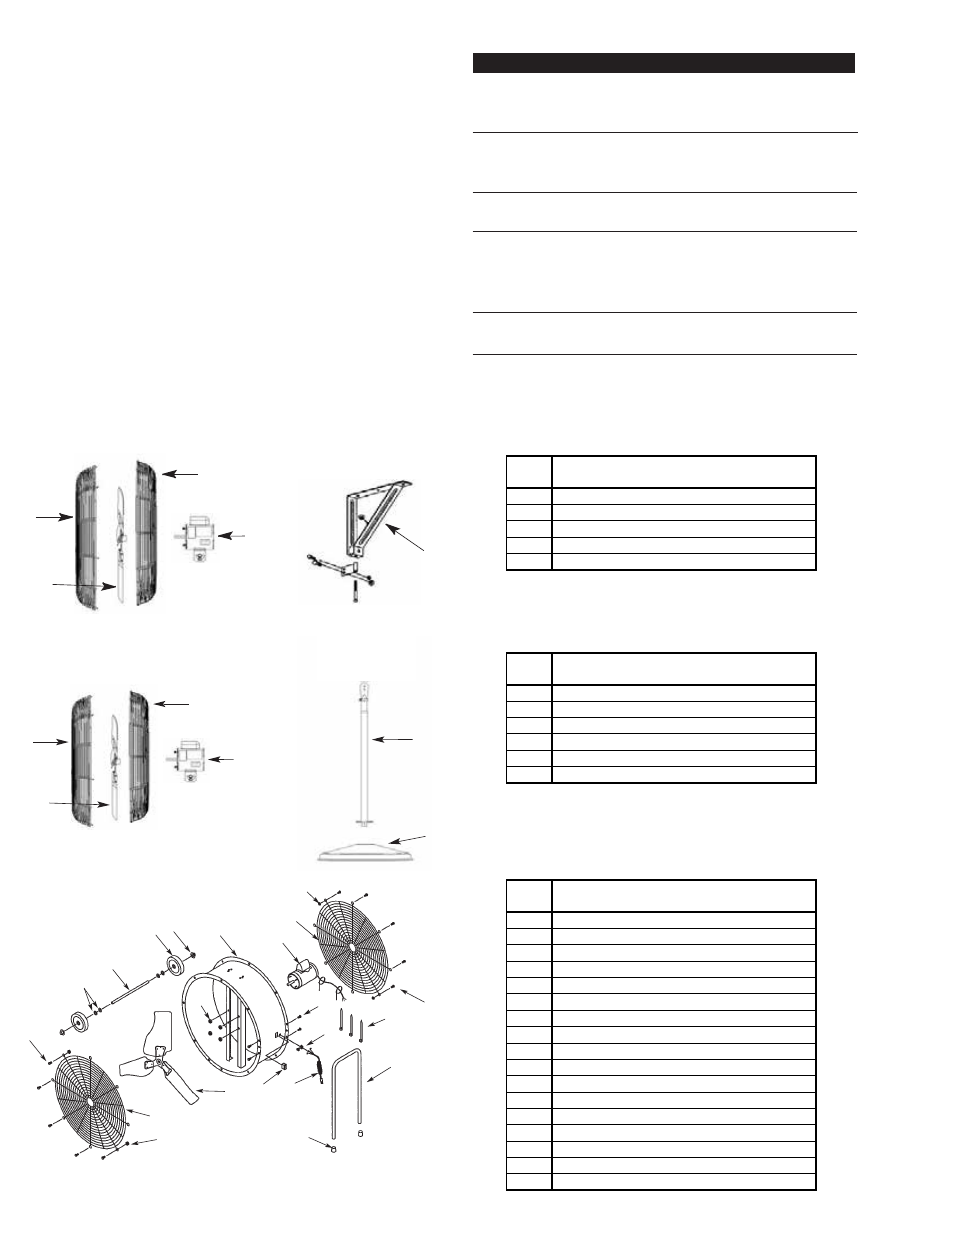
CAC-W / CAC-WO Parts List
2
3
7
4
1
CAC-P / CAC-PO Parts List
Part
No.
Description
1
Propeller
2
Front Guard
3
Rear Guard
4
Motor Assembly (includes cord & switch)
7
Wall/Ceilling Bracket
Part
No.
Description
1
Propeller
2
Front Guard
3
Rear Guard
4
Motor Assembly (includes cord & switch)
5
Pedestal Base Assembly
6
Column Assembly
Troubleshooting Chart
Symptom
Possible Cause(s)
Corrective Action
Fan inoperative
Fan cycles on and of f
Unit fails to
oscillate (sweep)
Excessive noise
while operating
Insufficient air flow
1. Blown fuse or open cir-
cuit breaker
2. Defective motor or
switch
3. Broken belt
1. Thermal protector
2. Faulty wiring or control
switch
1. Connection arm not
secured
2. Defective gear assembly
1. Defective bearing
2. Loose or damaged pro-
peller
3. Loose, worn, or dirty belt
4. Motor not secure
1. Belt slippage
2. Guard excessively dirty
1. Replace or reset
2. Repair or replace
3. Replace
1. Check for obstructions
to air flow , voltage,
intake air temperature
2. Repair or replace
1. Tighten
2. Replace
1. Replace shaft/bearing
assembly
2. Tighten or replace
3. Adjust, replace, or
clean
4. Tighten motor nuts
1. Replace and/or adjust
tension
2. Clean guards
4. Torque bolt to 85-90 ft-lb.
5. Proceed to unit mounting.
Wall Mounting
1. Locate a solid support structure within the wall.
2. Discard the back plate when wall mounting.
3. Use four 5/8” x 2” lag bolts, grade 5 minimum (not
included), to secure bracket to the wall.
4. Proceed to unit mounting.
Unit Mounting
1. Using 4-1/2” x 1/75” bolts and nuts, attach the high
volume, high velocity industrial circulator to the column/
wall bracket (See CAC-WH Parts List on Page 7).
Tighten the nuts and bolts to 45-50 ft-lb torque.
2. Using the safety cable holes located in the Column
Mounting Bracket and the Back Plate, install the safety
cable (See CAC-WH Parts List). Overlap the cable’s
ends, and tighten the clamps and nuts to 45 ft-lb torque.
The cable should not exceed 1” of slack.
9
15
1
2
6
17
16
12
13
11
5
4
3
10
8
15
6
14
17
7
16
CAC-M Parts List
Part
No.
Description
1
Housing
2
Motor (w/key)
3
Propeller
4
SPST Switch
5
Cord Assembly
6
Guard
7
Handle
8
1/2” Dia. Axle
9
7” Dia. Wheel
10
#10-32 Lock Nut
11
Strain Relief
12
1/4-20 x 1/2” HWH Screw
13
Wire Tie
14
1” Crutch Tip
15
Parts Pack
16
1/4-20 x 1/2” Screw
17
1/4-20 Nut