Installation, operation, &maintenance, Wall/ceiling bracket, Wall/ceiling bracket assembly instructions – COOK CAC User Manual
Page 2: Installation, Operation, Maintenance
2
1. Read and follow all instructions, cautionary markings
and make sure power source conforms to requirements
of equipment.
2. Follow all local electrical and safety codes, as well as
the National Electrical Code (NEC) and the
Occupational Safety and Health Act (OSHA) in the Unit-
ed States, including fire rated construction. Ground
motor in accordance with NEC Article 250, (grounding).
3. Avoid extension cords. If used, assure it is UL rated and
of proper type, gauge, and length. Never operate more
than one fan from a single extension cord.
4. Do not kink power cord or allow it to contact oil, grease,
hot surfaces, sharp objects, or chemicals. Replace worn
or damaged cord immediately.
5. Do NOT use general purpose circulators in flammable,
explosive, chemical-laden, or wet or rainy atmospheres.
Use special purpose circulators designed for that
application. Do not attach ductwork to a circulator.
6. In critical applications, use a suitable alarm (air switch,
temperature sensor, etc.) should the circulator
malfunction.
Installation
Where power cord is not provided, connect power to the
motor in accordance with the United States NEC and all
local codes. Motor terminal connection data is provided on
the motor nameplate or on the motor terminal box cover
plate. Use adequate size wire for all branch and feeder
runs.
a. Dock Door Fan (Model CAC-DF): Refer to Page 6, for
correct positioning of parts.
b. Mobile Air Circulators and High Volume, High Velocity
Industrial Fans (Models CAC-M, CAC-WH & CAC-FH):
Locate the fan in the desired location on a stable, level
surface, or on ceiling for ceiling mounted high volume,
high velocity industrial fans. Connect the power cord or
wire unit per all National and Local
Motors may be equipped with automatic reset thermal
protection. Motor may activate without warning.
Do not place body parts or objects in circulator, motor
openings, or drives while motor is connected to the
power source.
To reduce the risk of fire, electric shock, or injury to
persons, observe the following: Do not use a three-prong
to two-prong adapter on the power cord. Do not use
circulators with a solid state speed control device. Do not
depend on any switch or thermostat to disconnect power
supply. Always unplug the power cord.
Installation, troubleshooting, and parts repair to be per-
formed only by qualified personnel.
Electrical Codes as required.
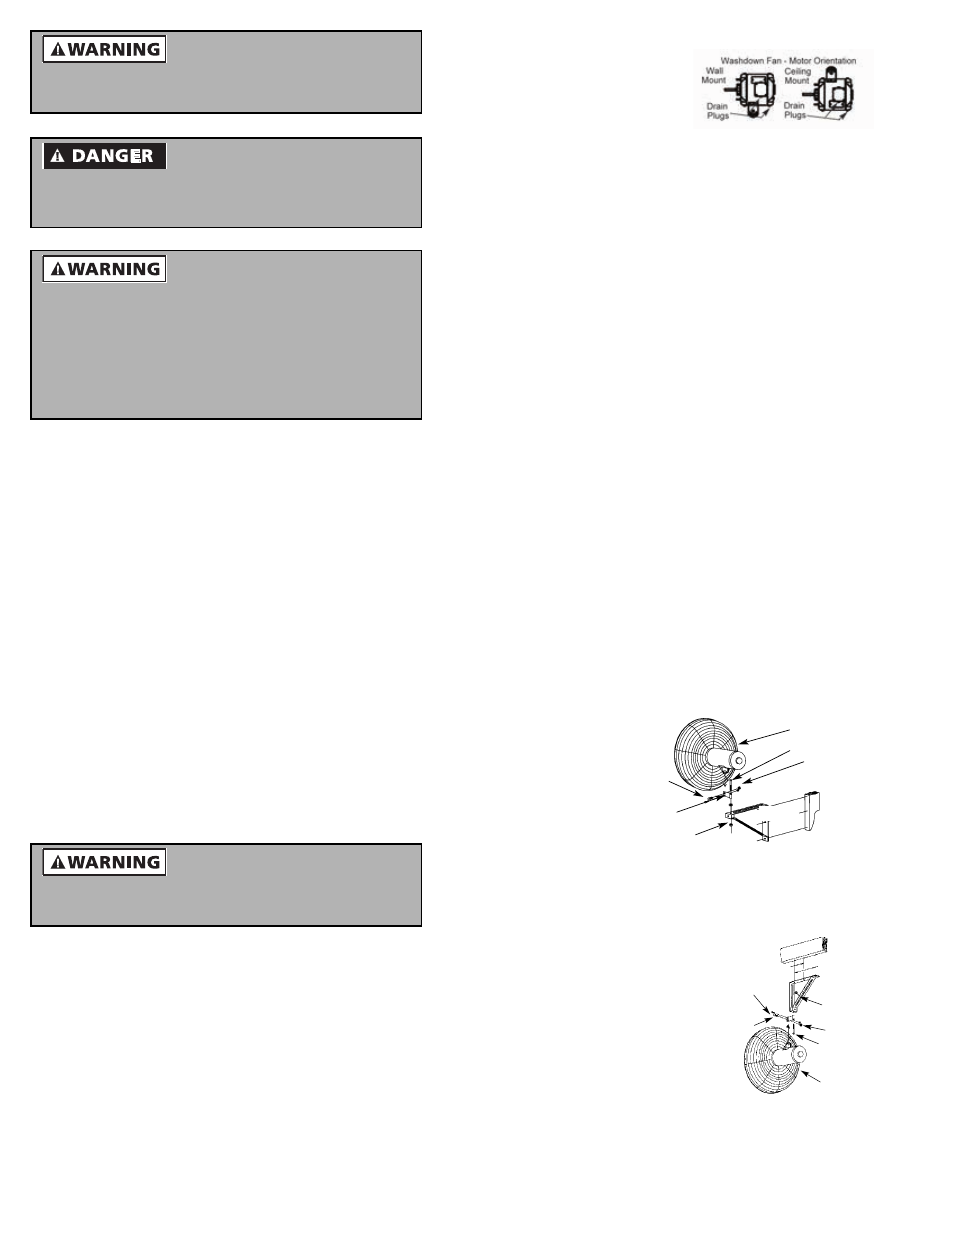
c. Washdown Air Circulators
(CAC-WW): After
mounting motor, remove
drain plugs.
Operation
1. CAC-P, CAC-W, CAC-PO and CAC-WO are operated
by pulling chain: High - Low - Off
2. CAC-M operates by rocker style switch: On - Off
3. CAC-DF operates by two-speed rocker style switch:
Low - Off - High
4. CAC-FH, CAC-WH, CAC-WW and CAC-WX requires
service switch wired by others.
Maintenance
1. Periodically clean propeller, guard, and motor of any
excessive dirt accumulation. Allow unit to cool; motors
can be hot enough to cause injury.
2. Follow motor manufacturer’s instructions for motor
lubrication.
IMPORTANT: When making repairs, use only Loren Cook
authorized repair parts.
Wall/Ceiling Bracket
1. For mounting circulator to wall, post, or ceiling.
Adjustable pivot bracket allows omni-directional air
circulation.
2. Furnished with secondary support cable for use when
circulator is mounted overhead. NOTE: Not
recommended for use with oscillating circulators when
ceiling mounted.
Wall/Ceiling Bracket Assembly Instructions
(Refer to Figures 1 and 2)
1. The wall/ceiling bracket should be assembled with the
swivel bracket as shown in the appropriate illustration.
The bracket has two holes; be sure smaller hole is as
specified in the illustration.
2. Locate the
wall or ceiling
stud nearest
the desired
fan location.
Attach the
bracket to the
stud using (3)
5/16 x 2”lag
screws or
appropriately sized bolts and nuts if attaching to I-
beams.
NOTE: Always install the
bracket to a minimum of 2 x
4 studding.
3. Position the swivel bracket
in the motor yoke (or along
side the oscillation circular
cast aluminum support
bracket) and align the pivot
hole with the larger hole in
the swivel bracket.
4. Insert the larger dia. bolt in
the pivot hole and install
the lock nut finger tight.
5. Insert the smaller dia. bolt in the slot in the motor yoke
Circulator
Mounting Bolt
Mounting Nuts
Mounting
Bolts
Swivel Bracket
(Smaller Hole Down)
Mounting Nut
Wall
Stud
10-7/8"
5-7/16"
Figure 1 - Wall Mounted Assembly
Mounting
Bolts
Swivel Bracket
(Smaller Hole Down)
5-7/16"
Circulator
Mounting
Nuts
Mounting
Bolt
Mounting
Nut
10-7/8"
Figure 2 - Ceiling
Mounted Assembly