Balboa Water Group 59350 Front Access Light User Manual
Page 2
LIGHT FEATURES
UК}
К«>VÌÊVi>ÀÊ}
МКvАК
А>Ì
iÀ>«Þ°
UÊVVi«ÌÃÊLМ
К
К>`ÊÃÌ>`>А`К£ÓÊLÕLð
UК"«М>ÊVÀi`ÊwÌiÀÃÊ>Û>>LiÊvÀÊÕÃiÊÜМ
К£ÓÊLÕL°
UКЬКЫМ>}iК£УКЫ®К1ÊÀiV}вi`К>ÃÃiLÞ°
UК/А>ГvАiАК>Û>>LiКК£УдЫК>`КУ{дКЫМ°
RELAMP INSTRUCTIONS
WARNING – RISK OF ELECTRIC SHOCK:
UКА>ÊL>М
КЙКГ«>Ê>`Ê`ÃViVÌÊ«ÜiÀÊLivÀiÊ>ММi«М}КМК«iÊið
UК"ЮК«iÊÌ
iÊiÃÊvÊÌ
iК}
МКХГ}КМ
iКЙКiÃÊÃiÀÌÊÌК«АЫ`i`КvАКМ
>МК«ХА«Гi°
UККМК>ÌÌi«ÌÊÀi>«}КЬМ
ХМКМ
iК«А«iÀÊÌ°КМ>VÌÊ>ʵÕ>wi`ÊÃiÀÛViК«АviÃÃ>ÊvÊÌ
iКМКГК
not available.
FOLLOW THE INSTRUCTIONS ON THE LENS INSERT TOOL PROVIDED.
1. Remove lens insert with tool.
2. Pull bulb straight out.
3. Gently push in new bulb.
{°Ê6iÀvÞÊÌ
iКА}КГКМК`>>}i`Ê>`КГК«А«iАЮКК«>Vi°КМ>VÌÊ>ʵÕ>wi`ÊÃiÀÛViК«АviÃÃ>ÊvÊ>Ê
replacement o-ring is needed.
5. Replace lens insert with tool.
6. Tight to align tool with notch.
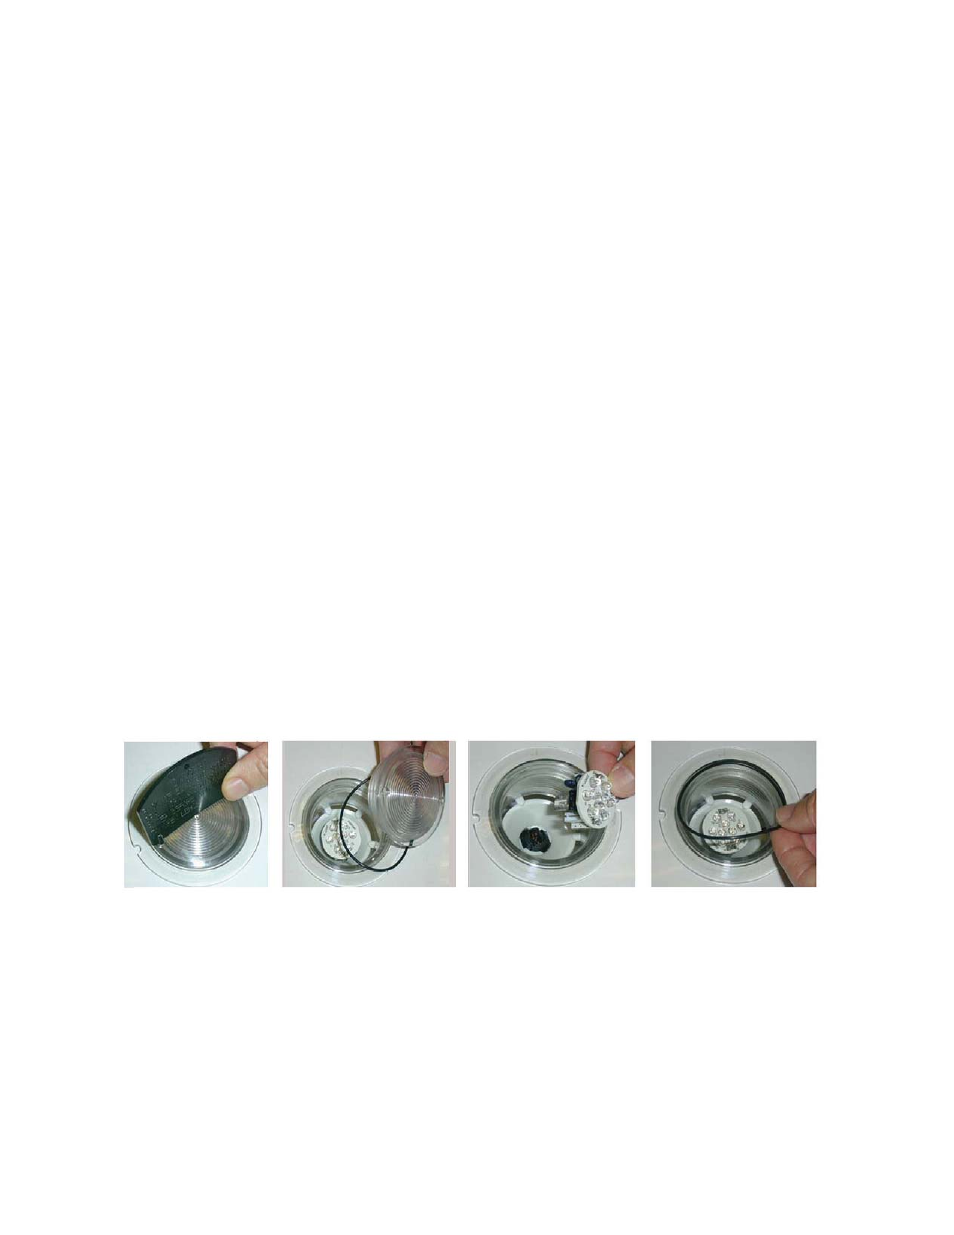
IN THE ILLUSTRATIONS BELOW, LEFT TO RIGHT:
1. Remove lens with insert tool.
2. Remove lens. Pull bulb straight Out. Verify the o-ring is not damaged and is properly in place.
К М>VÌÊÊ>ʵÕ>wi`ÊÃiÀÛViК«АviÃÃ>ÊvÊ>ÊÀi«>ViiМКА}КГКii`i`°
3. Gently push in new bulb.
4. Replace lens insert with tool. Tighten to align tool with notch.
US Operations
1382 Bell Avenue, Tustin, California 92780
Main Number 1-714-384-0384 | Fax Number 1-714-384-0385 | Inside Sales 1-714-384-0384 | Tech Support 1-714-384-0384
28545 Livingston Avenue, Valencia, California 91355
Main Number 1-661-257-5700 | Fax Number 1-714-384-0385 | Inside Sales 1-714-384-0384 | Tech Support 1-714-384-0384
www.balboawatergroup.com
email: [email protected]
© 2009 Balboa Water Group Inc. All rights reserved. Your Single Source Solution.
Disclaimer: Every endeavour has been made to publish the correct details in this data sheet.
No responsibility will be taken for errors, omissions or changes in product specifications.
Balboa Water Group reserves the right to change specifications.