3 checking for problems, 4 setting parameters, Checking for problems -6 – APC AXFA11G User Manual
Page 80: Setting parameters -6
IM 01E20C01-01E
8-6
8. OPERATION VIA HART COMMUNICATOR
NOTE
Data changed with the HART Communicator is sent to the AXFA11 by pressing
SEND (F2)
of the HART Communicator.
8.3.3
Checking for Problems
The self-diagnostic function of the AXFA11 is explained in Section 6.5 “Alarm Functions”
By using the HART Communicator, it is also possible to carry out this function in the
“Test/Status” parameter. Test for each error.
1. Device Setup
2. Diag/Service
3. Test/Status
* Open the “Test/Status” setting display.
8.3.4
Setting Parameters
As mentioned in Section 5.2.2 “Setting Mode,” the AXFA11’s parameters are divided into
three types:
i.
Selection type
ii.
Numeric type
iii.
Alphanumeric type
This section describes how to set these parameters using a HART communicator.
NOTE
All three parameters must be set to obtain a correct signal.
Nominal size, flow rate span and meter factor must be set.
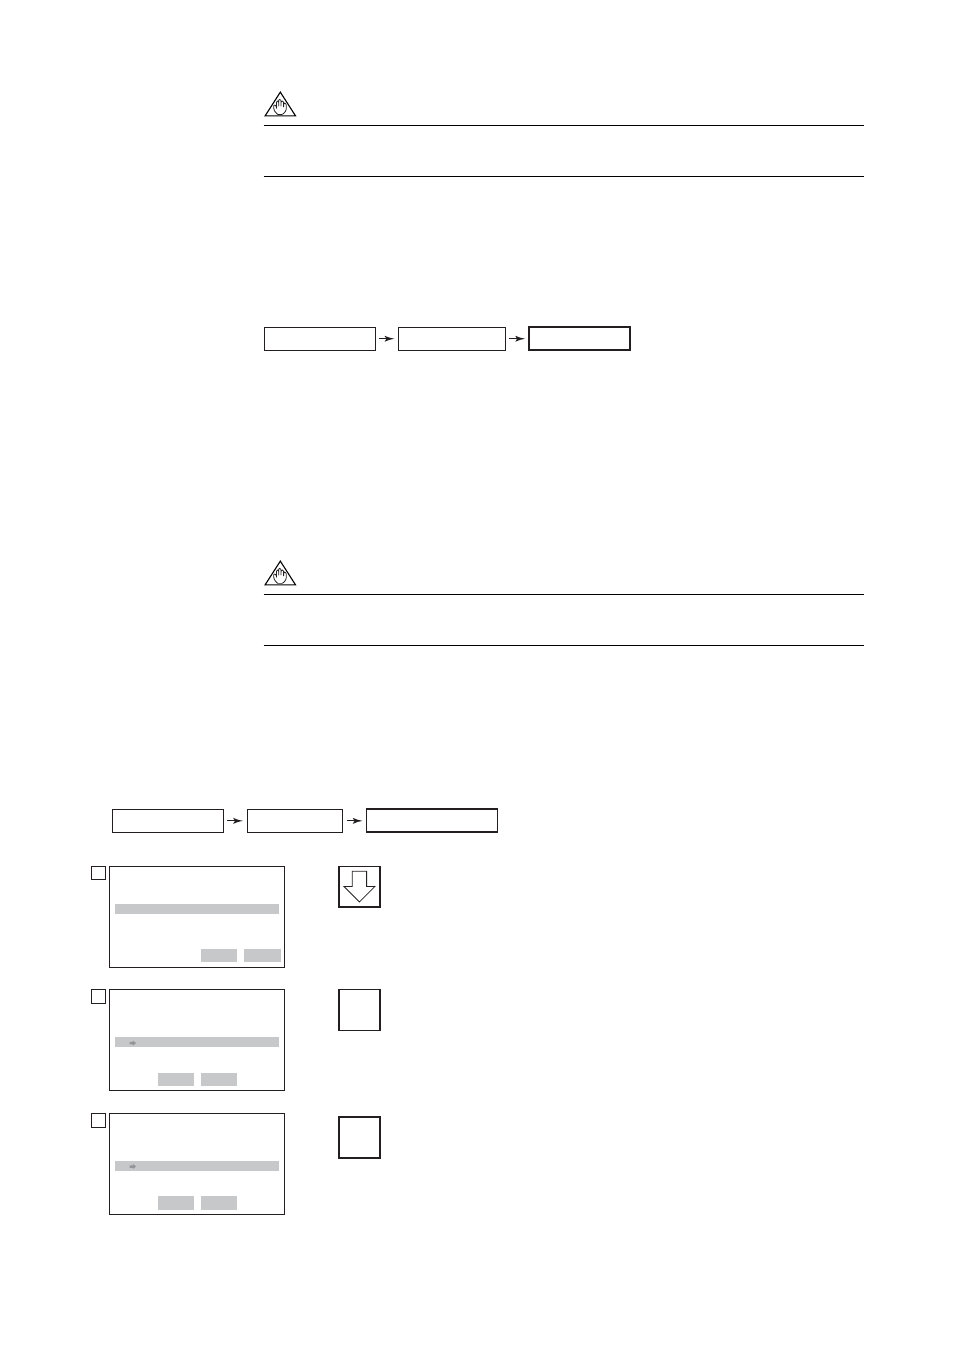
8.3.4.1
Example of Setting Selection-Type Data: Base Flow Unit
This example describes the setting of the flow rate units for the selection-type parameter
“Base Flow Unit” from m
3
to l (Liter).
1. Device Setup
3. Easy Setup
3. Base Flow Unit
AXFA11 : FI-1100
Base Flow Unit
m3
m3
K1(Kiloliter)
l(Liter)
cm3
DEL
DEL
ESC
ENTER
1
3
Select “1(Liter)”.
Press ENTER (F4).
Press SEND (F2) to set the data into the AXFA11.
Open the “Base Flow Unit” setting display.
AXFA11 : FI-1100
Easy Setup
1 Language
2 PV Damping
3 Base Flow Unit l
4 Base Time Unit /h
5 PV Span
DEL
DEL
HOME
2
F4
(ENTER)
F2
(SEND)
×
2
F0807.EPS
SEND
AXFA11 : FI-1100
Easy Setup
1 Language
2 PV Damp
3 Base Flow Unit l
4 Base Time Unit /h
5 PV Span
DEL
DEL
HOME
SAVE