Parts identification, Charging the clipper – Panasonic ERGS60 User Manual
Page 9
9
English
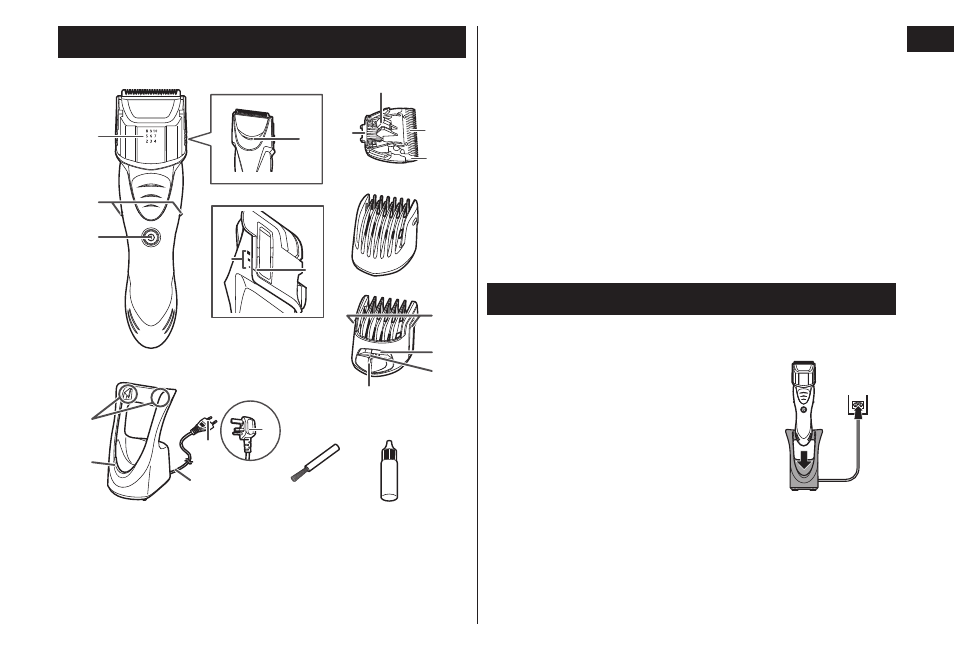
Parts identification
A
Main body
1
Trimming height indicator
2
Side terminals
3
Power switch
4
Water inlet
B
Side view with trimming
height comb attachment
5
3 mm adjustment scale
6
3 mm adjustment indicator
C
Blade block
7
Cleaning lever
8
Moving blade
9
Stationary blade
:
Mounting hook
D
1 mm comb attachment
(1 mm)
E
Trimming height comb
attachment
(2 mm to 10 mm)
;
3 mm adjustment buttons
<
Trimming height window
=
Trimming height indication
mark
>
Trimming height
adjustment lever
F
AC adaptor (RE7-69)
(RE7-74 for the United
Kingdom)
(The shape of the AC
adaptor differs depending
on the area.)
Charging terminals
Charge indicator lamp
Power cord
Power plug
Accessories
G
Cleaning brush
H
Oil
Charging the clipper
Perform the following steps to charge the clipper if it seems to lose
the speed.
1
1
Turn off the clipper and insert
it in the AC adaptor until it
clicks as illustrated.
• The clipper will not charge unless the
side terminals are in contact with the
charging terminals.
• Wipe off any water droplets on the
side terminals.
• If you charge the clipper with power
switch turned on, it will start working
when you remove from the AC adaptor.
2
1