Getting started, Assembling the turntable – Sony PS-LX350H User Manual
Page 4
4
6
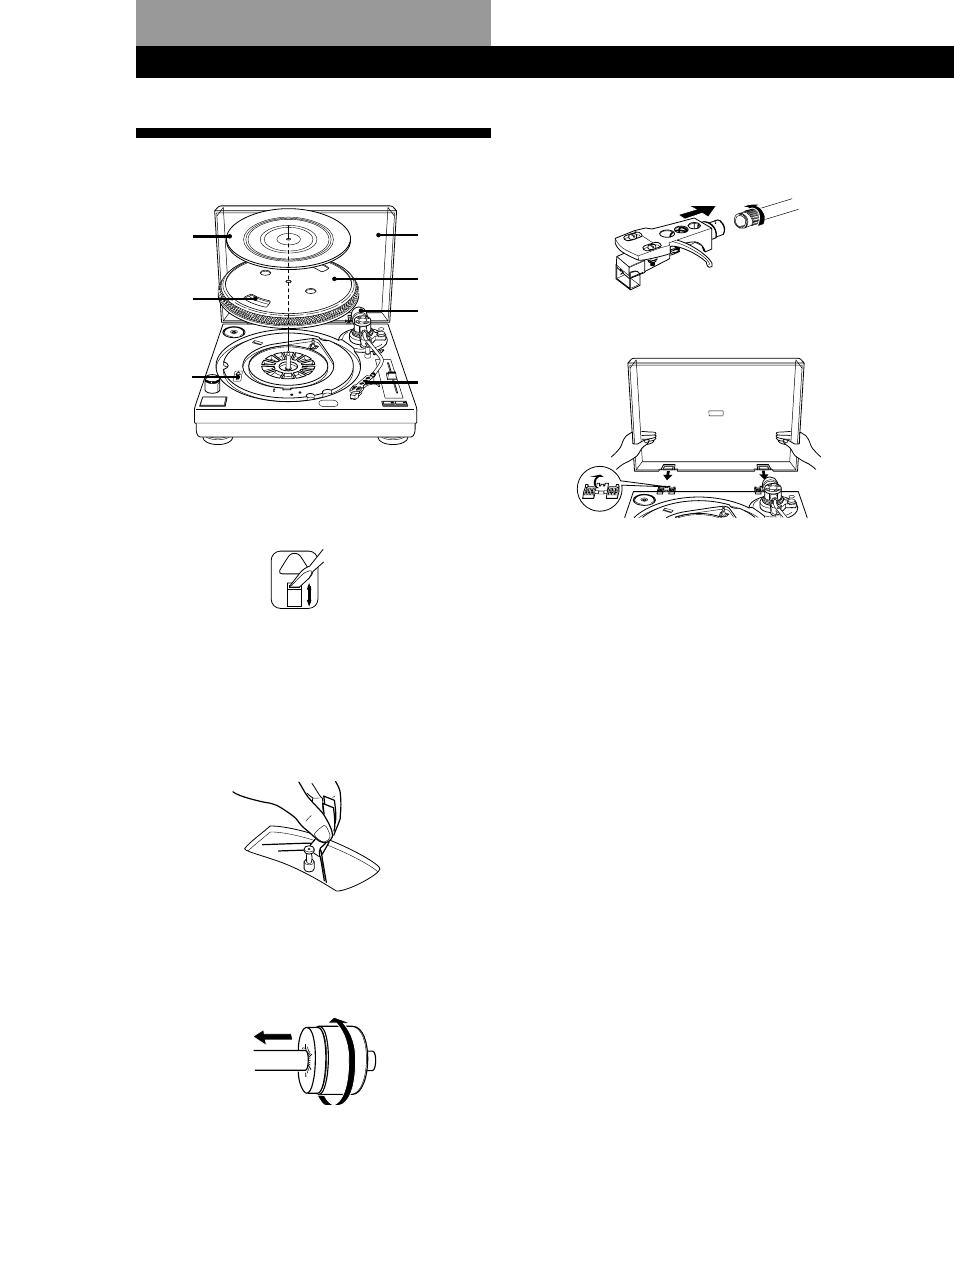
Insert the headshell into the front of the tone arm.
Turn the locking collar in the direction of the
arrow until the headshell is secure.
7
Insert the hinges on the dust cover into the hinge
pockets on the rear of the cabinet.
3
4
7
5
6
1
2
Assembling the Turntable
1
If your turntable is equipped with a voltage
selector, be sure to set the selector to your line
voltage.
2
Carefully, place the platter on the spindle.
3
Using the ribbon, loop the drive belt around the
motor pully. After looping the belt, do not forget
to remove the ribbon.
4
Place the rubber mat on the platter.
5
Slide the counter weight onto the shaft at the rear
of the tone arm and turn 3 or 4 times in the
direction of the arrow.
Getting Started
110V·120V
220V·240V
See also other documents in the category Sony CD-players:
- CDP-CX450 (48 pages)
- CDX-601 (2 pages)
- CDX-M60UI (140 pages)
- CDX-M60UI (2 pages)
- D-EJ825 (28 pages)
- D-NE326CK (35 pages)
- CDP-XB920 (64 pages)
- D-E666 (24 pages)
- CDX-F7750 (108 pages)
- CDX-F7750S (2 pages)
- D-NE830 (40 pages)
- CDP-CX55 (28 pages)
- 2-581-922-11 (218 pages)
- XR-MS5 (18 pages)
- D-NF420PS (39 pages)
- D-NE920 (20 pages)
- D-NE9 (52 pages)
- D-NE9 (112 pages)
- 3-878-117-11(1) (2 pages)
- CDP-XA50ES (112 pages)
- CDP-C365 (16 pages)
- D-EJ815 (28 pages)
- CDX-GT201C (92 pages)
- CDX-656 (3 pages)
- CDX-656 (2 pages)
- WALKMAN EJ121 (2 pages)
- CDX-C90R (170 pages)
- D-NE715 (104 pages)
- D-NE710 (2 pages)
- D-NE329SP (39 pages)
- NW-S205F (4 pages)
- NW-S202F (93 pages)
- CDX-838 (4 pages)
- CDP-XE520 (56 pages)
- MZ-R55 (208 pages)
- MZ-R501 (76 pages)
- MZ-R501 (20 pages)
- MZ-R55 (42 pages)
- Model D-NE900 (44 pages)
- D-T405 (40 pages)
- CDC-X217 (10 pages)
- RCD-W1 (28 pages)
- CDX-2180 (16 pages)
- CDX-GT292 (36 pages)
- MDX-C6500RX (152 pages)