Dubbing sound to a recorded tape, D (p. 78), Connecting – Sony DCR-HC36 User Manual
Page 78
78
E:\SONY\2659813111\01US05BAS.fm
DCR-HC36/HC46/HC96
2-659-813-11(1)
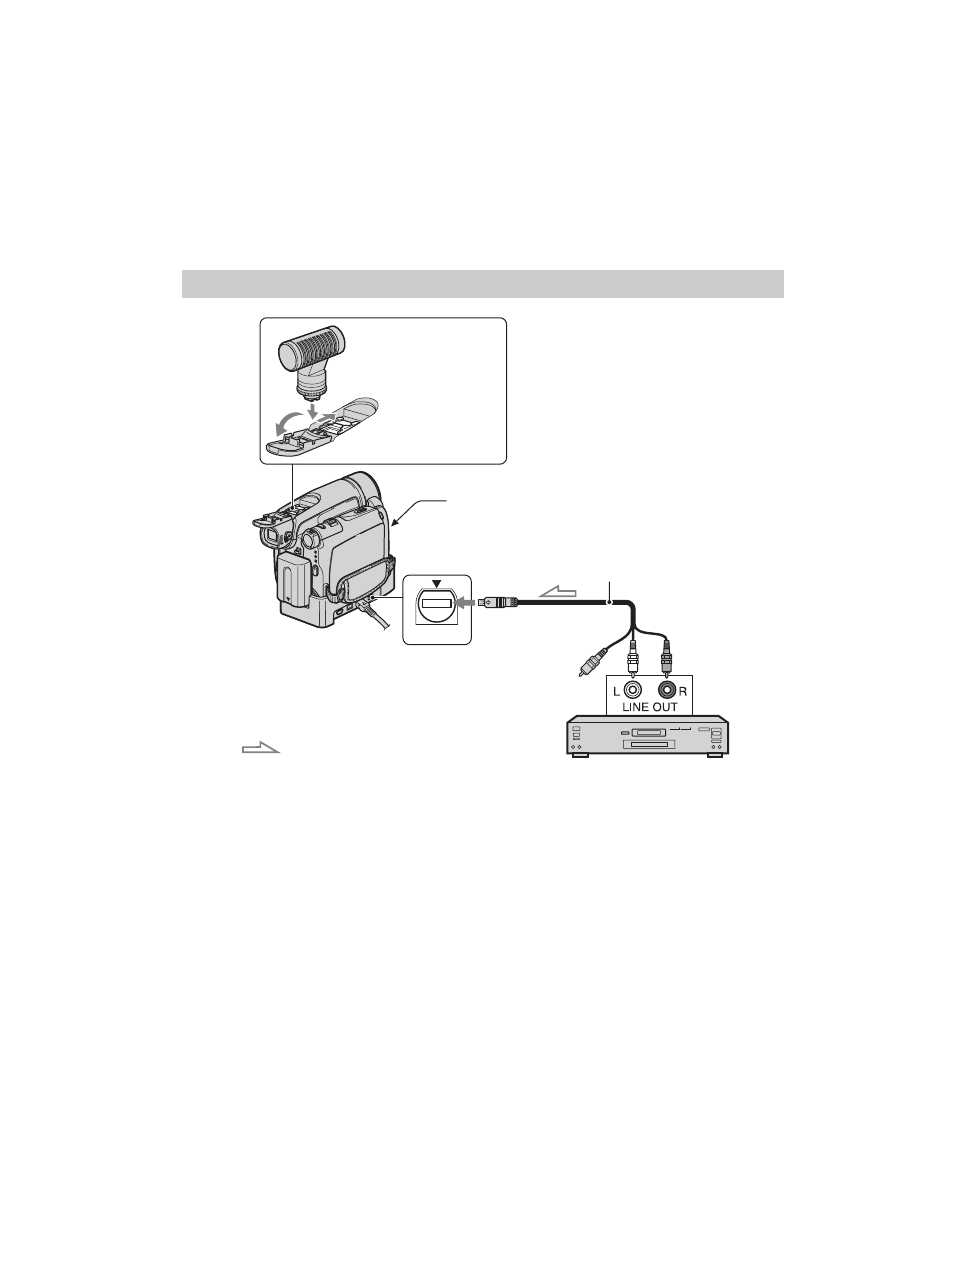
Dubbing sound to a recorded tape
You can add sound to a tape already recorded in the 12-bit mode (p. 65) without erasing the
original sound.
For DCR-HC96:
The Handycam Station and your camcorder
are both equipped with A/V jacks. Connect
the A/V connecting cable either to the
Handycam Station or to your camcorder,
depending on your setup.
You can input audio in the following ways:
A
For DCR-HC96:
An external microphone (optional) to the
Active Interface Shoe.
B
For DCR-HC96:
An audio device to the Handycam Station
or your camcorder using the A/V
connecting cable.
C
Using the internal stereo microphone (no
connection required).
The audio input to be recorded takes
precedence over others in the order of A
t B t C.
You cannot record additional audio:
– When the tape has been recorded in the 16-bit
mode (p. 65).
– When the tape has been recorded in the LP
mode.
– When your camcorder is connected via an
i.LINK cable.
– When the tape has been recorded in 4CH MIC
mode.
– On blank sections of the tape.
Connecting
A/V
A
Active
Interface Shoe
C
Internal stereo
microphone
A/V connecting cable (supplied)
B
A/V jack
(White)
(Red)
Audio device (such as
CD/MD players)
: Signal flow
AUDIO OUT
Do not connect
the video plug
(Yellow).