Sony VGN-N160G User Manual
Page 2
P/N 994644000 Rev. C
2/2
VGN-N1xx Series Optical Disk Drive
Replacement Instructions
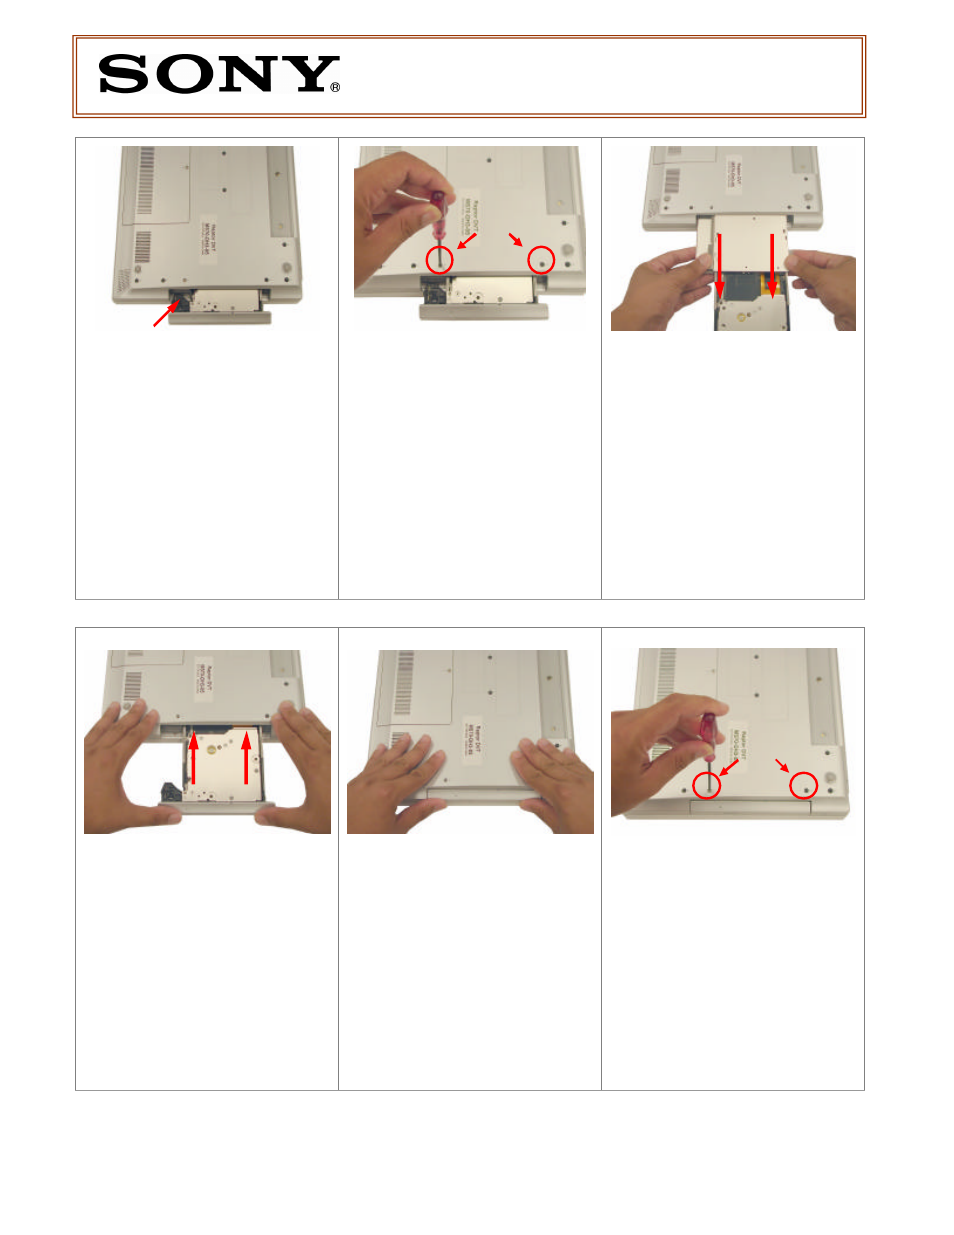
Step 4. Locate ODD Bay.
Rotate the computer with the
Optical Disk Drive (ODD) Bay
facing you as shown in the picture
Step 5. Unscrew the ODD Bay.
Using the enclosed magnetic
screwdriver, loosen up the two (2)
screws securing the ODD Bay.
Step 6. Remove the ODD Bay.
Slide open the CD/DVD drive by
first grasping the tray and then
ODD Bay at both sides and slowly
pulling the drive away from the
PC.
Note: Some force may be
required to initiate the removal of
the drive.
Step 7. Install new CD/DVD Drive.
Gently insert the new CD/DVD
drive into the unit as shown in the
picture. Push both sides of the
drive faceplate with equal force
towards the PC.
Step 8. Align new CD/DVD Drive
When the installation is done
properly, the drive faceplate
should be flat with the PC, and the
screw holes should be aligned with
the screw openings.
Step 9. Secure the ODD Bay
Using the enclosed magnetic
screwdriver, reinstall the two (2)
screws to secure the ODD Bay.
Reinstall the battery pack and
return the old CD/DVD drive to
Sony following the included
shipping instructions.
ODD Bay