Sony VPCEA Series Hard Disk Drive (Replacement Instructions) User Manual
Page 3
VPCEA Series Hard Disk Drive
Replacement Instructions
P/N
989201978
Rev. B
3/3
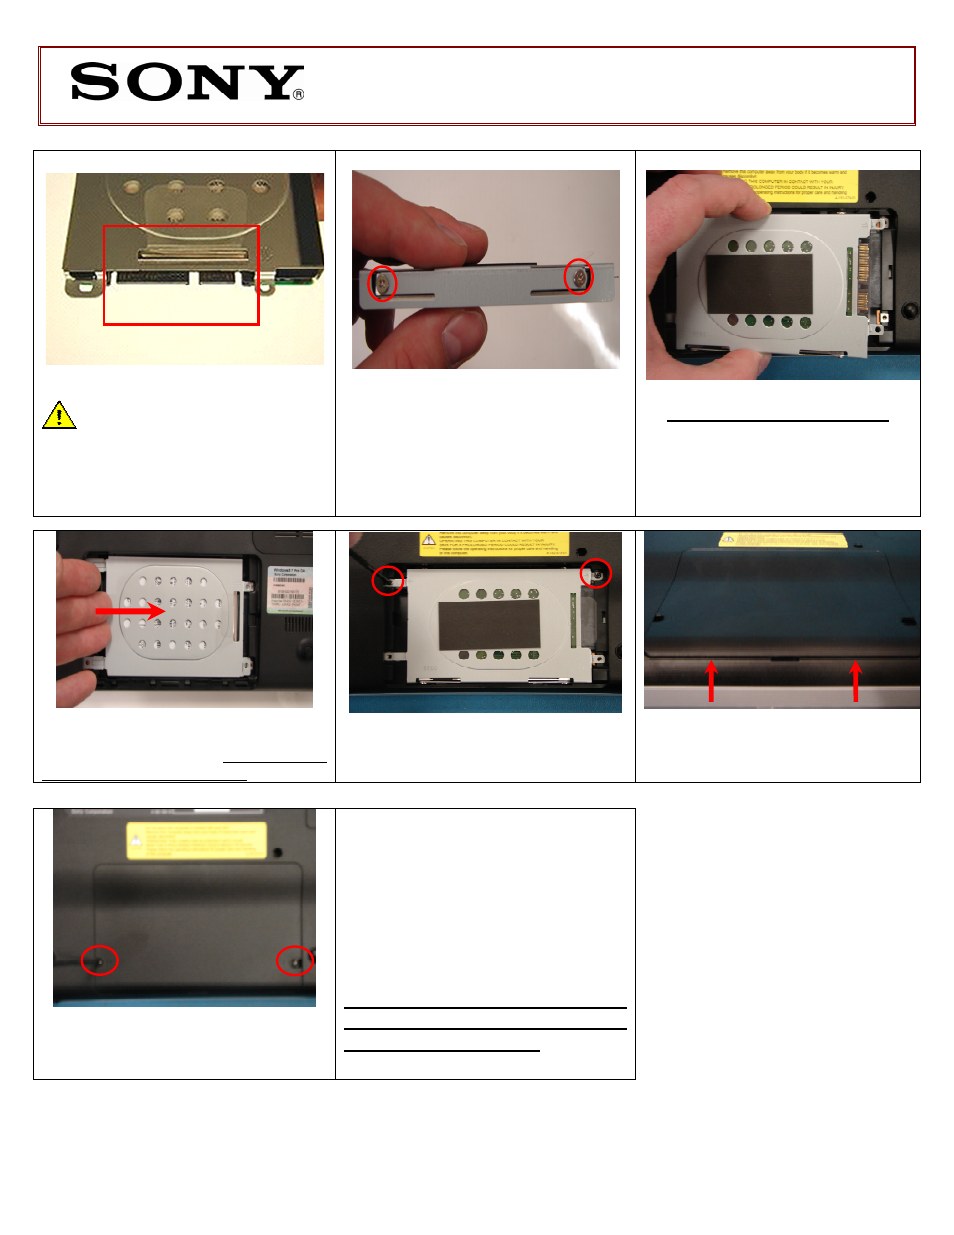
NOTE! Verify proper mounting
of the Hard Drive Bracket with the
Hard
Drive,
the
Hard
Drive
connectors should appear below
the Plastic Pull Tab.
Step 13. Re-install the four (4) Hard
Drive Bracket screws to secure the Hard
Drive Bracket to the New Hard Drive.
Hard Drive Reinstallation
(Steps 14-18)
Step 14. Insert the Hard Drive
Assembly into the Hard Drive Bay.
Hold the Hard Drive on the sides to
avoid damage.
Step 15. Install the Hard Drive by sliding
the assembly to the right. Make sure the
screw holes align correctly.
Step 16. Re-install the two (2) Hard
Drive screws holding the Hard Drive
Assembly in place.
Step 17. Re-attach the Hard Drive
Door. Verify that the Door is flush with
the Bottom Housing.
Step 18. Re-install the two (2) Hard
Drive Door Screws to secure the Door.
Step 19. Re-install the battery pack and
reconnect the AC Adaptor.
Power on your computer and continue
with the recovery process by following
the instructions described on the back of
the recovery disk’s case.
Return the old Hard Drive to
Sony
using
the
included
shipping instructions.