Sony PCG-K23 User Manual
Page 2
PCG-K Series Hard Disk Drive
Replacement Instructions
P/N T99860098
Rev. D
2/2
Step 7
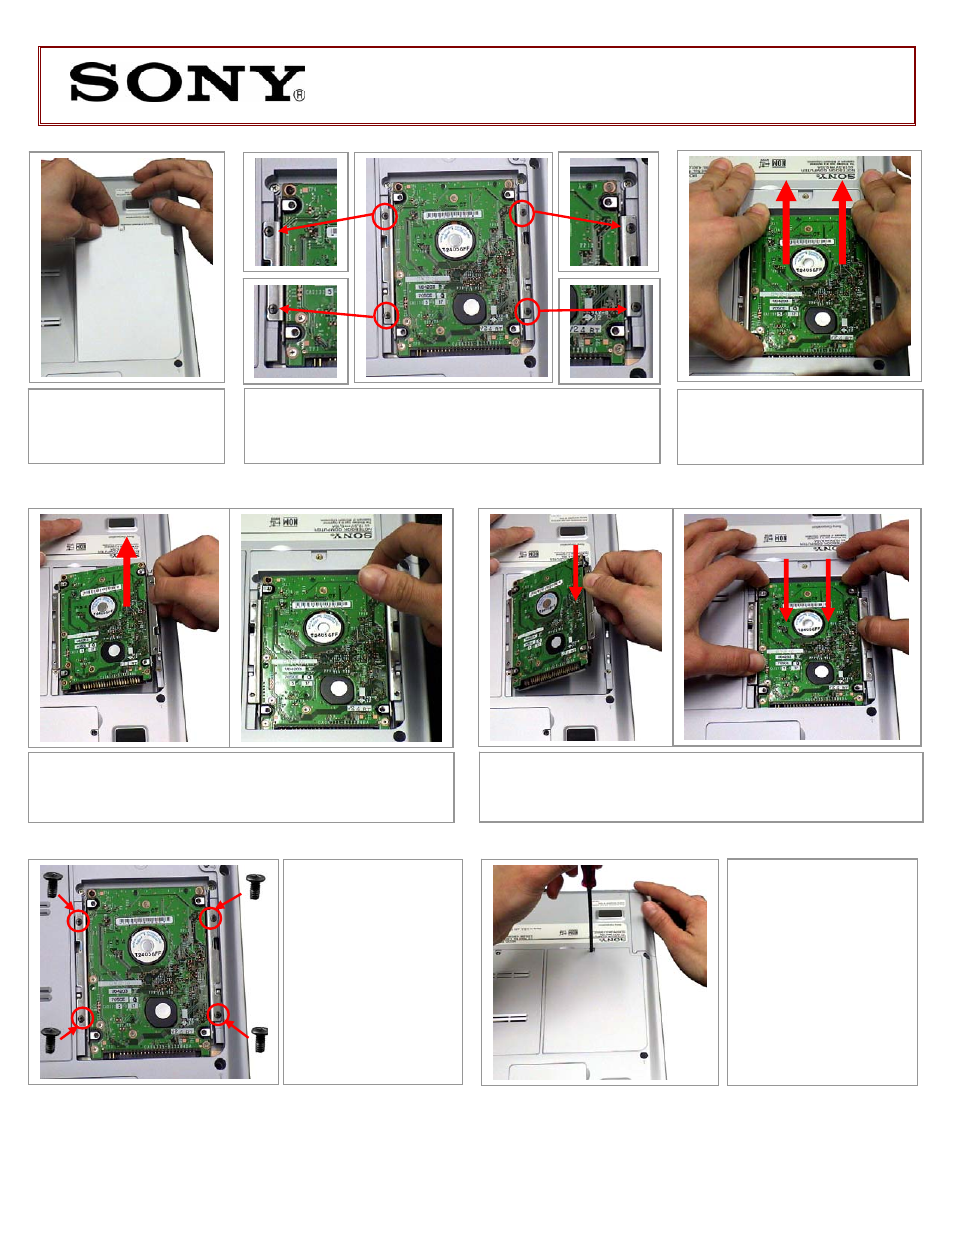
.
Gently remove the drive as shown.
CAUTION!
Be
careful not to lift the drive before releasing the pins from the
socket as instructed in Step 6!
Step 8
.
Place the new drive flat in the opening. Slide the drive
into position in the direction of the arrows, as shown above. Make
sure both rows of pins have been inserted into the socket.
Step 4
.
Remove hard
drive access door as
shown and set aside.
Step 9
.
Using the
enclosed magnetic
screwdriver, reinstall the
four (4) previously
removed screws.
CAUTION!
Be careful
not to drop screws into
the unit, and be careful
to use the correct
screws, as shown in the
picture.
Do not over
tighten the screws!
Step 10
.
Reinstall
the
hard drive access door and
screw. Power on your
computer and continue with
the recovery process by
following the instructions
described on the back of the
recovery disk’s case.
Return the old HDD Bay to
Sony following the included
shipping instructions.
Step 6
.
Gently slide the drive in
the direction of the arrows to
release the pins from the socket.
X
Step 5
.
Using the enclosed magnetic screwdriver, remove
the four (4) screws as indicated in the picture.
CAUTION!
Be
careful not to drop screws into the unit.